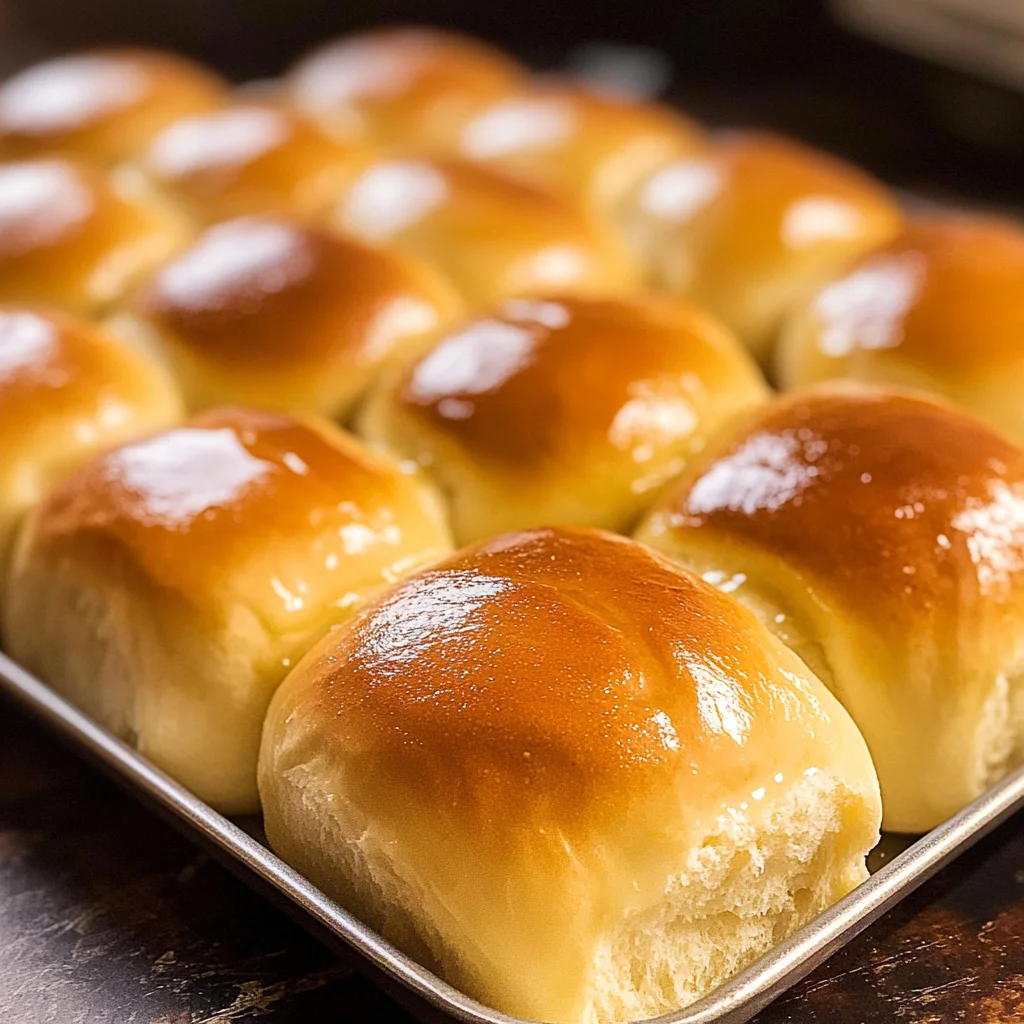
Soft Dinner Rolls Recipe
There’s something utterly magical about the aroma of freshly baked bread wafting through the kitchen, a scent that feels like a warm hug on a chilly day. When I think of my Soft Dinner Rolls Recipe, I’m immediately transported back to my childhood, where family gatherings were marked by laughter, stories shared over the dinner table, and of course, those pillowy rolls that seemed to melt in your mouth. These rolls are not just a side dish; they are the embodiment of love and comfort, bringing people together around a feast. Imagine pulling apart a warm roll, its steam curling up into the air, and slathering it with creamy butter – it’s an experience that transcends mere sustenance.
I promise you; this recipe is simple yet profound, requiring just six ingredients to create something truly extraordinary. Each ingredient plays its part in crafting these soft, fluffy wonders that are perfect for any occasion – be it a holiday feast or a cozy weeknight dinner. Trust me when I say that once you master this Soft Dinner Rolls Recipe, you’ll find every excuse to bake them again and again. They are irresistibly comforting and versatile enough to complement any meal while also standing majestically at the center of your dinner table.
Soft Dinner Rolls Recipe: A Hug in Bread Form
Welcome to the heartwarming journey of creating Soft Dinner Rolls that will elevate your dining experience! These rolls are soft as clouds and bursting with flavor, making them an essential addition to any meal. Whether you serve them alongside homemade soups or as a delightful base for sandwiches, they are sure to impress your family and friends. Let’s dive into this culinary adventure together!
Ingredients:
Before we embark on this baking escapade, let’s take a moment to appreciate our ingredients – each one is vital in achieving the perfect roll.
- 1 1/2 cup whole milk (warmed to 110F): Whole milk is rich and creamy, adding moisture and tenderness to our dinner rolls. Warming it up activates the yeast more effectively – think of it as giving our dough a gentle wake-up call! You want it to be around 110°F; too hot can kill those precious yeast cells while too cold won’t activate them properly. If you don’t have whole milk on hand, feel free to substitute with 2% or even almond milk for a lighter option.
- 4 Tbsp unsalted butter (melted): Melted unsalted butter serves as the heart of these rolls – providing richness and flavor without overpowering the other ingredients. It also helps create that desired soft texture we all love. I always use unsalted butter so I can control the saltiness of my dish better; this way, we can adjust flavors precisely how we want!
- 1 Tbsp active dry yeast: Yeast is what breathes life into our dough! This tiny powerhouse ferments sugars in our mixture, producing carbon dioxide which causes our rolls to rise beautifully. Make sure your yeast is fresh for optimal results; if it doesn’t foam when activated with warm milk and sugar, toss it out and start anew.
- 1/3 cup granulated sugar: Sugar is not just for sweetness; it feeds our yeast during fermentation so they can work their magic! It also contributes to browning during baking, giving our rolls that lovely golden crust we all crave.
- 1 1/4 tsp salt (we used fine sea salt): Salt enhances flavors like nothing else! But beyond taste, it also strengthens gluten structure in our dough which is crucial for achieving that tender yet chewy texture. Be mindful not to skip this step as it’s non-negotiable for flavor balance.
- 4 cups all-purpose flour: Flour is the backbone of our rolls! All-purpose flour provides enough protein content to develop gluten while still being versatile enough for other recipes. Start with 4 cups but adjust as needed; you want your dough sticky but manageable – if too dry or wet, your rolls won’t be quite right.
- 1 Tbsp unsalted butter (melted to brush the tops of dinner rolls): This final touch before serving adds glossiness and an additional layer of buttery flavor atop those freshly baked rolls! It entices everyone at the table – who can resist reaching for one?
- 1/2 tsp kosher salt (to sprinkle finished rolls): This finishing touch elevates everything by adding contrast against the softness of the bread itself. Just a pinch goes a long way!
Equipment You’ll Need:
Having the right tools makes all the difference when creating something wonderful in your kitchen! While these aren’t “ingredients” in themselves, they play an essential role in ensuring success with your Soft Dinner Rolls Recipe.
- Stand mixer with dough hook: A stand mixer can save you so much time and effort when mixing and kneading dough – plus it gives you consistent results! The dough hook attachment mimics hand-kneading but does all the hard work for you while allowing you more freedom for other tasks.
- Mixing bowls: A good set of mixing bowls keeps everything organized while you’re cooking! Opt for glass or stainless steel since they’re easy to clean and don’t retain odors like plastic can do over time.
- Baking sheet or casserole dish: A sturdy baking sheet or casserole dish ensures even heat distribution while your rolls bake away happily in the oven without burning on one side!
- Plastic wrap: This humble item helps keep moisture trapped during rising periods so our dough doesn’t dry out – trust me on this one because no one wants crusty dinner rolls!
Step 1: Activate Your Yeast!
To get started on this incredible journey toward pillowy perfection, begin by activating your yeast! In the bowl of your stand mixer (or any mixing bowl if you’re going old school), whisk together your warmed milk with about one tablespoon of sugar until dissolved. Then sprinkle that glorious active dry yeast over top like fairy dust! Allow it to sit undisturbed for about five minutes until bubbles form on top – this foamy layer signals that your yeast is alive and ready to go! If nothing happens after five minutes… well friend, I suggest checking if your yeast was fresh because we need its magic today!
Step 2: Mix It All Together
Once you’ve got that foamy goodness going on in your bowl – let’s add some richness! Pour in four tablespoons melted unsalted butter along with the rest of your granulated sugar (that’s two tablespoons left) plus salt. Give everything another good whisk until nicely combined before starting on adding flour half a cup at a time into this delightful mixture; whisk vigorously until fully integrated each time so there aren’t any lumps hiding out!
Step 3: Knead Your Dough
Once things get too thick for whisking—this usually occurs after incorporating about two cups—you’ll want switch gears slightly by attaching that handy-dandy dough hook onto your stand mixer at speed two (or keep using muscle power if kneading by hand). Continue incorporating up until you’ve added around four cups total but remember only add extra flour gradually—just one tablespoon at most—if necessary until everything sticks together nicely without leaving residue on clean fingers…sticky yet manageable is what we’re aiming for here!
Step 4: Let It Rise
Now comes perhaps one of my favorite parts—the waiting game—but trust me when I say patience pays off immensely here! Once mixed correctly knead lightly either by hand or machine until smooth then place into an oiled bowl covered tightly with plastic wrap before letting rise somewhere cozy—like next door near warmth from an oven preheating—for approximately two hours or until doubled inside size…this signifies fermentation has occurred which develops flavor throughout entire loaf!
Stay tuned as we continue crafting these irresistible Soft Dinner Rolls together — every step brings us closer towards experiencing their fluffy delights fresh from oven straight onto plates waiting eagerly below…
The Journey to Irresistibly Soft Dinner Rolls
If you’re anything like me, the moment you step into a kitchen filled with the warm aroma of freshly baked bread, your heart skips a beat and your spirits soar. There’s something inherently magical about the process of transforming simple ingredients into fluffy clouds of deliciousness. This Soft Dinner Rolls Recipe is not just a collection of steps; it’s a heartfelt invitation to create something truly extraordinary with your own hands. So let’s roll up our sleeves and dive into this delightful adventure together!
Step 5: Giving Your Dough a Cozy Home
Once your dough has had its initial rise and has doubled in size—this is crucial for developing that airy texture we’re aiming for—you’ll want to turn it out onto a lightly floured surface. As you do so, take a moment to appreciate the transformation that has occurred. The dough should feel soft and slightly tacky, almost like a tender embrace. You might notice some air bubbles popping as it hits the counter; that’s a good sign! It shows that the yeast has been working hard, producing carbon dioxide which creates those beautiful pockets of air.
Now comes the fun part: dividing the dough! Depending on how large you want your rolls, you can cut it into 15 to 24 even pieces. I find that using a bench scraper makes this step incredibly easy and keeps everything neat and tidy. Once you’ve cut the dough, gently roll each piece into a ball by tucking the edges underneath until they form a smooth surface on top. This little technique not only helps shape them but also promotes surface tension, which is vital for achieving those perfectly round rolls that rise beautifully in the oven. As you place these little dough balls into an oiled 9×13 casserole dish or baking sheet, give them enough space to grow; they’re going to expand further during their second rise.
Step 6: The Importance of Patience
Now it’s time for another rise! Cover your newly shaped rolls with plastic wrap and let them sit in a warm place for about 30 to 60 minutes. This step is where all your earlier work pays off—allowing these rolls to puff up is absolutely paramount for texture and flavor development. If you rush through this phase, you risk ending up with dense rolls instead of soft ones that melt in your mouth.
As they rise, keep an eye on them; they should become noticeably puffy and have nearly doubled in size again. A great tip is to preheat your oven to 375°F while they proof so that as soon as they’re ready, you can pop them right in without any waiting around. This way, you’ll maintain their warmth without losing any of that lovely airiness you’ve built up during the rising process.
Step 7: Baking Your Perfect Rolls
Once your rolls have blossomed beautifully, it’s time to send them off to the oven for their transformation into golden-brown orbs of joy! Preheat your oven if you haven’t already done so; having it at temperature ensures that they start baking immediately upon entering, which contributes wonderfully to their final texture. Bake these beauties at 375°F for about 23-25 minutes or until their tops are gloriously golden brown—a color reminiscent of sun-kissed fields during harvest.
To test for doneness, gently tap the top of one roll; if it sounds hollow, congratulations! You’ve nailed it! If not quite there yet, give them another minute or two but keep an eye on them as ovens can vary significantly. The aroma wafting through your kitchen will be utterly intoxicating—this is when anticipation builds and when I often find myself sneaking small tastes (trust me on this!).
Step 8: The Finishing Touches
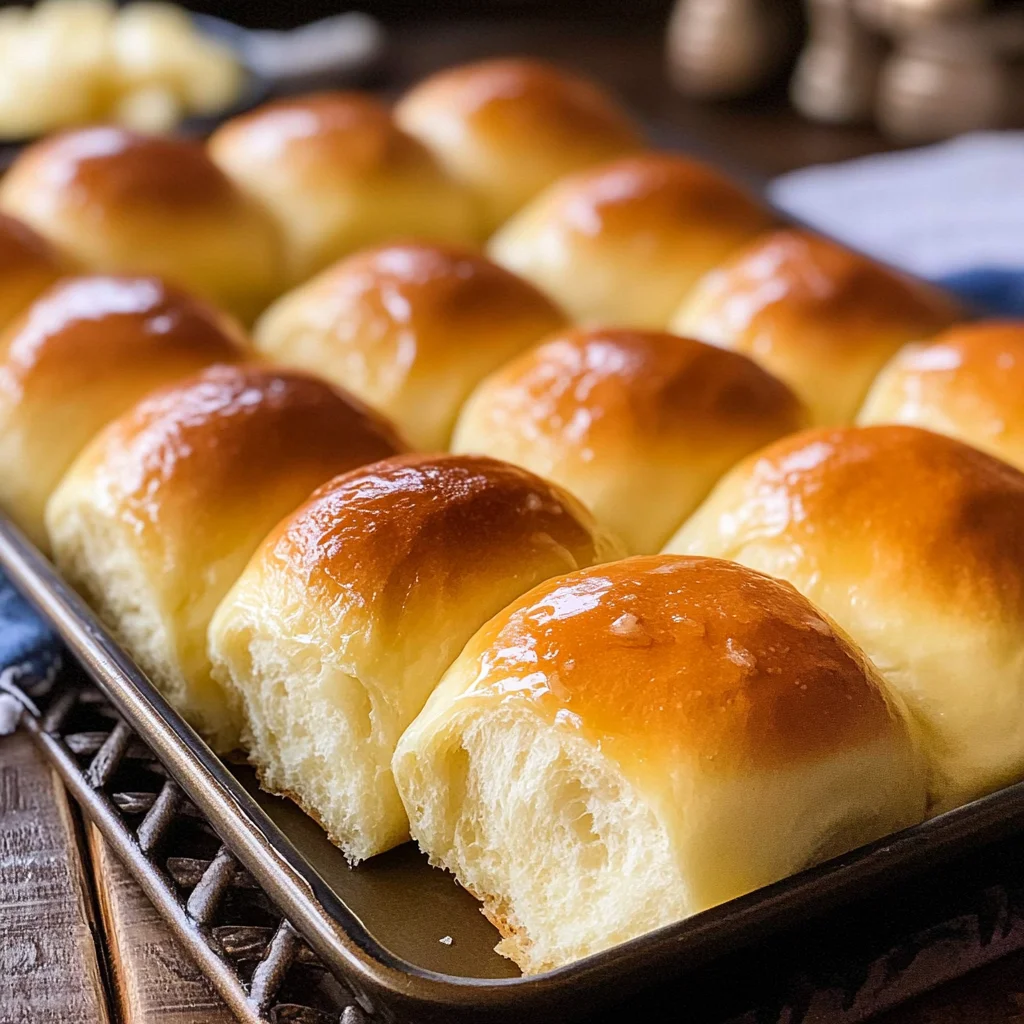
As soon as those gorgeous rolls are out of the oven and cooling slightly on a wire rack, grab some melted butter and brush it generously over their tops while they’re still warm. This non-negotiable step adds richness and enhances both flavor and texture—it creates an irresistible sheen that calls out to be devoured! After brushing with butter, sprinkle just a dash of kosher salt over each roll; this contrast elevates every bite from merely delicious to absolutely divine.
Let them cool down before serving—though I know how hard this can be when you’re surrounded by such heavenly scents—but trust me here: letting them rest allows steam to escape so they don’t get soggy inside while still keeping that soft interior intact. Once they’ve cooled just enough so you don’t burn yourself (though who am I kidding? We often eat them while still warm), gather everyone around the table because these Soft Dinner Rolls are ready to shine at your meal!
Final Thoughts
The beauty of my Soft Dinner Rolls Recipe lies not only in its simplicity but also in its ability to bring people together around the table. Whether enjoyed with family during holiday feasts or simply as an accompaniment on weeknights, these rolls embody comfort and warmth in every bite. I promise you; once you’ve tasted these fresh from the oven creations, you’ll understand why they’re not just dinner rolls—they’re love made tangible!
So go ahead—make these rolls with love and share them generously! Because nothing says “home” quite like the aroma of fresh bread wafting through your space—and when they’re homemade? Well, that’s pure magic! Happy baking!
Storage and Enjoyment Tips for Your Soft Dinner Rolls Recipe
Now that your kitchen is filled with the delightful aroma of freshly baked rolls and you can almost hear the applause from family and friends as they take their first bite, it’s time to think about how to preserve these little treasures. I promise you, the joy of pulling a warm roll from the oven is just the beginning! These Soft Dinner Rolls are not only perfect for immediate enjoyment but also lend themselves beautifully to storage, allowing you to savor their fluffy goodness even days later.
Storing Leftover Soft Dinner Rolls Recipe
To keep your Soft Dinner Rolls fresh and delicious for as long as possible, I recommend storing them in an airtight container. A glass or plastic container with a secure lid works wonders; it creates a cozy environment that keeps out air while preserving moisture. Place them at room temperature, away from direct sunlight, and they should stay soft for about 2-3 days. If you’re anything like me and want to ensure every last crumb is as delightful as the first, try placing a slice of bread in the container alongside your rolls. This non-negotiable trick helps maintain moisture levels, keeping your rolls irresistibly fluffy! After a couple of days, if you notice they’ve become a tad firm (this can happen), don’t worry! A quick zap in the microwave for just a few seconds will bring back that lovely softness—trust me on this!
Freezing Soft Dinner Rolls for Later
If you find yourself with leftover rolls (or perhaps you just want to prepare ahead for a special occasion), freezing them is an absolutely fabulous option! To freeze your Soft Dinner Rolls properly, let them cool completely after baking, then place them in a freezer-safe bag or wrap each roll in plastic wrap followed by aluminum foil. This dual-layer protection is crucial because it prevents freezer burn and maintains that incredible texture we all adore. These little bundles of joy can be stored in the freezer for up to three months—what a convenient way to have fresh rolls on hand! When you’re ready to enjoy them, simply take out however many you need and let them thaw at room temperature or pop them straight into the oven at 350°F until warmed through. The convenience factor is fantastic; imagine having fresh rolls ready whenever cravings strike!
Soft Dinner Rolls
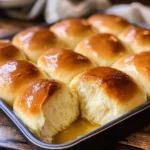
Indulge in the comforting embrace of homemade Soft Dinner Rolls, a delightful addition to any meal. These fluffy rolls are reminiscent of family gatherings, filling your kitchen with their warm, inviting aroma. With just six simple ingredients, you can create these tender and airy rolls that practically melt in your mouth. Perfect as a side dish for hearty soups or as the foundation for scrumptious sandwiches, this Soft Dinner Rolls Recipe will quickly become a staple in your household.
- Prep Time: 30 minutes
- Cook Time: 25 minutes
- Total Time: 55 minutes
- Yield: Approximately 15 servings 1x
- Category: Bread
- Method: Baking
- Cuisine: American
Ingredients
- 1 ½ cups whole milk (warmed to 110°F)
- 4 tbsp unsalted butter (melted)
- 1 tbsp active dry yeast
- ⅓ cup granulated sugar
- 1 ¼ tsp salt
- 4 cups all-purpose flour
Instructions
- Activate the yeast by whisking together warmed milk and sugar in a mixing bowl. Sprinkle yeast on top and let sit until foamy (about 5 minutes).
- Stir in melted butter, remaining sugar, and salt.
- Gradually add flour, mixing until the dough forms a sticky ball.
- Knead the dough until smooth and elastic, either by hand or with a stand mixer.
- Place dough in an oiled bowl, cover with plastic wrap, and let rise in a warm place until doubled (about 2 hours).
- Turn out onto a floured surface, divide into equal pieces, and shape into balls.
- Place shaped rolls into an oiled baking dish and let rise again for about 30-60 minutes.
- Preheat oven to 375°F and bake for 23-25 minutes until golden brown.
- Brush tops with melted butter and sprinkle with kosher salt before serving.
Nutrition
- Serving Size: 1 serving
- Calories: 150
- Sugar: 4g
- Sodium: 180mg
- Fat: 5g
- Saturated Fat: 3g
- Unsaturated Fat: 2g
- Trans Fat: 0g
- Carbohydrates: 22g
- Fiber: 0g
- Protein: 3g
- Cholesterol: 15mg