30 minute dinner rolls
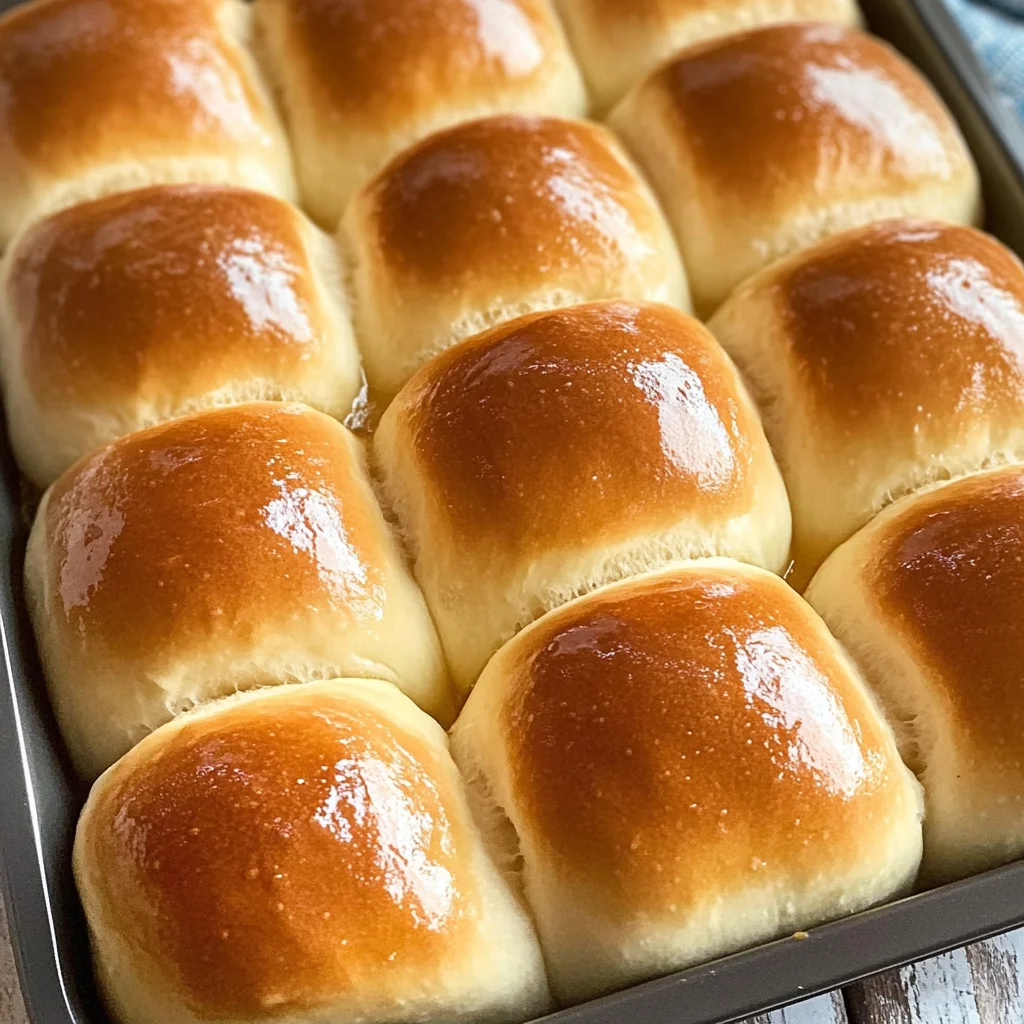
There’s something truly magical about the smell of freshly baked bread wafting through your home, isn’t there? It’s like a warm hug that envelops you and beckons you closer, whispering promises of comforting flavors and delightful textures. These 30 Minute Dinner Rolls are not just a recipe; they are an experience that transforms a simple meal into a cherished memory. Picture this: golden-brown rolls emerging from the oven, their tops glistening with a touch of melted butter, beckoning you to break them open and reveal their fluffy interiors. It’s an invitation to gather around the table, share stories, and savor every bite. This is what cooking is all about—the connection, the warmth, the love embedded in every dish.
I’ve always been captivated by how something as humble as flour, water, and yeast can come together to create something so profoundly satisfying. These dinner rolls are soft and airy with just the right hint of sweetness—a delightful companion to any meal. Whether it’s a holiday feast or a quiet weeknight dinner, these rolls will elevate your dining experience and make you feel like a culinary hero in your own kitchen. Trust me on this: once you make these rolls, they will become a staple in your home repertoire, requested time and time again by family and friends who crave that comforting taste of homemade bread.
30 Minute Dinner Rolls: Soft Pillows of Delight
This recipe for 30 Minute Dinner Rolls is about more than just speed; it’s about creating something truly delicious without spending hours in the kitchen. Imagine being able to serve freshly baked rolls alongside your favorite dishes without the long wait! They are perfect for holidays when time is tight but tradition calls for something homemade. You’ll find these rolls are also fantastic for weeknight meals or even as an unexpected treat for guests anytime you want to impress without excessive effort. The joy of pulling these beauties out of the oven knowing they were made with love (and in record time) is genuinely unparalleled.
Ingredients:
Let’s gather our ingredients for this delightful journey into bread-making! Each component plays its role beautifully in crafting these fluffy dinner rolls.
- 1 1/4 cups warm water: This warm water is where the magic begins! It’s essential for activating our yeast—think of it as giving our yeast a little wake-up call after its slumber. Aim for water that’s cozy but not scalding—ideally around 110°F (43°C). If it’s too hot, you risk killing those little yeast soldiers; too cold, and they won’t rise effectively. The right temperature ensures that your dough will become light and airy rather than dense.
- 1/4 cup sugar: Ah, sugar—the sweet little secret behind those wonderfully rich flavors! Sugar serves two purposes here: it feeds the yeast during fermentation and enhances the flavor of our rolls. Plus, it helps achieve that beautiful golden crust we all crave when baking bread. Don’t worry if you’re watching your sugar intake; feel free to reduce this slightly without compromising too much on flavor or texture!
- 2 Tbsp. active dry yeast: Yeast is what brings our rolls to life! When activated with warm water and sugar, it begins to bubble and froth—this means your yeast is alive and ready to do its job! Active dry yeast is perfect for this recipe because it’s reliable and easy to work with. If you’re using instant yeast instead, you can skip the proofing step since it’s ready to go straight into the dry ingredients.
- 1/3 cup vegetable oil: This ingredient adds moisture and richness while helping create that tender crumb we all adore in homemade bread. Vegetable oil has a neutral flavor that won’t interfere with our other ingredients but contributes to the overall mouthfeel of the rolls. If you’re looking for alternatives, light olive oil or melted coconut oil works beautifully too!
- 1 tsp. salt: Salt is absolutely paramount in baking—it enhances flavors across the board while also regulating yeast activity during fermentation. Without it, your rolls could end up tasting bland or even overly yeasty! Just remember not to go overboard; too much salt can inhibit yeast growth.
- 1 egg: The egg acts as both a binding agent and source of richness in these dinner rolls. It helps hold everything together while also imparting a lovely color to our finished product thanks to its natural fats. If you’re looking for an egg substitute due to dietary preferences or restrictions, try using a flaxseed egg (1 tablespoon ground flaxseed mixed with 2.5 tablespoons water) or applesauce instead!
- 3 3/4 cups all-purpose flour: This is where we bring everything together! All-purpose flour provides structure while allowing our dough to remain soft and pliable—making them easy to shape into those beautiful little balls we’ll soon be placing into the baking pan. Be gentle when adding flour; too much can lead us down a dense path instead of achieving those fluffy clouds we’re aiming for.

Equipment You’ll Need:
Having the right tools makes all the difference when diving into bread-making! While not technically ingredients, these pieces of equipment are essential partners in creating something wonderful.
- Stand mixer – A stand mixer can be your best friend during this process! It takes out much of the manual labor from kneading dough while ensuring everything mixes uniformly – especially helpful when we’re working with sticky dough like this one! If you don’t have one handy, no worries; you can certainly mix by hand but be prepared for some good old-fashioned elbow grease!
- 9×13 baking pan – A good-quality baking pan ensures even cooking throughout your dinner rolls without burning or undercooking any parts. Lining it with parchment paper makes cleanup easier while also preventing any sticking issues as we pull those glorious rolls out post-baking.
- Dish towel – A simple yet crucial tool for covering your dough during its rise! Keeping it warm helps accelerate fermentation while preventing drafts from cooling down what we’ve worked so hard on creating.
Now that we’ve gathered our ingredients and tools let’s dive headfirst into preparing these delectable 30 Minute Dinner Rolls!
Step 1: Proofing the Yeast
We begin by combining warm water with sugar in the bowl of our stand mixer—that’s where all those lovely bubbles will start forming shortly! Stir gently until dissolved before sprinkling over your active dry yeast evenly across the surface—this step allows each grain ample opportunity for hydration before activating them fully through proofing! Let this sit undisturbed for about 2-5 minutes until you’re greeted by frothy bubbles dancing atop like tiny fireworks—a telltale sign that your yeast is alive and kicking!
Step 2: Mixing Together
Once you’ve seen those frothy bubbles appear, it’s time to add our vegetable oil first followed by salt—a key player here as well—and then crack open an egg right inside that bubbly mixture! With everything now mingling happily together in one bowl, gradually incorporate flour one cup at a time—this slow addition allows us control over consistency making sure we don’t unintentionally weigh down those delicate dinner rolls later on! Mix until combined before letting your stand mixer do its magic kneading away at low speed…and don’t forget—we’re aiming for soft dough here—not sticky but pliable enough so shaping becomes effortless!
Step 3: Shaping Your Rolls
Now comes one of my favorite parts—shaping those lovely dough pieces into individual balls! Spray some baking spray onto your hands so they glide easily without sticking—trust me; this step saves time cleaning up later on too! Pinch off small portions from our beautiful mass (roughly equal size) before rolling them between palms until they resemble smooth little spheres ready for rising ahead… oh goodness gracious—I can’t tell you how exciting it feels watching them transform!
Step 4: Rising Time
Place these shaped beauties snugly inside their prepared baking dish while draping a dish towel over top—this keeps warmth around them as they rise beautifully during preheating… which brings us perfectly onto setting that oven at 375°F (190°C)! As temperatures reach optimum levels inside there awaits ample opportunity for further expansion…so don’t forget patience here—it may seem long but I promise it’ll pay off tenfold once they emerge golden brown later on!
Stay tuned as we continue this delicious adventure through baking these magnificent dinner rolls… I assure you every moment spent crafting will yield utter satisfaction come mealtime!
Step 5: Shaping the Dough into Perfect Little Balls
Now that our dough has risen beautifully and is double in size—trust me, seeing that fluffy mass of dough is a sight to behold!—it’s time to shape them into those delightful little dinner rolls. First things first, spray your hands with some baking spray; this will keep the dough from sticking to your fingers and make the shaping process much smoother. With a gentle touch, grab about a handful of dough and pinch off a portion that feels right for a single roll—aim for roughly the size of a golf ball. Then, using your palms, roll the piece of dough in circular motions until it forms a smooth ball. This is such an important step because shaping the dough helps create surface tension on each roll, which allows them to rise evenly during baking.
As you form each ball, place them into the prepared 9×13 baking dish, ensuring there’s a little space between each one for expansion. Don’t rush this step; take your time to create those distinct shapes. I promise you, you’ll be rewarded with rolls that are not only visually appealing but also have that perfect texture and airiness inside when they emerge from the oven. The anticipation builds as you see those little beauties waiting for their moment in the spotlight!
Step 6: The Magic of Rising
With your rolls nestled comfortably in the baking dish, it’s time to let them rise again. This second rise is crucial—it allows the yeast to continue doing its magic by producing carbon dioxide gas, which creates those delightful air pockets inside your rolls that make them soft and fluffy. So here’s what we do: cover the dish with a clean dish towel and place it on top of your preheating oven. The warmth from the oven will encourage the dough to rise faster while also providing just enough heat without cooking it.
You’ll want to give them about 20 minutes for this final rise; however, if you notice they look puffy and have nearly doubled in size sooner than expected, don’t hesitate to pop them into the oven! Keep an eye on them—they should look swollen and pillowy, which means they’re ready for their transformation in the oven. It’s like watching a live performance where every act leads up to an incredible finale!
Step 7: Baking Your Rolls to Perfection
Ahh, now we arrive at perhaps the most thrilling part—the baking! Carefully slide that pan of risen rolls into your preheated oven set at 375°F (190°C). As they bake, an intoxicating aroma will fill your kitchen; it’s almost like they are singing songs of warmth and comfort just for you! You’ll want to keep an eye on them as they bake—set your timer for around 20 minutes but remember that every oven behaves differently.
You’re looking for that signature golden-brown hue on top; it should be invitingly warm rather than overly dark or burnt. To check for doneness without cutting into one just yet (we want to preserve all that soft goodness!), gently tap on the top of one roll—you should hear a hollow sound if they are ready! And trust me when I say there’s nothing quite like pulling perfectly baked rolls out of the oven—this moment is truly extraordinary.
Step 8: The Finishing Touch – Butter Brushing Bliss
Once those gorgeous rolls are out of the oven and still warm, it’s time for my favorite part—brushing them with melted butter! This step is absolutely paramount because not only does it give each roll a glossy finish but also adds an extra layer of flavor that’s utterly irresistible. Using a pastry brush or simply drizzling melted butter over each roll works wonders; you’ll want enough butter so that it glistens enticingly but not so much that it pools at the bottom.
Let those rolls cool slightly before serving; this will allow all those flavors to settle beautifully inside while maintaining their soft texture. Picture this: breaking open one of these fluffy rolls reveals steam wafting up with hints of buttery goodness—it’s pure bliss! Trust me on this one: serve these alongside any meal or even enjoy them fresh out of the oven with a smear of creamy plant-based butter or savory spreads—it turns into an unforgettable experience every single time!
Conclusion:
As we wrap up this delightful journey through making 30 minute dinner rolls together, I cannot help but feel a warm sense of joy knowing that you’re now equipped to create these little clouds of happiness in your own kitchen. There’s something absolutely magical about pulling apart that first warm roll—each fluffy bite transports you into a world where comfort meets satisfaction. The sweet undertones from the sugar paired with that beautifully golden crust create such an inviting experience; it’s like wrapping yourself up in your coziest blanket on a chilly evening.
These rolls are not just another side dish—they’re an experience waiting to unfold at your table. Imagine gathering around with family and friends for Thanksgiving or celebrating life’s everyday moments over supper; these little gems are versatile enough to shine on any occasion! Plus, who wouldn’t want to see their loved ones’ faces light up as they savor these freshly baked treasures right out of the oven? The aroma alone will draw everyone into the kitchen like moths to a flame!
When it comes to serving suggestions, let your imagination run wild! Imagine savoring one with creamy mushroom soup on a crisp autumn evening or pairing it with hearty stews during winter gatherings—the combos are endless! For an afternoon pick-me-up, try slathering one with herbed vegan butter or even dipping it into olive oil infused with garlic and herbs; I promise you’ll be transported straight to culinary bliss.
Feeling adventurous? This recipe is wonderfully adaptable! Experiment by adding herbs like rosemary or thyme into the dough for an aromatic twist or even fold in some shredded cheese—yes please! You could also form these rolls into knots instead of balls for an elegant touch that will impress anyone at your dining table. Whatever path you choose, I wholeheartedly invite you to dive into this recipe’s world, share your experience with others, and continue spreading joy through food. Happy baking!
30 Minute Dinner Rolls
Experience the joy of baking with these 30 Minute Dinner Rolls, a quick and delightful addition to any meal. These soft and fluffy rolls are perfect for weeknight dinners, holiday feasts, or simply as a warm treat to share with family and friends. With a hint of sweetness and a golden-brown crust, they transform any table setting into a cozy gathering spot. Best of all, you can whip them up in just half an hour without sacrificing flavor or quality!
- Prep Time: 10 minutes
- Cook Time: 20 minutes
- Total Time: 30 minutes
- Yield: Approximately 12 rolls 1x
- Category: Bread
- Method: Baking
- Cuisine: American
Ingredients
- 1 1/4 cups warm water
- 1/4 cup sugar
- 2 tablespoons active dry yeast
- 1/3 cup vegetable oil
- 1 teaspoon salt
- 1 egg or substitute
- 3 3/4 cups all-purpose flour
Instructions
- In a bowl, combine warm water and sugar. Sprinkle yeast over the top and let sit for 2-5 minutes until frothy.
- Stir in vegetable oil, salt, and egg (or substitute). Gradually add flour one cup at a time until dough is soft but not sticky.
- Shape the dough into small balls and place them in a greased baking pan. Cover with a towel and let rise for about 20 minutes.
- Preheat oven to 375°F (190°C). Bake rolls for approximately 20 minutes or until golden brown.
- Brush warm rolls with melted butter before serving.
Nutrition
- Serving Size: 1 serving
- Calories: 120
- Sugar: 2g
- Sodium: 130mg
- Fat: 4g
- Saturated Fat: 0.5g
- Unsaturated Fat: 3g
- Trans Fat: 0g
- Carbohydrates: 19g
- Fiber: 0.5g
- Protein: 3g
- Cholesterol: 15mg