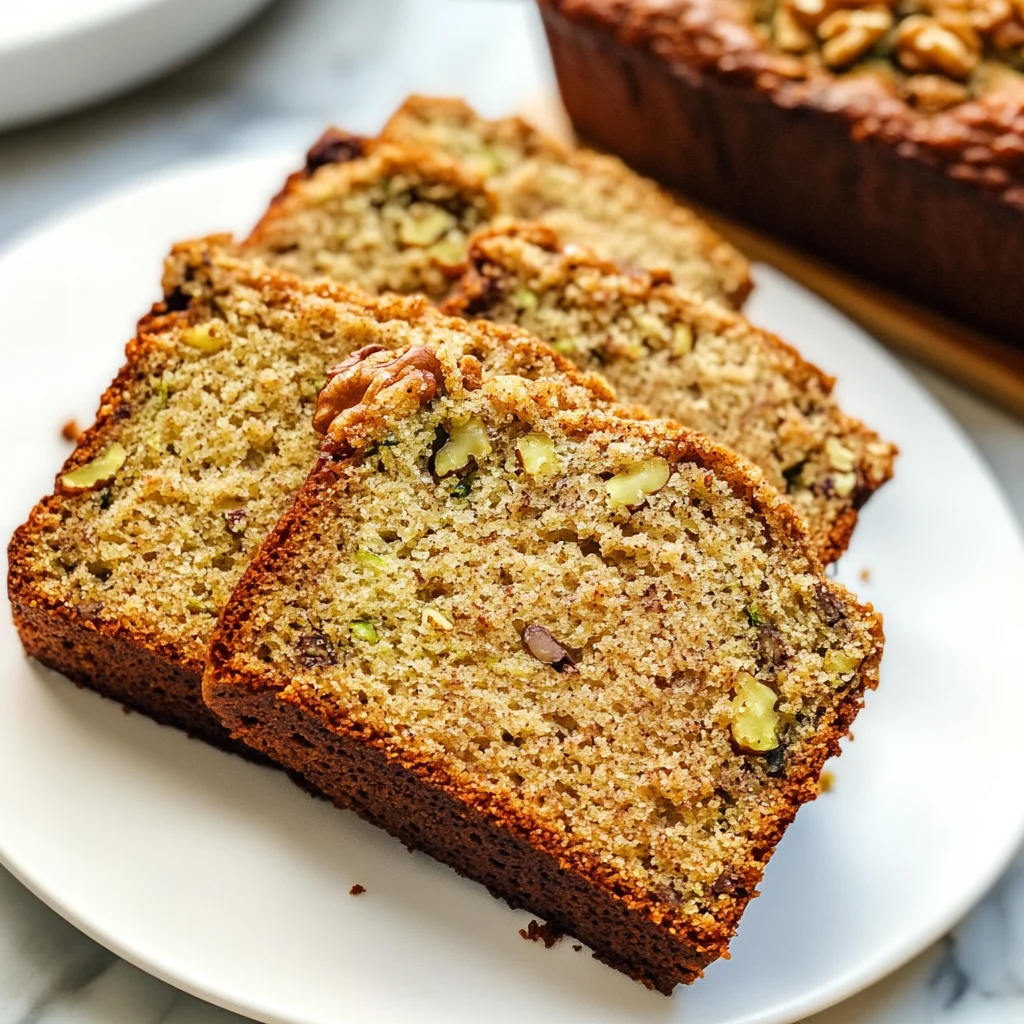
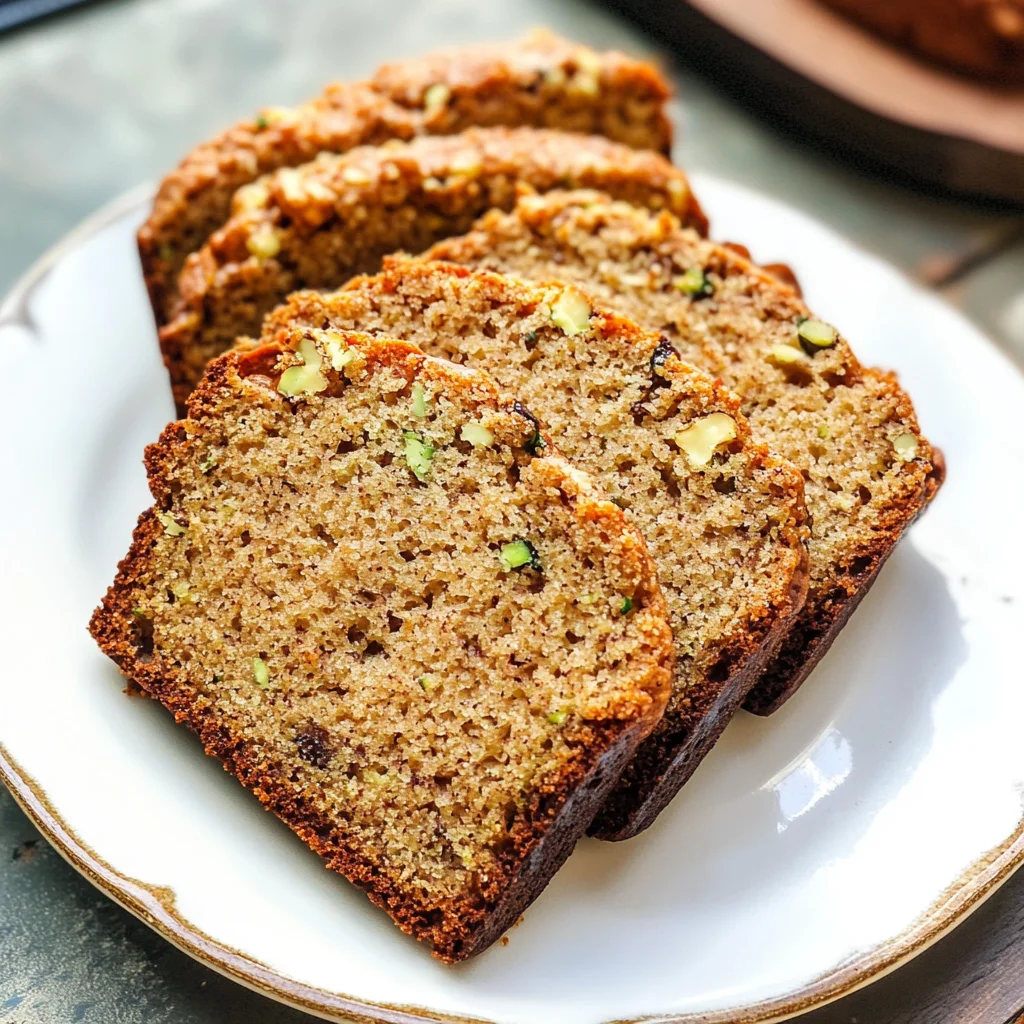
Old Fashioned Zucchini Bread
There’s something utterly magical about stepping into a warm kitchen, the aroma of spices swirling around like a cozy hug, inviting you to take part in a delicious ritual. That’s exactly what you’ll experience with this Old Fashioned Zucchini Bread. It’s more than just a recipe; it’s an experience steeped in tradition, where every bite offers a delightful blend of cinnamon warmth and the sweetness of fresh zucchini. I promise you, as soon as that golden loaf emerges from the oven, you’ll be enveloped in memories of family gatherings and sunny afternoons spent baking with loved ones. This is a treat that bridges generations, showcasing how simple ingredients can come together to create something profoundly satisfying.
As you prepare to embark on this culinary journey, allow yourself to be swept away by the nostalgia that each step evokes. The process of grating zucchini brings back fond memories for me—there’s something therapeutic about it, almost like meditation. And when you mix those vibrant green shreds into your batter, it’s not just about adding moisture; it’s about weaving nature’s bounty into your creation. This Old Fashioned Zucchini Bread is perfect for any occasion—whether you’re looking for a comforting dessert after dinner or a sweet pick-me-up during your afternoon tea time. Trust me; each slice is an invitation to linger a little longer, savoring every crumb.
Old Fashioned Zucchini Bread: A Slice of Nostalgia
This delightful recipe embodies everything I love about baking—it’s straightforward yet yields extraordinary results. As you gather your ingredients and tools, let your excitement build! This isn’t just about following steps; it’s about creating something beautiful with your own hands. With its moist crumb and hints of vanilla and walnut crunch, this zucchini bread will quickly become a beloved staple in your home.
Ingredients:
Now that we’re ready to dive into this culinary adventure together, let’s explore the key players in our Old Fashioned Zucchini Bread recipe. Each ingredient plays an essential role in crafting the perfect loaf, so let’s take the time to appreciate them!
- 3 cups all-purpose flour: Flour is truly the backbone of any baking project! It provides the structure that holds our bread together while also contributing to its texture. Using all-purpose flour strikes the perfect balance between softness and stability—it’s versatile enough for our needs here without getting too heavy or dense. When measuring flour, I recommend spooning it into your measuring cup rather than scooping directly from the bag to avoid packing it down too tightly; we want that light crumb!
- 1 teaspoon salt: Salt may seem like a small player in our ingredient lineup, but it has an important job—it enhances flavors and balances sweetness beautifully. It’s almost like magic! Without salt, our zucchini bread could taste flat and one-dimensional. So don’t skip this step; it’s absolutely paramount for bringing out all those warm flavors hiding within.
- 1 teaspoon baking soda: Baking soda acts as our leavening agent here—it helps our bread rise and achieve that lovely fluffy texture we crave. When combined with acidity (which we’ll get from our zucchini), it creates carbon dioxide bubbles that lift our batter as it bakes. Make sure your baking soda is fresh; old baking soda loses potency over time and might leave you with a dense loaf instead of one that’s light and airy.
- 1 teaspoon baking powder: Baking powder works hand-in-hand with baking soda in this recipe to ensure proper rising power. It contains both an acid and a base, which means it will help give us additional lift even if we don’t have any acidic components in play. Together with baking soda, they make sure we end up with a beautifully risen loaf that’s perfectly moist.
- 3 teaspoons ground cinnamon: Ahh, the warm embrace of cinnamon! This spice adds depth and comfort to our zucchini bread; it’s that aromatic hug that makes every slice feel like home. Cinnamon pairs perfectly with both the sweetness of sugar and the earthiness of zucchini—creating an irresistible harmony of flavors. Quality counts here; opt for fresh ground cinnamon if possible since older spices can lose their potency.
- 3 large eggs: Eggs serve multiple functions in baking—they bind ingredients together while also adding moisture and richness to our loaf. They contribute protein which helps stabilize the structure as the bread rises during baking. Be sure to use room temperature eggs as they blend more easily into your batter compared to cold ones straight from the fridge.
- 1 cup vegetable oil: This liquid gold contributes moisture without weighing down our bread like butter might do; plus, it keeps things beautifully tender! Vegetable oil also enhances shelf life—allowing you to enjoy leftovers without worrying about them drying out too quickly. You can substitute other oils like canola or sunflower if needed; just keep in mind their flavor profiles may slightly alter yours!
- 2 1/4 cups granulated sugar: Sugar is not only responsible for sweetness but also plays an essential role in moisture retention during baking—helping create that soft crumb we all adore! Different sugars can yield different results; granulated sugar gives us that classic sweetness while allowing other flavors (like cinnamon) to shine through without overshadowing them.
- 3 teaspoons vanilla extract: Vanilla extract adds warmth and complexity—a truly transformative ingredient! It enhances all those beautiful flavors we’ve carefully blended together while also imparting its own delightful aroma into each slice we cut later on. I recommend using pure vanilla extract whenever possible for optimal flavor rather than imitation varieties.
- 2 cups grated zucchini: Here comes the star of our show—the humble yet magical zucchini! Grated finely into strands before being mixed into our batter adds incredible moisture without overpowering everything else at play here flavor-wise! Plus, it’s an easy way to sneak some veggies into what would otherwise be indulgent dessert fare—a win-win!
- 1 cup chopped walnuts (optional): If you’re feeling adventurous or simply love nuts like I do—don’t hesitate to sprinkle in some chopped walnuts! Their crunchy texture contrasts beautifully against the soft crumb while adding nutty undertones that elevate every bite beyond ordinary expectations! If allergies or preferences prevent you from using them though? No worries at all—they’re entirely optional!
Equipment You’ll Need:
Before we roll up our sleeves and get started on this delicious journey together, let’s take stock of some essential equipment you’ll want by your side! Having these trusty tools will make everything smoother—and who doesn’t love an organized kitchen?
- Two 8×4 inch loaf pans: Your choice of pan matters more than you might think! These sizes are ideal for achieving perfectly shaped loaves without risking overflow during rising/baking processes—which can be quite messy otherwise! Greasing them ensures easy release post-bake (we don’t want any sticking mishaps!) so keep those pans happy too!
- Mixing bowls: A set of good mixing bowls ensures efficient prep work as you combine dry/wet ingredients separately before merging later on—this helps avoid clumping issues while making clean-up easier overall too! Opt for larger sizes so there’s plenty of room when folding in grated veggies later on.
- Whisk or electric mixer: Whether you prefer stirring by hand or using electric help—the choice is yours! An electric mixer makes quick work outta combining wet ingredients smoothly but whisking manually offers satisfaction as well—it really depends on what mood strikes you!
- Rubber spatula: A trusty rubber spatula becomes invaluable when folding grated zucchini gently into batter without over-mixing—we want tenderness here folks! Plus it helps scrape down sides effectively ensuring nothing goes wasted along way either!
Preparing the Old Fashioned Zucchini Bread
Step 1: Prepping Your Oven & Pans
Before anything else happens in this delectable endeavor—we need to set ourselves up for success right from the start! Begin by preheating your oven to 325°F (165°C). This allows ample time for heat distribution inside once we slide those lovingly crafted loaves inside later on—ensuring even cooking throughout each yummy slice afterward too! While waiting patiently (because who wouldn’t want their kitchen smelling heavenly sooner?), take two 8×4 inch loaf pans and generously grease them using either butter or non-stick spray followed by dusting lightly with flour afterward—this step prevents sticking disasters post-bake which nobody deserves facing after all their hard work!
Step 2: Sifting Dry Ingredients
Next up? Let’s tackle those dry ingredients head-on using one large mixing bowl at least capable enough hold everything comfortably together while whisking away any clumps along way—we wouldn’t want lumpy bread would we? In go three cups all-purpose flour alongside one teaspoon salt followed by additional leaveners (baking soda/baking powder) and finally three teaspoons ground cinnamon—the aroma wafting through air already makes my heart sing just thinking about it! Sifting these components not only mixes things nicely but aerates them as well allowing lighter texture upon final bake—so trust me when I say don’t rush through this step—it truly sets foundation needed later down road!
Step 3: Whipping Up Wet Ingredients
Now onto creating magic within another large bowl where we’ll combine three large eggs first before introducing liquid gold (one cup vegetable oil) next followed closely behind by two-and-a-quarter cups grandulated sugar plus three teaspoons pure vanilla extract immediately thereafter—all harmonizing beautifully together creating luscious mixture rich enough excite anyone who catches whiff nearby once completed shortly thereafter too! Beat everything until thoroughly combined ensuring no visible egg remains visible—trust me on this one folks—it leads towards smoother consistency ensuring seamless blending when folding dry mixes back inside afterward too!
Step 4: Merging Mixtures
With both mixtures prepped nicely now comes most exciting part where magic happens—we gently pour sifted dry ingredients right inside wet bowl filled previously then using rubber spatula slowly fold until barely combined avoiding over-mixing which could lead towards denser loaf than desired ultimately ruining end product completely—the goal here lies within tender crumb instead showcasing lightness throughout entire creation itself giving rise plenty gorgeous height during bake process itself too so patience pays off big time here friends trust me wholeheartedly on this one okay?!
Stay tuned as we continue crafting this incredible Old Fashioned Zucchini Bread together—we’re almost there!
Step 5: Gently Incorporating the Zucchini – The Heart of Moistness
Now comes the moment that brings this old-fashioned zucchini bread to life! After you’ve mixed the dry ingredients with the wet mixture, it’s time to fold in those beautiful, freshly grated zucchinis. This step is crucial because the zucchini is what infuses our bread with that signature moisture and subtle sweetness, creating a tender crumb that practically melts in your mouth. The key here is to gently fold in the zucchini and walnuts (if you’re using them) until just combined. Trust me on this—over-mixing can lead to a dense loaf, which defeats the purpose of our light, luscious treat.
As you incorporate these elements, take a moment to appreciate the vibrant green specks of zucchini peeking through your golden batter. The aroma will sweep through your kitchen like a warm hug, enveloping you in its comforting embrace. You’ll want to use a spatula or wooden spoon for this task—slowly and carefully turning your mixture over rather than stirring vigorously. This method helps retain air in the batter and keeps it light. Remember, we’re aiming for a delightful texture that balances tenderness with just enough structure to hold together beautifully while baking.
Step 6: Dividing the Batter – Equal Love for Each Loaf
With everything fully combined, it’s time to pour this luscious creation into your prepared loaf pans. Gently divide your batter evenly between the two greased and floured 8×4 inch pans. This part may seem simple, but it’s essential for even baking; if one loaf has significantly more batter than the other, you might end up with uneven doneness. I always recommend using a spatula to scrape every last bit from your mixing bowl—this is where so much flavor resides! Plus, who wouldn’t want every bite of their zucchini bread to be as delicious as possible?
As you fill each pan, take care not to overfill them; leaving about an inch from the top will allow room for rising without spilling over. At this point, you can give each pan a gentle shake or tap against the counter to settle the batter and eliminate any pesky air bubbles that might get trapped inside. This little step ensures that when you cut into your loaves later on, you’ll be rewarded with an even crumb structure—a visual cue that speaks volumes about how well you’ve executed this recipe!
Step 7: Baking Your Perfect Loaves – The Transformation Begins
Now we enter one of my favorite parts of this entire process: baking! Place your filled loaf pans into the preheated oven at 325°F (165°C). As they start to heat up, be prepared for an utterly intoxicating aroma that will soon fill your home—a warm symphony of cinnamon mingling with hints of vanilla and earthy zucchini wafting through every corner of your kitchen. The baking time will generally range from 60 to 70 minutes, but remember that each oven operates slightly differently; some may run hotter or cooler.
To test for doneness—and I promise it’s worth waiting for—you’ll insert a toothpick into the center of each loaf after about an hour. If it comes out clean or with just a few moist crumbs clinging to it (but no wet batter), then congratulations! Your loaves are ready to make their grand debut. If there’s still wet batter lingering on that toothpick, give them another five minutes before checking again—patience is key here! You’ll know they’re done when they spring back slightly when touched and have developed a golden-brown crust; this is absolutely paramount for achieving that beautiful texture we’re after.
Step 8: Cooling Your Masterpieces – Patience Pays Off
Once your loaves have achieved that glorious golden crust and passed the toothpick test, remove them from the oven and allow them to cool in their pans for about ten minutes. This resting period is crucial—it allows steam to escape while keeping moisture locked inside so that each slice remains tender and soft when you finally dig in! While it might be tempting to dive right into those delectable loaves while they’re still warm (and trust me, I totally understand!), giving them time on a wire rack is non-negotiable if you’re aiming for perfect slices later on.
After ten minutes have passed, carefully invert each loaf onto a wire rack—this helps ensure they don’t become soggy from steam collecting at the bottom. Allow them to cool completely before slicing; this cooling phase allows flavors to meld together beautifully while setting their structure perfectly. When cutting into these loaves later on, you’ll find they slice like butter—each piece revealing tender flecks of green zucchini nestled within its sweet embrace. Just imagine sharing these warm slices with friends or family over coffee or tea; it’s moments like these that turn simple recipes into cherished memories.
Conclusion:
As we come to the end of our journey through this cherished recipe for Old Fashioned Zucchini Bread, I can’t help but feel excited about all the delicious moments waiting ahead for you. This isn’t just any quick bread; it’s a heartfelt creation that brings together warm spices, luscious vanilla notes, and that wonderfully moist crumb which makes every bite feel like a cozy hug. The blend of cinnamon dances harmoniously with sweet zucchini while walnuts add their delightful crunch—truly extraordinary flavors coming together in perfect harmony!
But what makes this recipe a must-try extends far beyond its taste; it’s also about the joy and simplicity of making something so heartfelt from scratch. Picture yourself pulling one of these loaves from your oven—the beautiful golden crust beckoning you closer while its aroma fills your kitchen with warmth and happiness. It’s perfect for any occasion: whether served at brunch with friends paired alongside coffee or enjoyed leisurely on a rainy afternoon while curled up with your favorite book, this zucchini bread resonates as comfort food at its finest.
For serving suggestions, imagine savoring one slice warm from the oven spread with creamy almond butter for breakfast or perhaps enjoying another alongside an afternoon tea—each pairing elevating this already delightful treat into something truly special. And if you’re feeling adventurous? You could pair it with fresh berries on top of whipped coconut cream—what an utterly intoxicating combination!
This recipe is wonderfully adaptable too! Feeling adventurous? Swap out walnuts for pecans or add dried cranberries or chocolate chips if you’re looking to amplify those flavors. You could even experiment with different spices like nutmeg or ginger if you’re craving something unique. Each variation adds its own twist while keeping that nostalgic essence intact—a reminder of home-cooked goodness passed down through generations. So grab those zucchinis from your garden or local market and give this recipe a try—I promise you’ll create not just loaves but memories worth sharing!
Old Fashioned Zucchini Bread
Old Fashioned Zucchini Bread is a delightful, moist quick bread that combines the wholesome goodness of fresh zucchini with warm spices like cinnamon. This classic recipe is perfect for breakfast, an afternoon snack, or even dessert.
- Prep Time: 20 minutes
- Cook Time: 65 minutes
- Total Time: 1 hour 25 minutes
- Yield: Approximately 12 servings 1x
- Category: Dessert
- Method: Baking
- Cuisine: American
Ingredients
- 3 cups all-purpose flour
- 1 teaspoon salt
- 1 teaspoon baking soda
- 1 teaspoon baking powder
- 3 teaspoons ground cinnamon
- 3 large eggs
- 1 cup vegetable oil
- 2 1/4 cups granulated sugar
- 3 teaspoons vanilla extract
- 2 cups grated zucchini
- 1 cup chopped walnuts (optional)
Instructions
- Preheat your oven to 325°F (165°C). Grease two 8×4 inch loaf pans and dust with flour.
- In a mixing bowl, sift together the flour, salt, baking soda, baking powder, and cinnamon.
- In another bowl, whisk together the eggs, vegetable oil, sugar, and vanilla until well combined.
- Gradually add the dry ingredients to the wet mixture and fold gently until just combined. Avoid over-mixing.
- Fold in the grated zucchini and walnuts if using until evenly distributed.
- Divide the batter evenly between the prepared loaf pans.
- Bake for 60 to 70 minutes or until a toothpick inserted into the center comes out clean.
- Allow loaves to cool in pans for about 10 minutes before transferring them to a wire rack to cool completely.
Nutrition
- Serving Size: 1 slice
- Calories: 230
- Sugar: 15g
- Sodium: 150mg
- Fat: 10g
- Saturated Fat: 1g
- Unsaturated Fat: 9g
- Trans Fat: 0g
- Carbohydrates: 33g
- Fiber: 1g
- Protein: 3g
- Cholesterol: 30mg