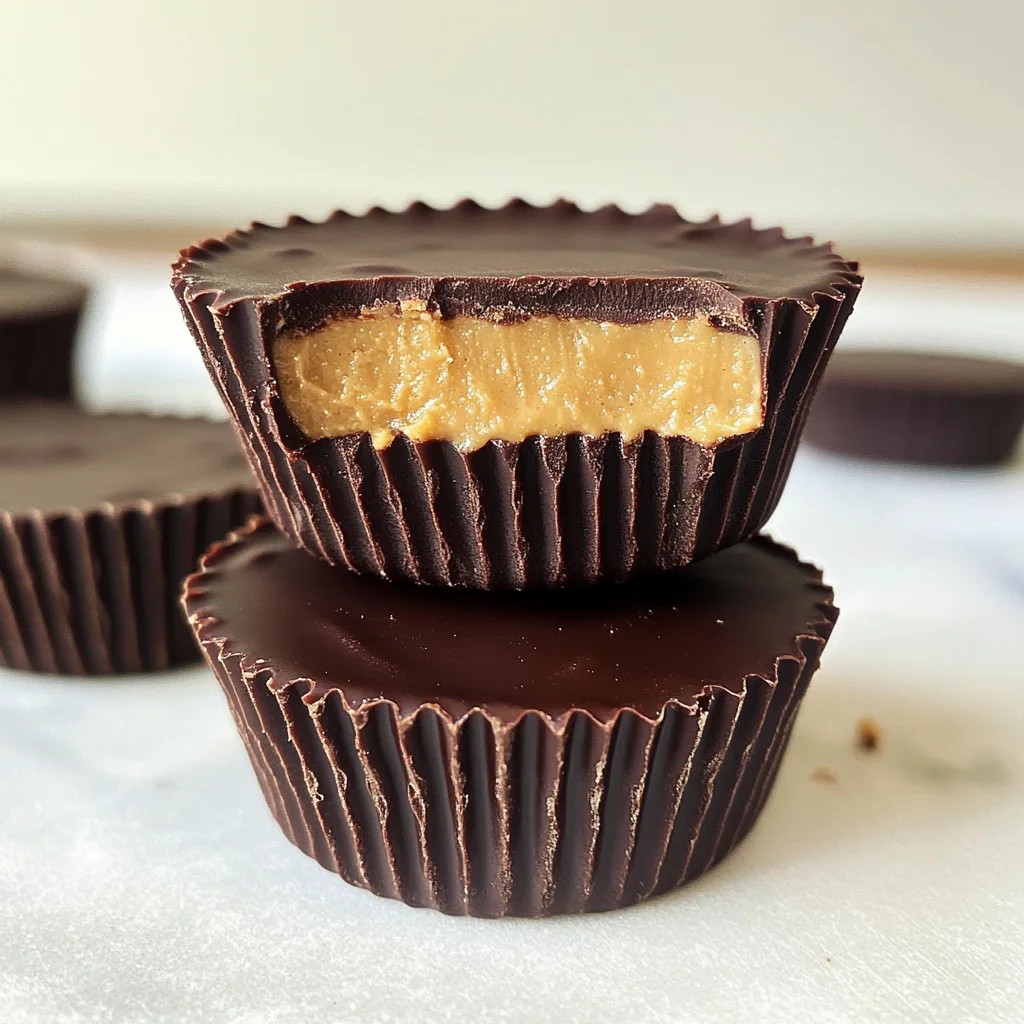
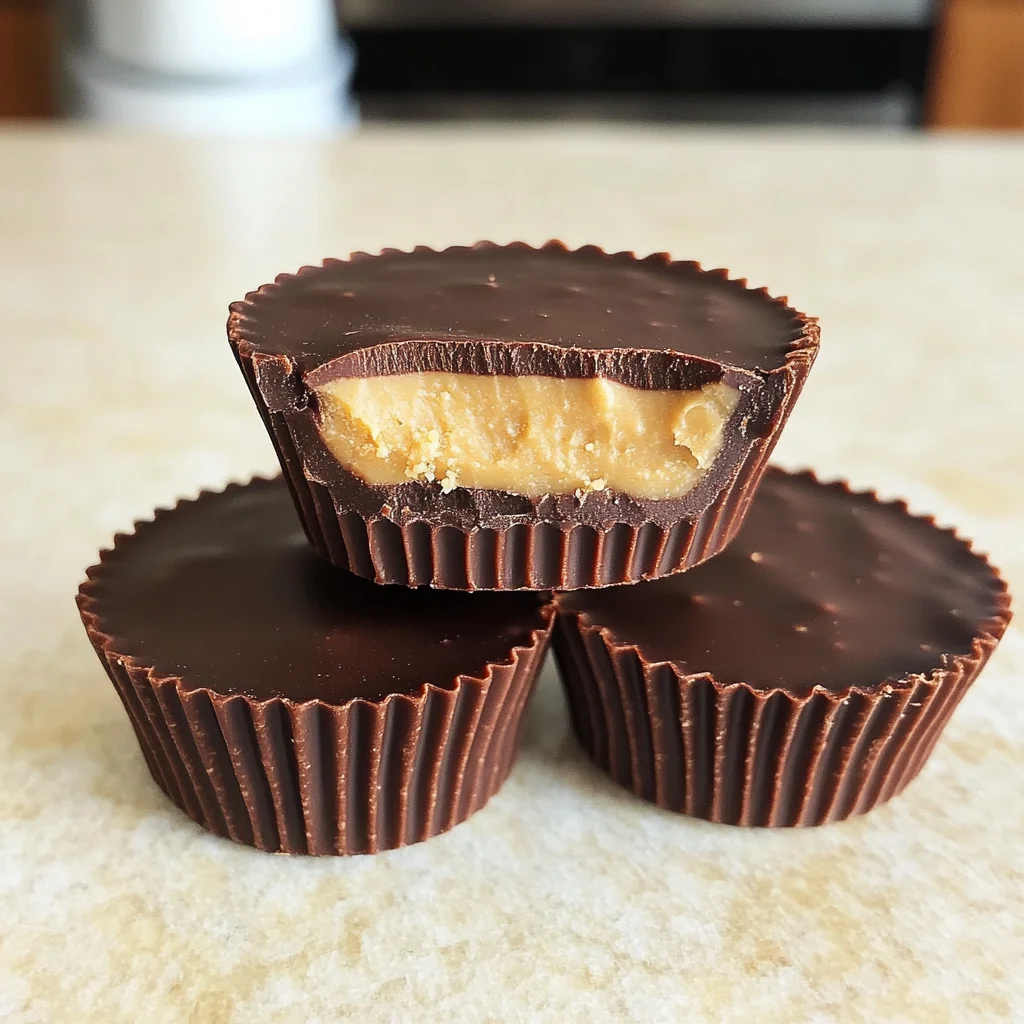
Make Tasty Homemade Reese’s Cups in 5 Simple Steps Today!
If you’re looking for a sweet treat that brings smiles to everyone’s faces, you’ve come to the right place! Today, I’ll show you how to make tasty homemade Reese’s Cups in 5 simple steps. These delightful little bites of joy are not only easy to prepare but also perfect for any occasion—be it a busy weeknight craving, a fun family gathering, or just a treat to indulge yourself. Trust me, once you try these, they will become your go-to dessert!
What makes this recipe truly special is how simple and wholesome the ingredients are. Plus, they are so satisfying that you might find yourself sneaking back for seconds (or thirds!). Let’s dive into this delicious adventure together!
Why You’ll Love This Recipe
- Quick and Easy: This recipe can be whipped up in just 25 minutes, making it a perfect option when those sweet cravings hit unexpectedly.
- Family-Friendly Appeal: Kids and adults alike love peanut butter cups! You can get the whole family involved in making these treats.
- Make-Ahead Convenience: These homemade Reese’s Cups store well in the refrigerator, making them great for meal prep or last-minute dessert needs.
- Customizable Flavor: With just a few tweaks, you can easily adjust the flavor to suit your taste preferences.
Ingredients You’ll Need
You won’t believe how simple these ingredients are! Just a handful of wholesome items and you’re on your way to creating something magical. Let’s gather what we need:
For the Peanut Butter Filling
- 1 cup creamy peanut butter
- 1 cup powdered sugar
For the Chocolate Coating
- 2 cups milk chocolate chips
- 1 tablespoon coconut oil
Variations
One of the best things about this recipe is its flexibility! Here are some fun ideas to switch things up:
- Add Crunch: Stir in some crushed nuts or crispy rice cereal into the peanut butter mixture for an extra crunch!
- Dark Chocolate Delight: Swap out milk chocolate chips for dark chocolate chips if you prefer a richer flavor.
- Flavor Boost: Mix in a teaspoon of vanilla extract or sprinkle some sea salt on top before setting for added depth and flavor.
How to Make Tasty Homemade Reese’s Cups in 5 Simple Steps Today!
Step 1: Prepare the Peanut Butter Mixture
In a mixing bowl, combine creamy peanut butter and powdered sugar. Mix until smooth and fully combined. This step is crucial because it creates that rich filling we all love. Make sure there are no lumps so each bite is creamy and delightful!
Step 2: Melt the Chocolate
Melt milk chocolate chips and coconut oil together using either a microwave or double boiler. Stir until smooth. The coconut oil helps give the chocolate that perfect glossy finish while also making it easier to work with when coating.
Step 3: Create the Chocolate Base
Pour a layer of melted chocolate into the bottom of cupcake liners. Use enough to cover the bottom completely. This layer is essential as it forms the foundation of your peanut butter cup.
Step 4: Add the Peanut Butter Filling
Spoon a generous amount of your peanut butter mixture on top of the chocolate layer. Try to keep it centered so that every bite has an equal amount of chocolate and peanut butter.
Step 5: Finish with More Chocolate
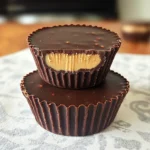
Cover your peanut butter layer with more melted chocolate. Ensure it completely encases the filling for that classic Reese’s Cup shape. Place them in the refrigerator until set—this will only take about 15-20 minutes!
And there you have it! Making tasty homemade Reese’s Cups in 5 simple steps today is not only achievable but also incredibly rewarding. Enjoy sharing (or keeping) these delightful treats!
Pro Tips for Making Make Tasty Homemade Reese’s Cups in 5 Simple Steps Today!
Creating your own Reese’s Cups at home can be a delightful experience, and with these tips, you’ll ensure they turn out perfectly every time!
-
Choose quality chocolate: Using high-quality milk chocolate chips enhances the flavor and texture of your cups. It really makes a difference in the overall taste.
-
Use natural peanut butter: Opt for naturally creamy peanut butter without added sugars or oils. This will give you a richer flavor and a smoother consistency that complements the chocolate beautifully.
-
Don’t overheat the chocolate: When melting the chocolate, take care not to overheat it. Chocolate can seize if it’s overheated, which would affect the smoothness of your final product. Melt it slowly and stir often!
-
Let them chill properly: After assembling your cups, it’s important to refrigerate them until fully set. This helps the layers bind together nicely, making them easier to unwrap and enjoy.
-
Experiment with flavors: Feel free to add a sprinkle of sea salt on top before chilling or mix in some crushed nuts for added texture. These small twists can make your homemade Reese’s Cups even more delightful!
How to Serve Make Tasty Homemade Reese’s Cups in 5 Simple Steps Today!
Serving up your homemade Reese’s Cups is just as fun as making them! Whether it’s for a special occasion or just because, here are some ideas to present this sweet treat beautifully.
Garnishes
- Sea salt: A light sprinkle of flaky sea salt on top of each cup adds a sophisticated touch that balances the sweetness perfectly.
- Chopped nuts: Garnish with finely chopped peanuts or almonds for an extra crunch and visual appeal.
- Chocolate drizzle: Drizzle some melted chocolate over the top for an elegant finish that also enhances the chocolatey goodness.
Side Dishes
- Fresh fruit salad: A refreshing side of mixed berries or sliced apples provides a nice contrast to the rich flavors of the Reese’s Cups.
- Vanilla yogurt: Creamy vanilla yogurt complements the sweetness of the cups while adding a tangy element that balances the dessert.
- Homemade whipped cream: Light and airy whipped cream can serve as a delicious accompaniment; consider adding a hint of vanilla extract for extra flavor.
- Coffee or chai tea: A warm beverage like coffee or chai tea pairs wonderfully with these chocolate treats, creating a comforting dessert experience.
With these serving suggestions and pro tips, you’re all set to create an unforgettable treat that everyone will love! Enjoy your homemade Reese’s Cups!
Make Ahead and Storage
These homemade Reese’s Cups are perfect for meal prep! You can whip up a batch in advance and enjoy them throughout the week or even share with friends and family. Here’s how to store and preserve their deliciousness.
Storing Leftovers
- Keep the Reese’s Cups in an airtight container at room temperature for up to 1 week.
- For longer freshness, store them in the refrigerator where they can last about 2 weeks.
- Ensure the cups are separated by parchment paper to prevent sticking.
Freezing
- Place the cups in a single layer on a baking sheet and freeze until solid.
- Once frozen, transfer them to a freezer-safe bag or container, separating layers with parchment paper.
- They can be frozen for up to 3 months.
Reheating
- To enjoy your Reese’s Cups slightly melty, remove them from the refrigerator or freezer and let them sit at room temperature for about 10 minutes before serving.
- If desired, you can gently warm them in the microwave for 5-10 seconds. Be cautious not to overheat!
FAQs
Here are some common questions you might have about this recipe.
Can I make tasty homemade Reese’s Cups in advance?
Absolutely! These cups are perfect for making ahead of time. Just store them properly as mentioned above, and you’ll have a sweet treat ready whenever you want!
What can I substitute if I don’t have coconut oil for my homemade Reese’s Cups?
If you don’t have coconut oil on hand, you can use vegetable oil or melted butter as alternatives. They will still provide the necessary consistency for melting chocolate.
How do I make tasty homemade Reese’s Cups healthier?
You can use dark chocolate chips instead of milk chocolate for a slightly healthier version. Additionally, opting for natural peanut butter without added sugars can enhance the health factor.
What’s the best way to serve homemade Reese’s Cups?
These cups are delightful on their own but pair wonderfully with a glass of almond milk or your favorite dairy-free alternative for an indulgent treat!
Final Thoughts
I hope you’re feeling inspired to make these delightful homemade Reese’s Cups! They are not only easy to prepare but also bring that comforting sweetness we all crave. Enjoy making this treat, share it with loved ones, and savor every bite. Happy cooking!
Make Tasty Homemade Reese’s Cups in 5 Simple Steps Today!
Indulge in the ultimate sweet treat with these homemade Reese’s Cups, crafted in just five simple steps! This delightful dessert combines creamy peanut butter with smooth chocolate, making it a perennial favorite for both kids and adults. Perfect for any occasion—from busy weeknights to family gatherings—these cups are not only easy to make but also customizable to suit your taste. With a prep time of only 25 minutes, you can satisfy your sweet tooth without compromising on flavor or quality. Get ready to treat yourself and your loved ones to a batch of these irresistible bites!
- Prep Time: 10 minutes
- Cook Time: 15 minutes
- Total Time: 25 minutes
- Yield: Makes approximately 12 cups 1x
- Category: Dessert
- Method: No-bake
- Cuisine: American
Ingredients
- 1 cup creamy peanut butter
- 1 cup powdered sugar
- 2 cups milk chocolate chips
- 1 tablespoon coconut oil
Instructions
- In a mixing bowl, blend the peanut butter and powdered sugar until smooth.
- Melt the chocolate chips and coconut oil together until glossy.
- Pour a layer of melted chocolate into cupcake liners, covering the bottom.
- Spoon peanut butter mixture on top of the chocolate layer, centering it well.
- Cover with more melted chocolate and refrigerate until set (about 15-20 minutes).
Nutrition
- Serving Size: 1 Reese’s Cup
- Calories: 150
- Sugar: 12g
- Sodium: 50mg
- Fat: 9g
- Saturated Fat: 4g
- Unsaturated Fat: 5g
- Trans Fat: 0g
- Carbohydrates: 15g
- Fiber: 1g
- Protein: 3g
- Cholesterol: 0mg