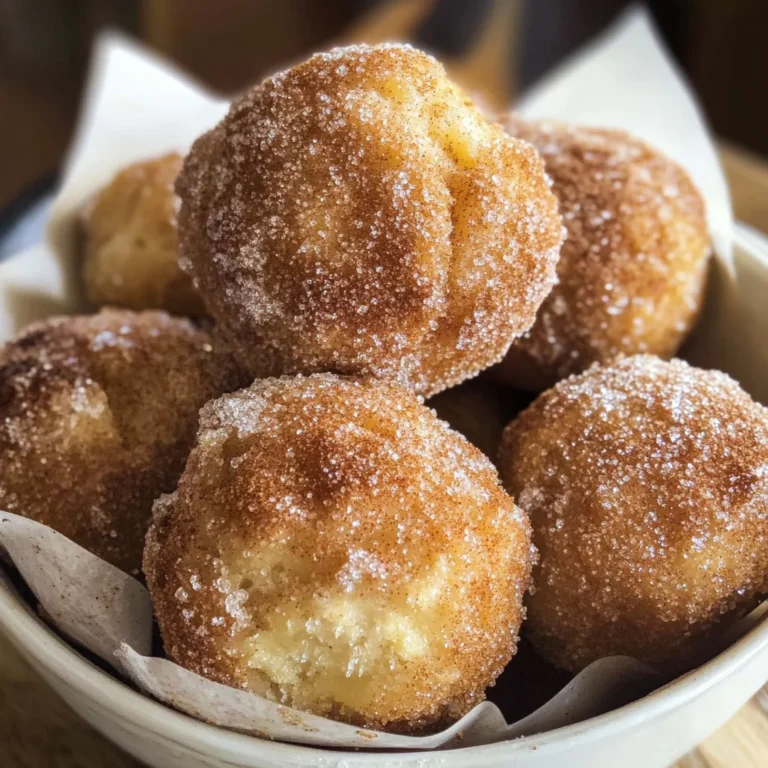
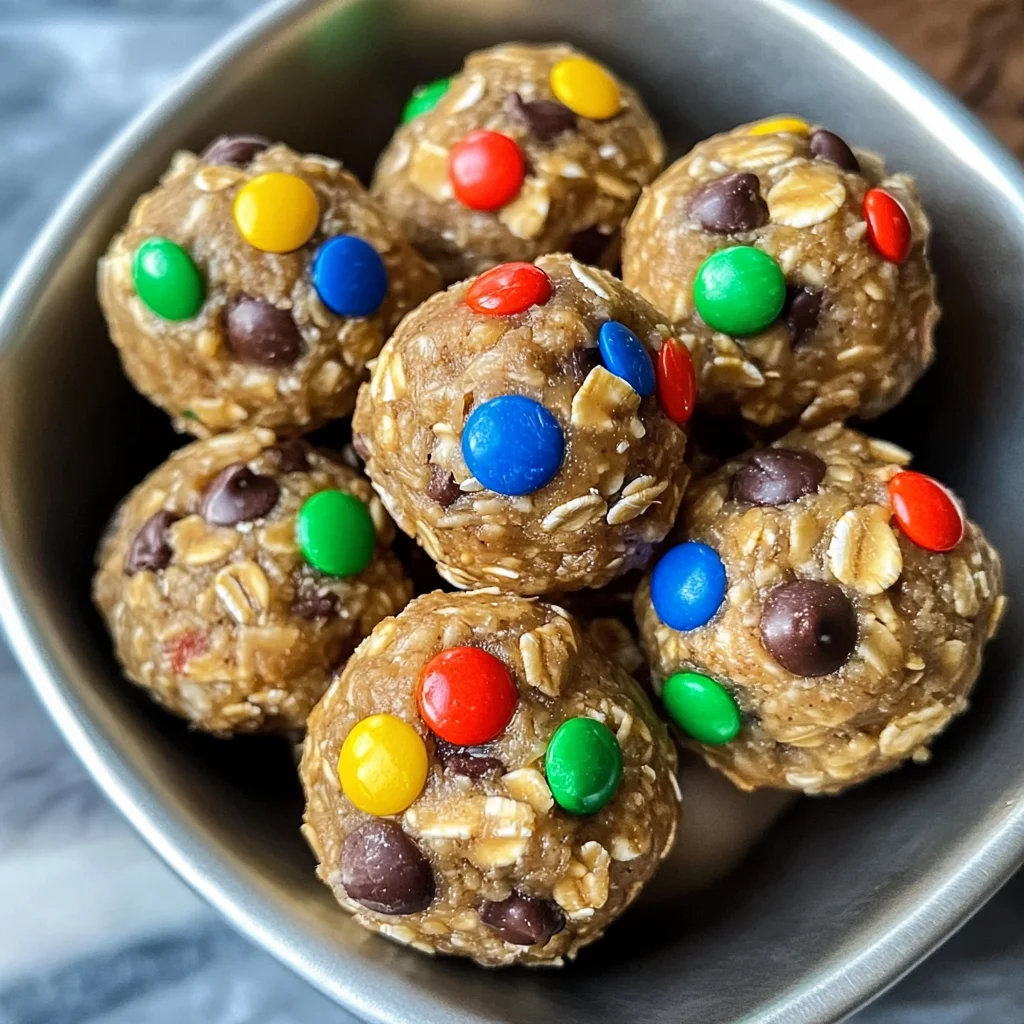
Quick Monster Cookie Protein Balls
If you’re looking for a quick and delicious snack that packs a nutritional punch, you’ve come to the right place! Quick Monster Cookie Protein Balls are one of my all-time favorites. They combine the comforting flavors of monster cookies with the convenience of no-bake snacks. These little bites are perfect for busy weeknights when you need something satisfying or for family gatherings where everyone is looking for a fun treat. Plus, they’re super easy to whip up in just 10 minutes!
What makes these protein balls truly special is how customizable they are. Whether you’re prepping for a long day at work or want a healthy snack to share with kids, these protein balls fit the bill perfectly.
Why You’ll Love This Recipe
- Super simple: With just a handful of ingredients, you can have these ready in no time.
- Family-friendly: Kids will love the sweet taste and colorful candies—it’s like having dessert that’s good for them!
- Make-ahead convenience: Prep these ahead of time and grab them when you need a quick energy boost.
- Nutritious and filling: Packed with protein and healthy fats, they keep you satisfied without weighing you down.
- Endless possibilities: You can mix and match ingredients to suit your cravings!

Ingredients You’ll Need
Getting started is easy with these simple, wholesome ingredients. Here’s what you’ll need to make your Quick Monster Cookie Protein Balls:
For the Base
- 1 cup smooth natural peanut butter
- 1/3 cup vanilla-flavored protein powder
- 1/2 cup rolled oats
- 1 tablespoon chia seeds
- 2 tablespoons honey
- 1 teaspoon vanilla essence
- 1/4 teaspoon salt
For the Fun!
- 1/4 cup mini chocolate chips
- 1/4 cup mini candies (such as m&ms)
- Optional: 1–4 teaspoons water (if needed)
Variations
This recipe is so flexible that you can easily switch things up! Here are a few delightful variations to try:
- Swap the nut butter: Use almond butter or sunflower seed butter for a different flavor.
- Change your protein: Try chocolate-flavored protein powder for an extra cocoa kick!
- Add some crunch: Toss in some chopped nuts or seeds for added texture.
- Go fruity: Mix in dried fruits like cranberries or raisins for a chewy bite.
How to Make Quick Monster Cookie Protein Balls
Step 1: Mix It All Together
In a large bowl, combine the peanut butter, protein powder, rolled oats, chia seeds, honey, vanilla essence, and salt. Stir until everything is well blended. This step is crucial because it ensures that every bite is packed with flavor and nutrients.
Step 2: Add the Fun Ingredients
Now it’s time to fold in those irresistible mini chocolate chips and colorful mini candies. Gently mix them into your doughy mixture—this adds sweetness and makes each bite feel like a little treat!
Step 3: Adjust Consistency If Needed
If your mixture feels too dry, don’t worry! Simply add one teaspoon of water at a time until it’s easier to form into balls. This step helps achieve the right texture so they hold together nicely.
Step 4: Form Your Protein Balls
Using your hands, scoop out about one tablespoon of the mixture and roll it into a ball. Repeat this process until all the mixture is shaped into delightful little bites. This part is fun—get your kids involved if you can!
Step 5: Chill and Enjoy
Place the formed protein balls on a plate or in an airtight container and refrigerate for about 30 minutes. Chilling helps them firm up so they’re perfect for snacking later on. Once they’re ready, enjoy them straight from the fridge or pack them up for on-the-go munching!
And there you have it—Quick Monster Cookie Protein Balls that are sure to be a hit! Whether you’re indulging after dinner or need an afternoon pick-me-up, these bites will make your day just a little sweeter.
Pro Tips for Making Quick Monster Cookie Protein Balls
Making these delicious protein balls is a breeze, but a few handy tips can take your snack game to the next level!
- Use room temperature ingredients – Having your peanut butter and honey at room temperature makes them easier to mix together, resulting in a smoother texture for your protein balls.
- Experiment with add-ins – Feel free to customize your monster cookie protein balls by adding dried fruits, nuts, or seeds. This not only enhances the flavor but also adds extra nutrients!
- Adjust the sweetness – Depending on your taste preference, you can modify the amount of honey or choose a different sweetener like maple syrup. This allows you to control how sweet you want your protein balls to be.
- Chill before serving – Letting the protein balls chill in the refrigerator for about 30 minutes helps them firm up. This makes them easier to handle and gives them a delightful chewy texture.
- Store properly – Keep any leftovers in an airtight container in the fridge. They’re perfect for snacking throughout the week!
How to Serve Quick Monster Cookie Protein Balls
These Quick Monster Cookie Protein Balls are not just tasty; they can also be presented beautifully for any occasion! Whether it’s a casual snack at home or an energy boost on-the-go, here’s how to serve them.
Garnishes
- Sprinkle with coconut flakes – A light dusting of unsweetened coconut flakes adds a tropical flair and enhances visual appeal.
- Drizzle with nut butter – A delicate drizzle of almond or cashew butter on top takes these protein balls to another level of indulgence.
Side Dishes
- Fresh fruit platter – Serve alongside a colorful array of fresh fruits like berries, apple slices, or banana halves for a refreshing contrast.
- Yogurt dip – Pair these protein balls with a bowl of creamy coconut yogurt. It’s perfect for dipping and adds an additional layer of creaminess.
- Trail mix – Offer a side of homemade trail mix featuring nuts, seeds, and dried fruits. It complements the sweetness of the protein balls while providing crunch.
- Rice cakes with nut butter – Light and crunchy rice cakes smeared with your favorite nut butter make an excellent side that balances out flavors and textures beautifully.
Enjoy making and sharing these delightful snacks! They’re sure to become a favorite in your household.
Make Ahead and Storage
These Quick Monster Cookie Protein Balls are not only delicious but also perfect for meal prep! They make an excellent on-the-go snack, and you can whip them up in no time. Here’s how to store and keep them fresh.
Storing Leftovers
- Store your protein balls in an airtight container.
- Keep them in the refrigerator for up to a week.
- For longer storage, consider freezing them (see below).
Freezing
- Place the protein balls in a single layer on a baking sheet.
- Freeze them for about 30 minutes until they are firm.
- Transfer the balls to a freezer-safe bag or container, separating layers with parchment paper.
- They can be stored in the freezer for up to three months.
Reheating
- These protein balls are best enjoyed cold or at room temperature.
- If you prefer them warm, microwave one for about 10-15 seconds.
- Enjoy immediately after heating for the best texture.
FAQs
Here are some common questions you might have about making Quick Monster Cookie Protein Balls.
Can I use different nut butters for Quick Monster Cookie Protein Balls?
Absolutely! You can substitute almond butter, cashew butter, or any nut-free alternative like sunflower seed butter. Just ensure it has a similar consistency to peanut butter.
How do I customize my Quick Monster Cookie Protein Balls?
Feel free to mix in your favorite add-ins! Consider using dried fruits, seeds, or even swapping out chocolate chips for carob chips. The options are endless!
Are Quick Monster Cookie Protein Balls gluten-free?
Yes! If you use certified gluten-free oats, these protein balls will be gluten-free and suitable for those with gluten sensitivities.
Final Thoughts
I hope you’re as excited about these Quick Monster Cookie Protein Balls as I am! They bring together all the fun flavors of classic monster cookies in a healthy, convenient form. Perfect for snacking anytime, they’ll surely become a go-to treat in your kitchen. Enjoy making this recipe, and don’t hesitate to share your creations with others!
Quick Monster Cookie Protein Balls

Quick Monster Cookie Protein Balls are the perfect solution for a nutritious, no-bake snack that the whole family will love! These delightful bites combine the classic flavors of monster cookies with a protein-packed punch, making them ideal for busy weeknights or as a fun treat during family gatherings. In just 10 minutes, you can whip up these customizable energy balls that satisfy sweet cravings while providing essential nutrients. Whether you’re preparing for a long workday or need a quick pick-me-up, these protein balls are sure to become a staple in your kitchen.
- Prep Time: 10 minutes
- Cook Time: None
- Total Time: 0 hours
- Yield: Approximately 12 servings 1x
- Category: Dessert
- Method: No-bake
- Cuisine: American
Ingredients
- 1 cup smooth natural peanut butter
- 1/3 cup vanilla-flavored protein powder
- 1/2 cup rolled oats
- 1 tablespoon chia seeds
- 2 tablespoons honey
- 1 teaspoon vanilla essence
- 1/4 teaspoon salt
- 1/4 cup mini chocolate chips
- 1/4 cup mini candies (such as M&Ms)
Instructions
- In a large bowl, mix together peanut butter, protein powder, rolled oats, chia seeds, honey, vanilla essence, and salt until well combined.
- Fold in mini chocolate chips and colorful mini candies until evenly distributed.
- If the mixture is too dry, add water one teaspoon at a time until it reaches a workable consistency.
- Scoop out about one tablespoon of the mixture and roll into balls.
- Refrigerate for 30 minutes to firm up before enjoying.
Nutrition
- Serving Size: 1 serving
- Calories: 110
- Sugar: 6g
- Sodium: 50mg
- Fat: 6g
- Saturated Fat: 1g
- Unsaturated Fat: 5g
- Trans Fat: 0g
- Carbohydrates: 11g
- Fiber: 2g
- Protein: 4g
- Cholesterol: 0mg