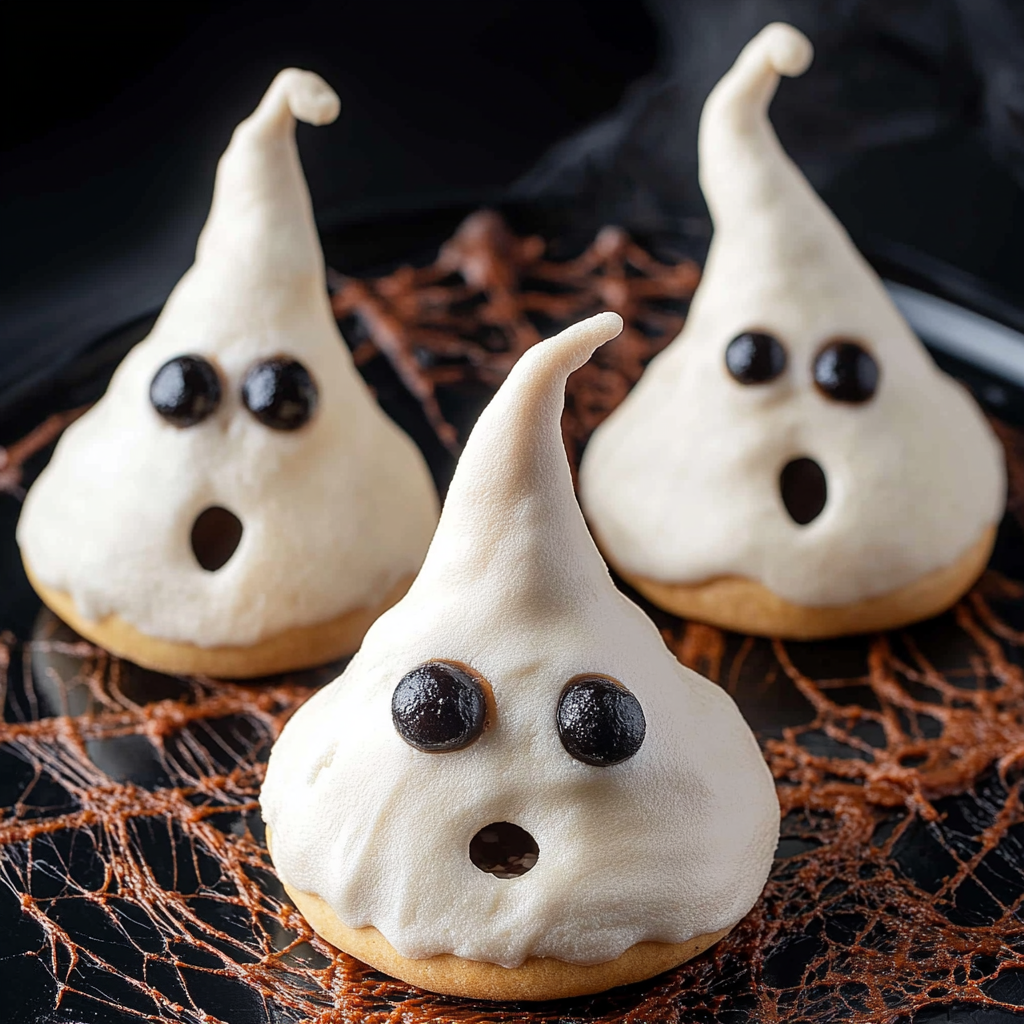
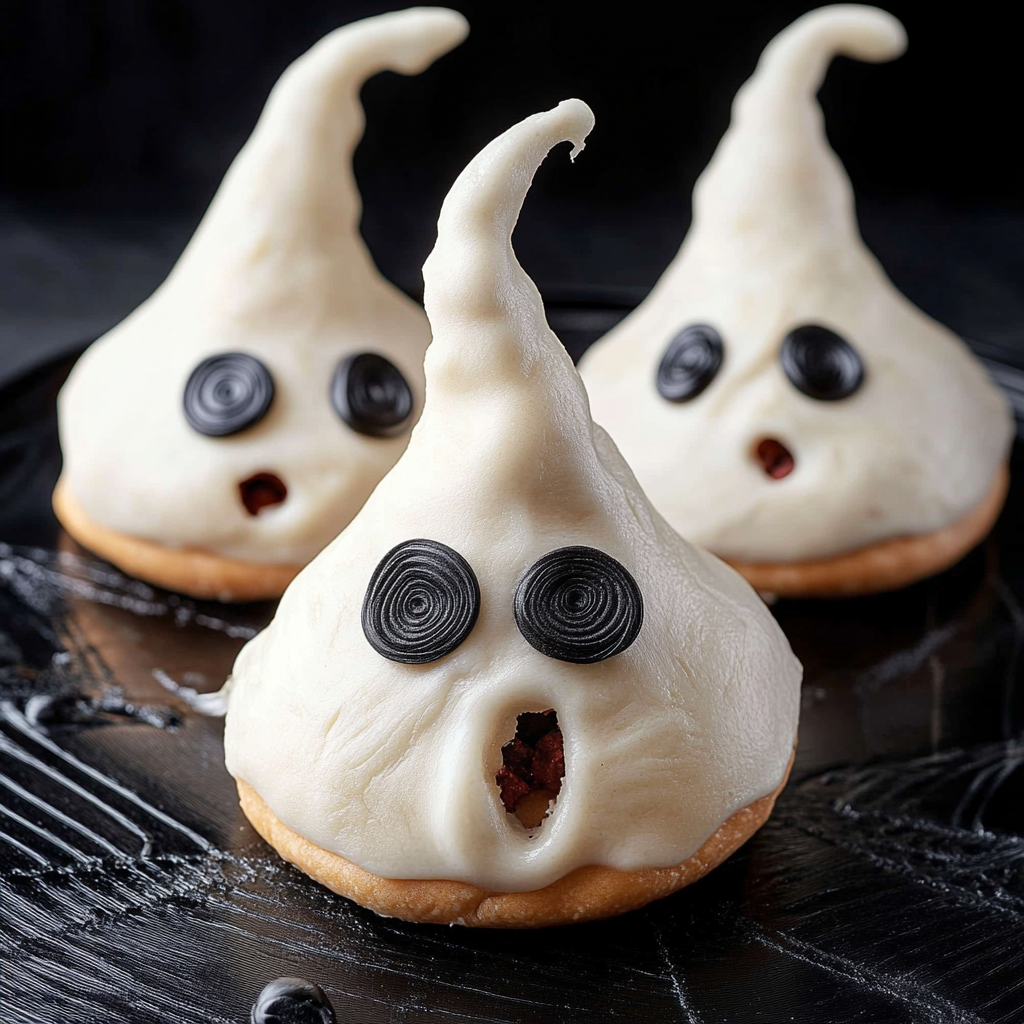
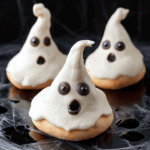
Meringue Ghosts
If you’re looking for a fun and delightful treat that’s perfect for Halloween or any festive gathering, look no further than these charming Meringue Ghosts! They are not only adorable but also incredibly light and airy. I love making these with my family – it’s such a joy to see everyone pipe out their own unique ghost shapes and decorate them with candy eyes. Plus, they bring a smile to everyone’s face, making them a favorite at parties!
These Meringue Ghosts are simple enough to whip up on a busy weeknight yet special enough for holidays or gatherings. With just a few basic ingredients, you’ll create a spooky dessert that’s sure to impress, and the kids will have a blast helping you in the kitchen!
Why You’ll Love This Recipe
- Easy to Make: This recipe requires just a few steps, making it perfect for bakers of all skill levels.
- Family Fun: Get the kids involved! Decorating the ghosts is an activity everyone will enjoy together.
- Make-Ahead Treat: These ghosts can be made in advance and stored, so they’re ready when you are!
- Cute Presentation: They add a whimsical touch to any dessert table with their adorable shapes and expressions.
Ingredients You’ll Need
You won’t believe how easy it is to create these delightful Meringue Ghosts with just a handful of simple, wholesome ingredients. Here’s what you’ll need:
- 2 large egg whites
- 1/4 teaspoon cream of tartar
- ½ cup granulated sugar
- ½ teaspoon pure vanilla extract
- candy eyeballs and/or mini chocolate chips
Variations
This recipe is flexible! Feel free to get creative with your Meringue Ghosts. Here are some fun ideas:
- Add Flavoring: Experiment with different extracts like almond or lemon for a unique twist on flavor.
- Color Them Up: Use food coloring to tint the meringue before piping for colorful ghosts!
- Change the Toppings: Instead of candy eyeballs, try using small candies or sprinkles for different expressions.
- Make Mini Ghosts: Pipe smaller versions for bite-sized treats that are perfect for little hands.
How to Make Meringue Ghosts
Step 1: Preheat Your Oven
First things first, preheat your oven to 275°F (135°C). This low temperature will slowly dry out your meringues without browning them. While that’s warming up, line two baking sheets with parchment paper or Silpats – this helps ensure that our adorable ghosts won’t stick!
Step 2: Whip the Egg Whites
In a metal or glass mixing bowl (avoid plastic!), add your egg whites. Beat them on medium-low until they become frothy, which should take about 30 seconds. This step is crucial because frothy egg whites create the base for our lovely meringues!
Step 3: Add Cream of Tartar
Now it’s time to add the cream of tartar into the frothy mixture! Continue mixing at medium-low speed until it’s fully incorporated. The cream of tartar helps stabilize the egg whites, ensuring your meringues hold their shape.
Step 4: Gradually Add Sugar
Next, we’ll gradually add in our granulated sugar – one tablespoon at a time! This should take about 1-2 minutes. Take your time here; if you dump all the sugar in at once, it can ruin your meringue texture. Patience pays off!
Step 5: Beat Until Stiff Peaks Form
Once all the sugar is added, turn up the mixer speed to medium. Beat until stiff peaks form and your meringue looks shiny – this takes about 3 minutes. It’s important not just to look for volume but also for that glossy shine!
Step 6: Mix in Vanilla
Gently fold in the pure vanilla extract until just combined. The vanilla adds a lovely flavor that complements our sweet ghosts beautifully.
Step 7: Prepare Your Piping Bag
Transfer your meringue into a large piping bag fitted with a 1/2-inch tip. A handy trick is to place the bag in a tall glass while filling it; this keeps everything tidy! Once filled, squeeze down towards the tip.
Step 8: Secure Your Parchment Paper
To prevent your parchment paper from sliding around while piping, place little dollops of meringue under each corner of the paper on your baking sheets.
Step 9: Pipe Your Ghosts
Now comes the fun part! Hold the piping bag perpendicular to the baking sheet and gently press out about an inch mound for each ghost (feel free to make some larger too!). Varying their shapes adds character – after all, ghosts come in all forms!
Step 10: Decorate!
Use candy eyeballs for spooky eyes and mini chocolate chips as mouths (the pointy side goes in!). This step allows each ghost to have its own personality.
Step 11: Bake Your Ghosts
Bake those cuties for one hour or until they feel dry and crisp. Don’t peek right after baking! Turn off the oven and let them cool inside for about 1-2 hours; this ensures they set perfectly.
Step 12: Store Your Treats
Once cooled, transfer your Meringue Ghosts into an airtight container where they can stay fresh at room temperature for up to two weeks! Just remember not to refrigerate them as it can make them soggy.
Enjoy these delightful Meringue Ghosts at your next gathering or just as a spooky treat at home! Happy baking!
Pro Tips for Making Meringue Ghosts
Making meringue can be a bit tricky, but with these handy tips, you’ll create the spookiest and most delightful ghost meringues!
- Use clean equipment: Make sure your bowl and beaters are completely free of grease. Any fat can prevent the egg whites from whipping into stiff peaks, resulting in flat meringues.
- Room temperature egg whites: Allow your egg whites to come to room temperature before whipping them. Room temperature eggs whip better and create a lighter meringue.
- Don’t rush the sugar: Gradually adding sugar helps it dissolve completely, which is crucial for achieving that glossy finish in your meringues. Remember, patience pays off!
- Avoid humidity: Meringues are best made on dry days because humidity can affect their texture. If it’s a rainy day, consider waiting until the weather clears up.
- Cool gradually: Once baked, let your meringues cool in the oven with the door closed. This prevents any sudden changes in temperature that could cause them to crack.
How to Serve Meringue Ghosts
These adorable meringue ghosts make for a fun and festive treat perfect for Halloween gatherings or any spooky celebration! They look delightful on a platter or as part of a dessert table spread.
Garnishes
- Edible glitter: Sprinkle some edible glitter over the ghosts for an enchanting sparkle that catches the eye.
- Chocolate drizzle: A light drizzle of melted dark chocolate adds an extra layer of flavor while enhancing the ghostly appearance.
Side Dishes
- Pumpkin spice cupcakes: These sweet treats bring seasonal flavors to your dessert table. The warm spices complement the lightness of the meringues beautifully.
- Caramel apple slices: Crisp apple slices drizzled with caramel sauce offer a refreshing contrast to the airy meringues while keeping with the fall theme.
- Spooky fruit salad: Create a colorful mix of fruits like oranges, grapes, and pomegranate seeds for a refreshing side that adds brightness and color to your dessert spread.
- Ghost-shaped cheese crackers: These savory snacks provide a delicious counterpart to your sweet ghosts and keep the festivity alive with their playful shape.
With these tips and serving suggestions, you’re all set to impress friends and family with your charming Meringue Ghosts! Happy baking!
Make Ahead and Storage
These Meringue Ghosts are not only adorable but also perfect for meal prep! You can whip them up ahead of time for parties or as a fun treat to enjoy throughout the week.
Storing Leftovers
- Store the meringues in an airtight container at room temperature.
- Ensure the container is completely dry to maintain their crispy texture.
- They will keep well for up to 2 weeks.
Freezing
- While it’s best to enjoy these meringues fresh, you can freeze them if needed.
- Place the meringues in a single layer in a freezer-safe container or bag.
- To prevent sticking, separate layers with parchment paper. They will last up to 3 months in the freezer.
Reheating
- Meringues do not require reheating; they are best enjoyed as-is!
- If they have absorbed moisture, you can place them back in a low oven (around 200°F/90°C) for about 10-15 minutes to crisp them up again.
FAQs
If you have any questions about making Meringue Ghosts, you’re in the right place!
Can I make Meringue Ghosts without egg whites?
Unfortunately, egg whites are essential for creating the structure and fluffiness of meringues. However, you can try aquafaba (the liquid from canned chickpeas) as an egg white substitute, though the texture may vary slightly.
How do I know when my Meringue Ghosts are done baking?
Your Meringue Ghosts should be dry and crisp to the touch after baking for about 1 hour. They will also feel lightweight and should easily lift off the parchment paper without sticking.
What if my meringue is too runny?
If your meringue mixture is too runny, it’s likely that it hasn’t been beaten long enough or there was some grease in your bowl. Keep whipping until stiff peaks form—this may take a few more minutes.
How can I decorate my Meringue Ghosts differently?
Feel free to get creative! Use colored icing or different types of candy for faces. You could even try adding edible glitter for an extra spooky touch!
Final Thoughts
I hope you enjoy making these delightful Meringue Ghosts as much as I do! They’re perfect for Halloween gatherings or just as a sweet treat whenever you’re feeling festive. Remember, there’s no right or wrong way to create your ghostly friends—let your imagination run wild! Happy baking, and I can’t wait to hear how your meringues turn out!
Meringue Ghosts
Looking for a delightful and whimsical treat to charm your guests this Halloween? These Meringue Ghosts are the perfect solution! Light, airy, and utterly adorable, they make a fun family activity as everyone can pipe their own ghostly shapes and decorate them with candy eyes. This simple recipe uses just a few basic ingredients, making it accessible for bakers of all skill levels. With their cute presentation, these Meringue Ghosts will be the highlight of any dessert table or festive gathering. Plus, they’re easy to prepare ahead of time, ensuring you’re ready for any occasion!
- Prep Time: 15 minutes
- Cook Time: 60 minutes
- Total Time: 1 hour 15 minutes
- Yield: Approximately 12 ghosts 1x
- Category: Dessert
- Method: Baking
- Cuisine: American
Ingredients
- 2 large egg whites
- 1/4 teaspoon cream of tartar
- ½ cup granulated sugar
- ½ teaspoon pure vanilla extract
- Candy eyeballs or mini chocolate chips
Instructions
- Preheat your oven to 275°F (135°C) and line baking sheets with parchment paper.
- In a mixing bowl, whip egg whites on medium-low until frothy.
- Add cream of tartar and mix until incorporated.
- Gradually add sugar one tablespoon at a time while beating until stiff peaks form and meringue is glossy.
- Gently fold in vanilla extract.
- Transfer meringue to a piping bag and pipe ghost shapes onto the baking sheets.
- Decorate with candy eyes and mini chocolate chips.
- Bake for 1 hour until dry and crisp; then cool in the oven for 1-2 hours.
Nutrition
- Serving Size: 1 ghost
- Calories: 33
- Sugar: 7g
- Sodium: 0mg
- Fat: 0g
- Saturated Fat: 0g
- Unsaturated Fat: 0g
- Trans Fat: 0g
- Carbohydrates: 8g
- Fiber: 0g
- Protein: 1g
- Cholesterol: 0mg