How to Make Pretzel Shamrocks
The aroma of freshly made treats wafting through the air, the laughter of friends gathered around, and the delightful sight of vibrant green snacks is what makes cooking such a joyous experience. Today, I’m thrilled to share with you an enchanting recipe that embodies the spirit of togetherness and celebration: How to Make Pretzel Shamrocks. These delightful little snacks are more than just a treat; they’re a whimsical reminder that food can bring us closer, spark joy, and even connect us to our heritage. The slightly salty crunch of the pretzels paired with the sweetness of candy melts creates an irresistible contrast that’s simply mouthwatering. Trust me when I say, once you try these charming shamrocks, you’ll find them popping up in your kitchen for every festive occasion!
The beauty of these Pretzel Shamrocks lies not only in their adorable appearance but also in their accessibility. With just a handful of ingredients and minimal prep time, you can create something truly unique and delicious that will impress your family and friends. Whether you’re celebrating St. Patrick’s Day or just looking for a fun snack idea, these pretzel pops are sure to steal the show. They’re easy enough for kids to help with—making them perfect for family bonding time in the kitchen—and they offer endless opportunities for creativity in decorating. Imagine how proud you’ll feel as you present these lovely little shamrocks, each one lovingly crafted by your own hands.
Ingredients:
As we embark on this culinary adventure together, let’s take a moment to appreciate each ingredient that plays a vital role in crafting our Pretzel Shamrocks. Each component adds its own special touch, creating a symphony of flavors and textures that come together beautifully.
- 18 Pretzel twists. These pretzels serve as the sturdy foundation for our shamrock design while providing that beloved salty crunch that perfectly balances out the sweetness of the candy melts. When selecting pretzel twists, look for those with a pleasing golden-brown color and a satisfying crunch; they should be firm enough to hold their shape during dipping but still tender enough to bite into easily. If you’re feeling adventurous, consider trying whole-grain or gluten-free options to suit different dietary preferences without sacrificing flavor.
- 1/2 cup Green candy melts. The candy melts are absolutely crucial for transforming our pretzels into delightful shamrocks adorned in vibrant green! Not only do they add sweetness and color but they also create a smooth coating that holds everything together. When choosing your candy melts, opt for high-quality brands—this will make all the difference when it comes to taste and melting consistency. If green isn’t your jam (or if you’re crafting these for another holiday), feel free to switch it up with any color you fancy! Just remember: patience is key when melting—slowly is best to avoid any clumping.
- Green sprinkles. These sprinkles are like little bursts of joy that add texture and sparkle to our pretzel shamrocks! They not only enhance the visual appeal but also provide an extra layer of sweetness that complements the chocolate coating beautifully. When selecting sprinkles, think about varying shapes or sizes for added fun—perhaps some star-shaped ones if you’re feeling whimsical! And here’s my little secret: sprinkle them immediately after drizzling on the candy melts; this ensures they stick perfectly before everything hardens.
Equipment You’ll Need:
Having the right tools at your disposal makes all the difference in creating something wonderful in the kitchen! While these items may not be ingredients themselves, they are essential partners in our culinary journey toward making perfect Pretzel Shamrocks.
- Baking tray – A sturdy baking tray will serve as your canvas where all the magic happens! It’s important for holding your pretzel shapes steady while they cool and allows easy transfer in and out of the fridge without any mess—a non-negotiable when working with melted chocolate! If you don’t have parchment paper handy, lightly greasing your tray will work too; just ensure everything is well spaced out so each shamrock can shine on its own.
- Parchment paper – This nifty tool is key for keeping things clean and ensuring our finished product doesn’t stick to anything undesirable! By lining your baking tray with parchment paper, you create a non-stick surface that allows easy removal of your pretzel pops once set—think of it as a protective shield helping us keep our creations intact.
- Microwave-safe bowl – A microwave-safe bowl is essential for melting those candy melts smoothly without any fuss! Choose one that’s big enough to provide adequate space so your melts can melt evenly without overflowing—a crucial detail that ensures we don’t waste any precious goodness!
- Fork – A simple fork becomes one of our best friends while dipping those pretzels! It helps us achieve an even coat on each piece while allowing us to flip them gracefully through the melted candy melt bath without burning ourselves—trust me; this step makes all the difference!
Now that we’ve gathered our ingredients and equipment together, let’s dive into making these adorable Pretzel Shamrocks!
Step 1: Crafting Your Shamrock Shape
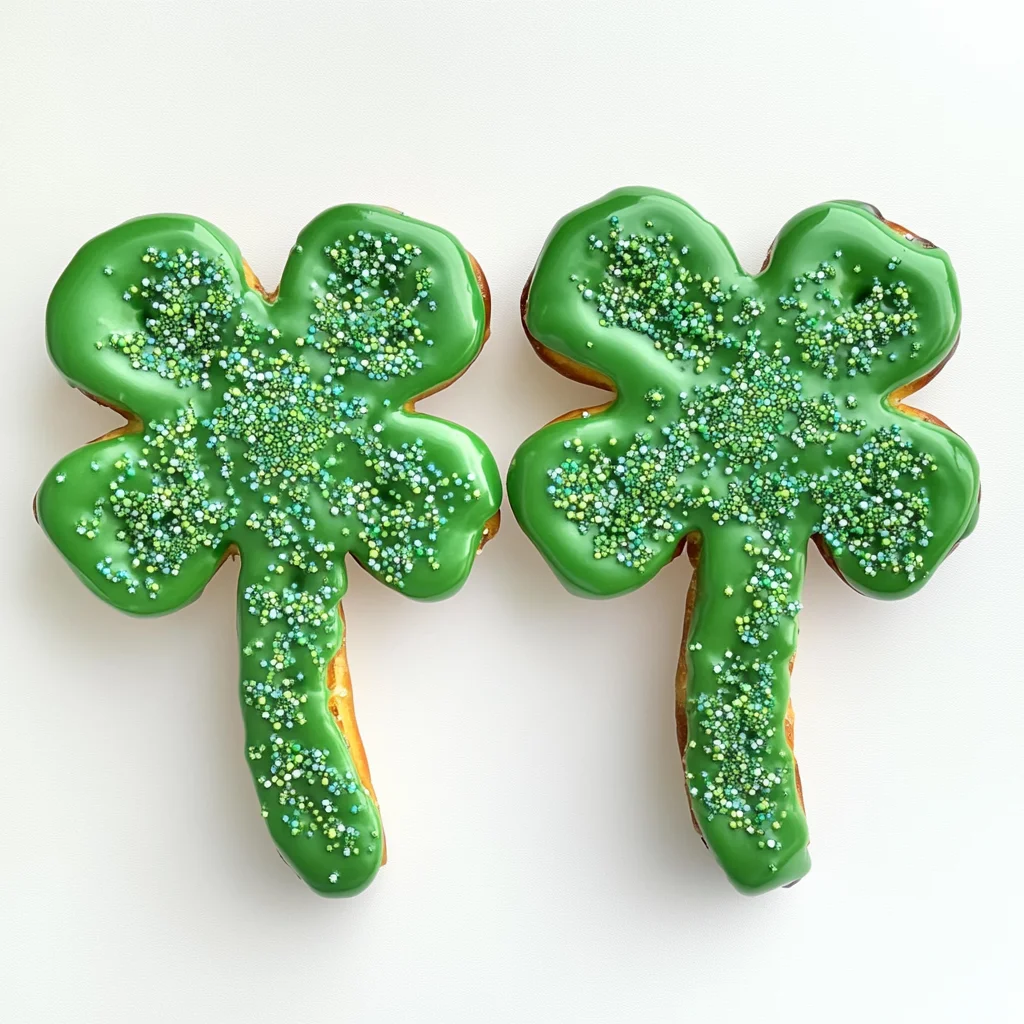
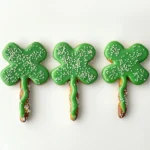
First things first—the design! Line a baking tray with parchment paper because we want everything ready before we dive into dipping those pretzels into sweet goodness! Take three pretzel twists per shamrock; place one upright at the top as the leaf’s center while positioning two others sideways so their bottoms touch—that’s right; we’re creating something magical here! Repeat this process until you have six adorable shamrock shapes lined up on your tray, eagerly waiting for their transformation into edible masterpieces.
Step 2: Prepping Your Lollipop Stick
This next step adds an extra element of fun—it’s time to insert lollipop sticks between those bottom two pretzels making up each shamrock’s leaves! Gently slide one stick between them until it feels secure but doesn’t poke through entirely—this gives us stability later when we’re enjoying our treats on-the-go or at gatherings. Once you’ve adjusted everything so it looks fabulous on your tray (even spacing is key here!), we’re ready to move onto melting those colorful candy wafers!
Step 3: Melting Those Candy Melts
Now comes one of my favorite parts—the melting process! Following package directions precisely adds integrity here; microwave those green candy melts in short bursts at medium power (around 45 seconds) then stir vigorously before returning them back again until smooth—watching those wafers transform from solid little discs into luscious liquid gold is utterly intoxicating! Be mindful not to overheat them either; if they start clumping instead of melting smoothly? You might find yourself facing some frustrating lumps later down the line!
Step 4: Dipping Our Pretzels
With melted candy goodness at hand, it’s time to dip each pretzel shamrock piece by piece into this heavenly concoction! Using your trusty fork (our unsung hero), gently lower one piece into those warm depths while giving it several flips around—the goal here? Coating every inch evenly so no part remains bare—it’s essential because we want maximum sweetness throughout every bite! Once coated thoroughly yet not dripping excessively (you can shake off any excess by moving it back-and-forth), carefully return each piece back onto its waiting spot on parchment paper.
Stay tuned as we continue this delectable journey through steps five through twelve where we’ll finish assembling these charming creations into something truly extraordinary! This culinary adventure is just beginning…
How to Make Pretzel Shamrocks: A Festive Treat for St. Patrick’s Day
Ah, the joy of celebrating St. Patrick’s Day with delightful treats that not only taste good but also bring smiles to faces! If you’re like me, you often find that a holiday just isn’t complete without a touch of creativity in the kitchen. That’s why I’m so excited to share with you how to make pretzel shamrocks—a sweetly salty snack that is not only adorable but also incredibly simple to whip up. Trust me, once you get the hang of these charming little pops, they’ll become a cherished tradition in your home, and a perfect way to involve kids in the kitchen as they help assemble these festive delights!
Step 5: Dipping into Deliciousness
Now comes one of the most exhilarating parts: melting those vibrant green candy melts! This step is where we transform ordinary pretzels into utterly intoxicating treats. Start by following the package instructions for melting your candy melts—usually, this involves microwaving them on medium power in 45-second intervals. Make sure to stir well between each interval; this stirring is absolutely paramount as it helps distribute the heat evenly and prevents any clumping. You want the melts to reach a velvety smooth consistency that flows beautifully when dipped.
Once your candy melts are perfectly melted and glossy, it’s time for dipping! Take one pretzel at a time and gently dip it into the warm green coating. I love using a fork here—it’s such a handy tool that allows you to fully submerge the pretzel while keeping your fingers clean (because who wants sticky fingers?). After dipping, give it a few gentle shakes using your fork to remove excess coating; this helps prevent drips while keeping that lovely sheen intact. Remember, this is all about creating an even coat; if you skip this step, you might end up with uneven patches which could affect both the look and taste of your shamrocks.
Step 6: The Art of Assembly
After dipping your first pretzel, carefully place it back on the parchment-lined tray where it belongs. Now, repeat this process with the remaining two pretzels that form your shamrock shape—this will create an enchanting trio of green goodness! As you’re working through each batch, take a moment to admire how they begin to come together; it’s truly magical watching these simple ingredients turn into something festive and fun.
This assembly stage is also where we need to be precise in our timing because once dipped, you’ll want to work quickly but thoughtfully. The candy melt coating starts to set as it cools down; if you wait too long or let it harden completely before adding sprinkles, they won’t stick well at all! So, I encourage you not to rush this step—take your time and enjoy every second of creating these beauties. Each shamrock pretzel should glisten like little treasures waiting for their final touches.
Step 7: Connecting the Pops
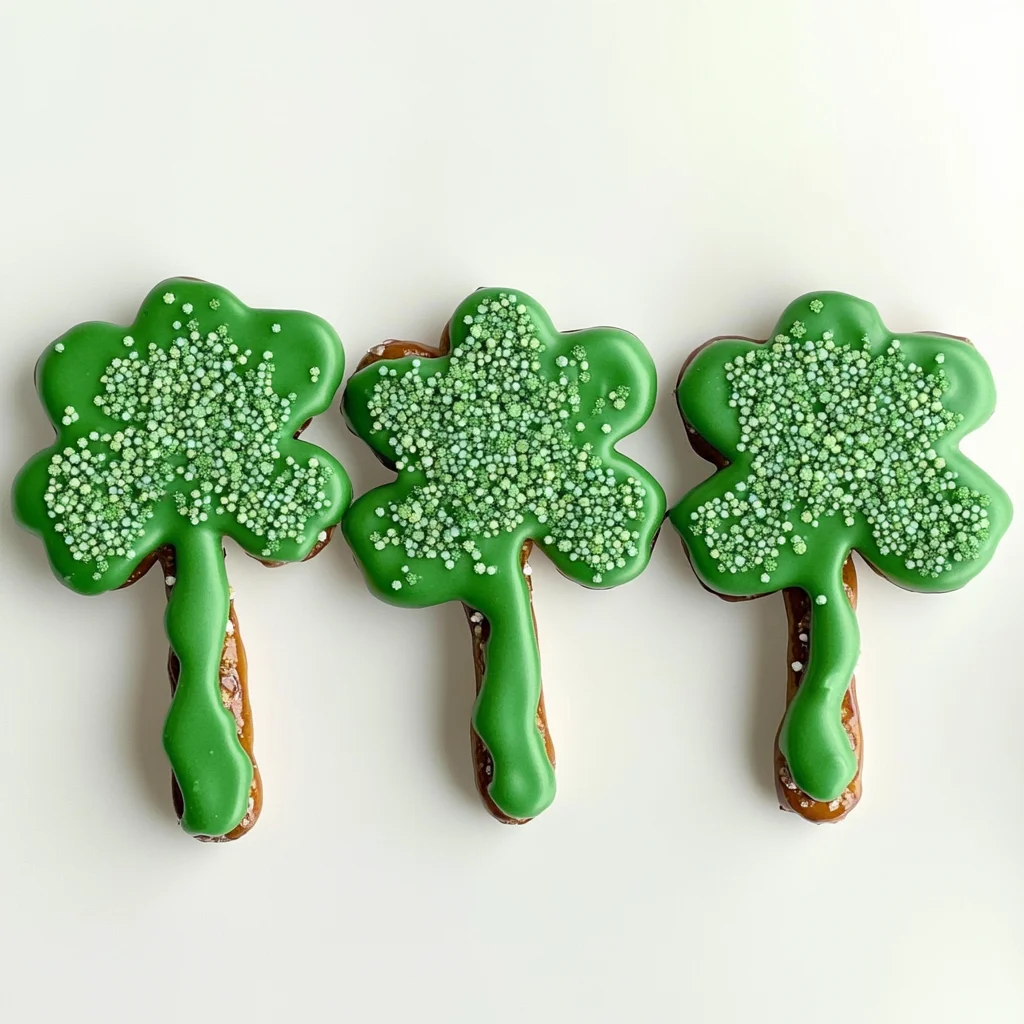
Next up is an essential part of creating our delicious pops: connecting those pretzels with lollipop sticks! Once you’ve dipped all three pretzels for each shamrock shape, slide a lollipop stick gently between the bottom two pretzels until it feels secure yet comfortable—think of it as giving your treat its very own sturdy stem! Adjust each shamrock on the tray so they’re spaced evenly apart; this not only looks lovely but also ensures that when they’re ready for serving or gifting, they won’t be crowded together.
Why do we use lollipop sticks? They provide structure and make them easier to hold while indulging in these delightful creations without fear of them crumbling apart. Plus, when kids are involved (and let me tell you—they will want to help), having a stick makes them feel like they’re holding something special. It’s all about enhancing the experience; who doesn’t love feeling like they’re eating something magical?
Step 8: The Sweet Drizzle
Now let’s talk about adding those finishing touches—this is where things get really exciting! After securing those lollipop sticks into place, grab your melted candy melts again and prepare for some artistic dripping action! With your fork or a piping bag (if you’re feeling fancy), drizzle some of that luscious green coating over the space between the three pretzels and around where the stick connects with them. This step might seem simple at first glance but trust me—it serves several important purposes.
Not only does this drizzle add an appealing visual element by tying everything together beautifully, but it also helps create an extra layer of stability for our precious shamrock pops. When done right, it’s like creating edible glue that holds everything snugly in place while adding more flavor and sweetness. Don’t hold back here; let those drizzles flow generously because who wouldn’t want more deliciousness? And remember—the key here is immediacy; sprinkle green sprinkles over those drizzles right away before they set!
And there you have it—a whimsical treat that’s not just fun but incredibly rewarding as well! Making pretzel shamrocks can become an annual family tradition filled with laughter and creativity every St. Patrick’s Day. I promise you these sweet snacks will bring joy not just from their taste but also from sharing them with loved ones around you. Enjoy every bite knowing you’ve created something special right from your heart—and isn’t that what cooking is all about? Happy snacking!
Storage and Enjoyment Tips for Your How to Make Pretzel Shamrocks
Now that you’ve created these delightful pretzel shamrocks, it’s time to savor the magic! There’s something truly joyous about sharing homemade treats with friends and family, and I can’t wait for you to experience their crunchy exterior and sweet, colorful finish. Whether you’re celebrating St. Patrick’s Day or simply wanting a fun snack, these shamrocks are sure to bring smiles all around. But what happens if you have some leftovers? Don’t worry; I’ve got you covered!
Storing Leftover How to Make Pretzel Shamrocks
To keep your pretzel shamrocks fresh and delicious, store them in an airtight container at room temperature. This method will help maintain their crunchiness and flavorful coating. Ideally, they should stay good for about 3-4 days, but trust me when I say they might not last that long—everyone is bound to dive into them with glee! To ensure they remain crispy, you can tuck a slice of bread into the container; it helps absorb any moisture that might compromise their delightful texture. Although they won’t be quite as perfect as when they’re freshly made, the flavor remains utterly charming even after storage. When you’re ready to enjoy them again, just let them sit out for a few moments to regain their signature snap before indulging.
Freezing Pretzel Shamrocks for Later
If you’re thinking ahead or want to prepare these festive treats in advance, freezing your pretzel shamrocks is an excellent option! Simply place the cooled pops in a single layer on a baking sheet until fully frozen before transferring them into a freezer-safe bag or container. They can be stored like this for up to two months without losing their charm. When you’re ready to enjoy them again, there’s no need to thaw; just pop one out and enjoy it straight away! The convenience of having these playful snacks on hand for unexpected guests or spontaneous celebrations makes freezing an incredibly smart move. Just imagine being able to whip out a festive treat anytime you desire—now that’s something worth celebrating!
How to Make Pretzel Shamrocks
Experience the joy of creating festive treats with this delightful recipe for Pretzel Shamrocks. Perfect for celebrations, these sweet and salty snacks combine the crunch of pretzels with the smooth sweetness of green candy melts. Not only are they a hit with friends and family, but they are also easy to make and fun for kids to help craft! Ideal for St. Patrick’s Day or any festive gathering, these whimsical pretzel pops will surely bring smiles all around. Let’s dive into this simple yet enchanting culinary adventure!
- Prep Time: 15 minutes
- Cook Time: 10 minutes
- Total Time: 25 minutes
- Yield: Makes approximately 6 shamrock pops 1x
- Category: Dessert
- Method: Baking
- Cuisine: American
Ingredients
- 18 Pretzel twists
- 1/2 cup Green candy melts
- Green sprinkles
- Lollipop sticks
Instructions
- Line a baking tray with parchment paper.
- Create shamrock shapes using three pretzel twists per shamrock—two positioned sideways as leaves and one upright in the center.
- Insert lollipop sticks between the bottom two pretzels of each shamrock.
- Melt green candy melts in a microwave-safe bowl at medium power, stirring every 45 seconds until smooth.
- Dip each pretzel piece into the melted candy using a fork, ensuring even coating, then place back on parchment paper.
- Drizzle extra melted candy over the connections and immediately sprinkle green sprinkles on top.
- Allow to set in the fridge for about 15 minutes before serving.
Nutrition
- Serving Size: 1 shamrock pop (30g)
- Calories: 140
- Sugar: 12g
- Sodium: 130mg
- Fat: 6g
- Saturated Fat: 3g
- Unsaturated Fat: 2g
- Trans Fat: 0g
- Carbohydrates: 20g
- Fiber: 0g
- Protein: 1g
- Cholesterol: 0mg