Ghost OREO Ball Truffles
If you’re looking for a fun and festive treat to brighten up your Halloween, you’ve come to the right place! These Ghost OREO Ball Truffles are not only adorable but also incredibly easy to make. With just four simple ingredients, you can whip up a batch that will charm both kids and adults alike. They’re perfect for busy weeknights or family gatherings when you want something sweet without spending hours in the kitchen.
What makes this recipe special is its delightful combination of flavors and textures. The creamy filling paired with the crisp Oreo cookie creates a deliciously rich treat that’s hard to resist. Plus, they make an impressive dessert for any Halloween-themed get-together!
Why You’ll Love This Recipe
- Super Easy to Make: With just four ingredients and simple steps, these truffles are beginner-friendly and quick to prepare.
- Family-Friendly Fun: Kids will love helping shape the ghosts and decorating them, making this a perfect activity for family bonding.
- Make Ahead Convenience: You can prepare these truffles ahead of time, allowing for stress-free entertaining on the big night.
- Adorable Presentation: Their cute ghostly appearance makes them a standout treat that will delight your guests.
- Deliciously Irresistible: The combination of cream cheese and Oreo cookies creates a rich flavor that everyone will enjoy!
Ingredients You’ll Need
Here’s what you’ll need to create these delightful Ghost OREO Ball Truffles. Don’t worry; these are all simple, wholesome ingredients you likely have on hand or can easily find at your local grocery store.
- 36 Oreo Cookies
- 8 oz cream cheese (softened)
- 2 cups white chocolate melting wafers
- 1/2 cup black melting wafers or icing
Variations
This recipe is wonderfully flexible! Feel free to get creative and try out different ideas to make it your own.
- Change Up the Coating: Instead of white chocolate, try using dark chocolate or colorful candy melts for a fun twist.
- Add Flavoring: Mix in some vanilla extract or peppermint extract into the cream cheese mixture for an extra flavor boost.
- Make Them Mini: Roll smaller balls instead of ghosts for bite-sized treats that are perfect for snacking.
- Use Different Fillings: Swap out the cream cheese with flavored cream cheese spreads like strawberry or pumpkin spice for seasonal flair.
How to Make Ghost OREO Ball Truffles
Step 1: Crush the Oreos
Start by crushing the Oreo cookies into fine crumbs. You can do this in a food processor for speed, or place them in a plastic bag and crush them with a rolling pin if you want a bit of exercise! This step is important because it creates the base of our truffle mixture.
Step 2: Combine Ingredients
In a mixing bowl, combine the softened cream cheese with the crushed Oreo cookies. Mix until it reaches a smooth, dark truffle-like texture. This creamy mixture is what makes our ghosts so delicious!
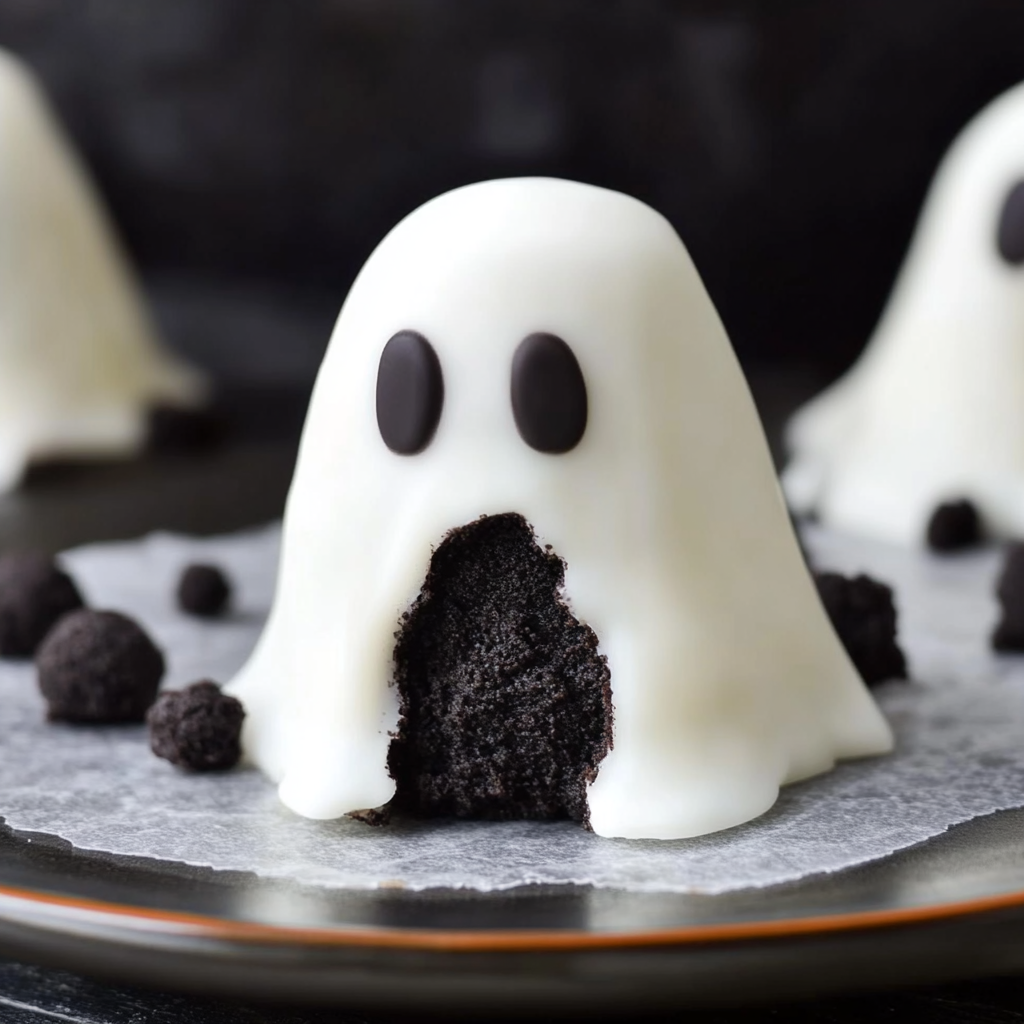
Step 3: Shape Your Ghosts
Take about 1-2 tablespoons of the mixture and firmly press it into ghost-shaped molds if you have them. If not, rolling them into balls works just as well! Refrigerate until firm, or pop them in the freezer for about 20 minutes if you’re short on time.
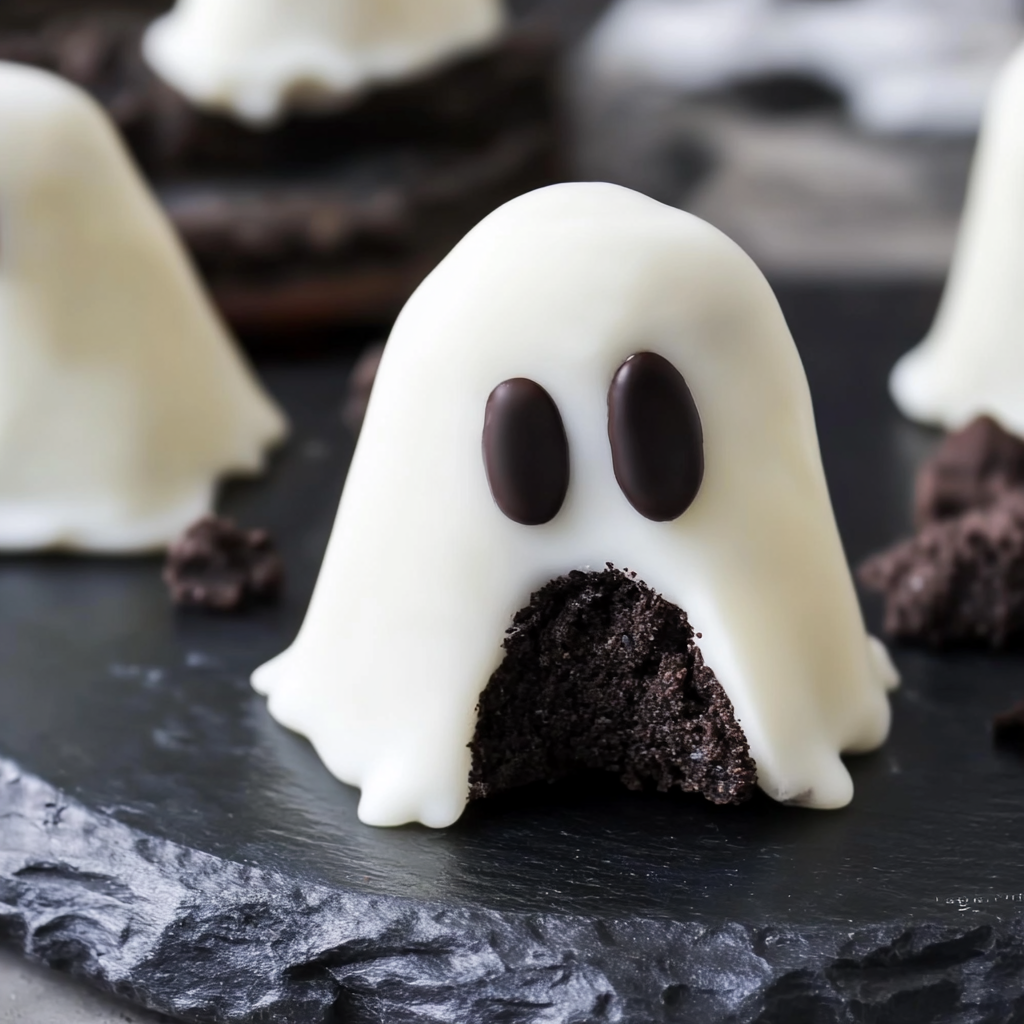
Step 4: Dip in Chocolate
Melt your white chocolate melting wafers according to package instructions. Once melted, gently remove your ghost shapes from the mold (or keep it simple if you rolled balls) and dip them in the melted chocolate. Place them on a parchment-covered baking sheet to cool. This step adds that lovely ghostly coating!
Step 5: Decorate Your Ghosts
Using either black icing or melted black wafers in a piping bag, add little eyes and mouths onto your chocolate-covered ghosts. This is where they really start to come alive – spooky but cute!
Step 6: Chill Before Serving
Finally, keep your Ghost OREO Ball Truffles refrigerated until you’re ready to serve them. They’ll stay fresh and delicious while looking absolutely adorable at your Halloween party!
Now you’re all set to impress friends and family with these charming treats! Enjoy making memories as you create these delightful Ghost OREO Ball Truffles together!
Pro Tips for Making Ghost OREO Ball Truffles
Making these delightful Ghost OREO Ball Truffles is a fun experience, and a few simple tips can take your treats to the next level!
- Use softened cream cheese: This ensures that your mixture blends smoothly with the Oreo crumbs, creating a creamy texture that is easy to mold.
- Chill before dipping: Refrigerating the formed truffles before dipping them in chocolate helps them hold their shape better during the coating process.
- Melt chocolate properly: Always follow package instructions for melting your chocolate wafers. This will prevent scorching and ensure a smooth coating that looks beautiful on your ghost truffles.
- Experiment with designs: Don’t feel limited by traditional ghost shapes! Try creating other spooky figures or holiday-themed designs to impress your guests.
- Store properly: Keep your Ghost OREO Ball Truffles refrigerated until serving to maintain their firmness and freshness, ensuring they taste as good as they look!
How to Serve Ghost OREO Ball Truffles
These Ghost OREO Ball Truffles are not only adorable but also versatile for various occasions. Here are some creative ideas for presenting them at your next gathering.
Garnishes
- Edible glitter: A sprinkle of edible glitter adds a magical touch, making your truffles shimmer like stars on Halloween night.
- Chocolate shavings: Sprinkle some finely shaved chocolate over the top for an extra layer of flavor and sophistication.
Side Dishes
- Pumpkin spice cupcakes: These moist cupcakes bring the warm flavors of fall to your dessert table, complementing the sweetness of the truffles beautifully.
- Candy corn mix: A colorful mix of candy corn and nuts provides a crunchy contrast to the creamy truffles while keeping with the Halloween theme.
- Fruit platter: Fresh fruits such as apples and grapes offer a refreshing balance to the richness of the truffles, providing a light and healthy option alongside the sweets.
With these serving ideas, your Ghost OREO Ball Truffles will be both delicious and visually appealing, ready to steal the show at any Halloween celebration!
Make Ahead and Storage
These Ghost OREO Ball Truffles are perfect for meal prep, making them a fantastic treat to whip up in advance. You can easily store them for later enjoyment or even prepare them ahead of time for a special occasion!
Storing Leftovers
- Keep the truffles in an airtight container in the refrigerator.
- They should last for about 5-7 days.
- If you notice any condensation on the container, wipe it down to prevent sogginess.
Freezing
- Place the truffles in a single layer on a baking sheet and freeze until solid.
- Once frozen, transfer them to a freezer-safe bag or container.
- They can be stored in the freezer for up to 2 months. Just thaw in the fridge before serving!
Reheating
- These truffles are best enjoyed cold or at room temperature.
- If you prefer them slightly softened, let them sit out for about 10-15 minutes before indulging.
FAQs
Here are some common questions you might have about making Ghost OREO Ball Truffles.
Can I use regular chocolate instead of white chocolate?
Yes! While white chocolate gives these truffles their ghostly appearance, you can definitely use milk or dark chocolate melting wafers if you prefer. Just remember that it will change the look of your Ghost OREO Ball Truffles!
How long do Ghost OREO Ball Truffles last?
When stored properly in an airtight container in the refrigerator, your Ghost OREO Ball Truffles will stay fresh for about 5-7 days. Perfect for enjoying throughout the week!
Can I customize the decorations on my Ghost OREO Ball Truffles?
Absolutely! Feel free to get creative with your decorations. You can use colored icing or different shapes to give each ghost its own personality. The sky’s the limit!
Are there any alternatives to cream cheese if I want a vegan version?
Yes! You can substitute cream cheese with vegan cream cheese or even use cashew cream as a dairy-free option. This way, everyone can enjoy your delicious Ghost OREO Ball Truffles!
Final Thoughts
I hope you enjoy making these delightful Ghost OREO Ball Truffles as much as I do! They’re not just fun to eat; they’re also a wonderful way to celebrate Halloween or any festive occasion with family and friends. Remember, they’re easy to prepare and absolutely delicious—perfect for sharing (or keeping all to yourself!). Happy baking, and may your kitchen be filled with sweet spooky vibes!
Ghost OREO Ball Truffles
Delight in these easy-to-make Ghost OREO Ball Truffles! Perfect for Halloween gatherings—try this fun recipe today!
- Prep Time: 20 minutes
- Cook Time: 10 minutes
- Total Time: 30 minutes
- Yield: Approximately 12 servings 1x
- Category: Dessert
- Method: No-bake
- Cuisine: American
Ingredients
- 36 Oreo Cookies
- 8 oz cream cheese (softened)
- 2 cups white chocolate melting wafers
- 1/2 cup black melting wafers or icing
Instructions
- Crush the Oreo cookies into fine crumbs using a food processor or by placing them in a plastic bag and crushing with a rolling pin.
- In a mixing bowl, combine softened cream cheese with crushed Oreos until smooth.
- Shape about 1-2 tablespoons of the mixture into ghost shapes or balls; refrigerate until firm (or freeze for 20 minutes).
- Melt white chocolate wafers according to package instructions, dip each ghost shape in melted chocolate, and place on parchment paper to cool.
- Decorate with black icing or melted black wafers for eyes and mouths.
Nutrition
- Serving Size: 1 truffle (30g)
- Calories: 130
- Sugar: 10g
- Sodium: 45mg
- Fat: 7g
- Saturated Fat: 4g
- Unsaturated Fat: 3g
- Trans Fat: 0g
- Carbohydrates: 15g
- Fiber: 0g
- Protein: 1g
- Cholesterol: 15mg