Brie and Caramelized Onion Dip
If you’re looking for the perfect crowd-pleaser for your next gathering, let me introduce you to my beloved Brie and Caramelized Onion Dip! This dip is a true labor of love, transforming simple ingredients into a creamy, flavorful treat that everyone will rave about. Whether you’re hosting a cozy family night or a festive holiday party, this dip fits right in. Trust me, it disappears faster than you can say “delicious!”
What makes this recipe special is not just the rich flavor of melted brie combined with sweet caramelized onions, but also how easy it is to whip up. With just a handful of wholesome ingredients and a little patience, you’ll create a dip that feels extravagant but comes together simply. It’s perfect for busy weeknights or special occasions alike!
Why You’ll Love This Recipe
- Easy to Prepare: Just a few simple steps turn your kitchen into a savory haven of flavors.
- Family-Friendly: Kids and adults alike will enjoy dipping into this cheesy goodness!
- Make-Ahead Convenience: Prep it in advance and warm it up right before serving—easy peasy!
- Delicious Flavor: The combination of brie and caramelized onions creates an irresistible taste that keeps people coming back for more.
- Versatile Serving Options: Pair it with bread, chips, fruits, or veggies—whatever you have on hand!
Ingredients You’ll Need
Let’s gather our ingredients! This Brie and Caramelized Onion Dip uses simple, wholesome components that allow the flavors to shine without any fuss. Here’s what you’ll need:
- 1 yellow onion (sliced thinly)
- 2 Tablespoons olive oil
- 14 ounces french brie cheese (rind removed and cut into small chunks)
- 1/4 cup white grape juice
- 3 Tablespoons fresh thyme (stems removed)
- Salt and pepper (to taste)
Variations
One of the best things about this recipe is its flexibility! Feel free to customize it based on what you have on hand or your personal preferences. Here are some fun ideas:
- Add Some Spice: Toss in a pinch of red pepper flakes for a hint of heat.
- Cheese Mix-Up: Try substituting half the brie with cream cheese for an extra creamy texture.
- Herb Infusion: Experiment with different herbs like rosemary or chives for a unique twist.
- Veggie Boost: Mix in some finely chopped spinach or artichokes for added flavor and nutrition.
How to Make Brie and Caramelized Onion Dip
Step 1: Caramelize the Onions
Heat the olive oil in an eight-inch cast iron skillet over medium heat. Add the sliced onions and reduce the heat to low. Allowing the onions to caramelize slowly is key; this process brings out their natural sweetness and creates that lovely golden-brown color. Stir occasionally every five to ten minutes until they are deep golden brown—this takes about 45 minutes.
Step 2: Deglaze the Pan
Once your onions are perfectly caramelized (around 30 minutes in), it’s time to deglaze the pan with white grape juice. This step helps lift all those delicious browned bits stuck to the skillet, adding even more flavor to your dip. Just scrape them up gently as you stir everything together.
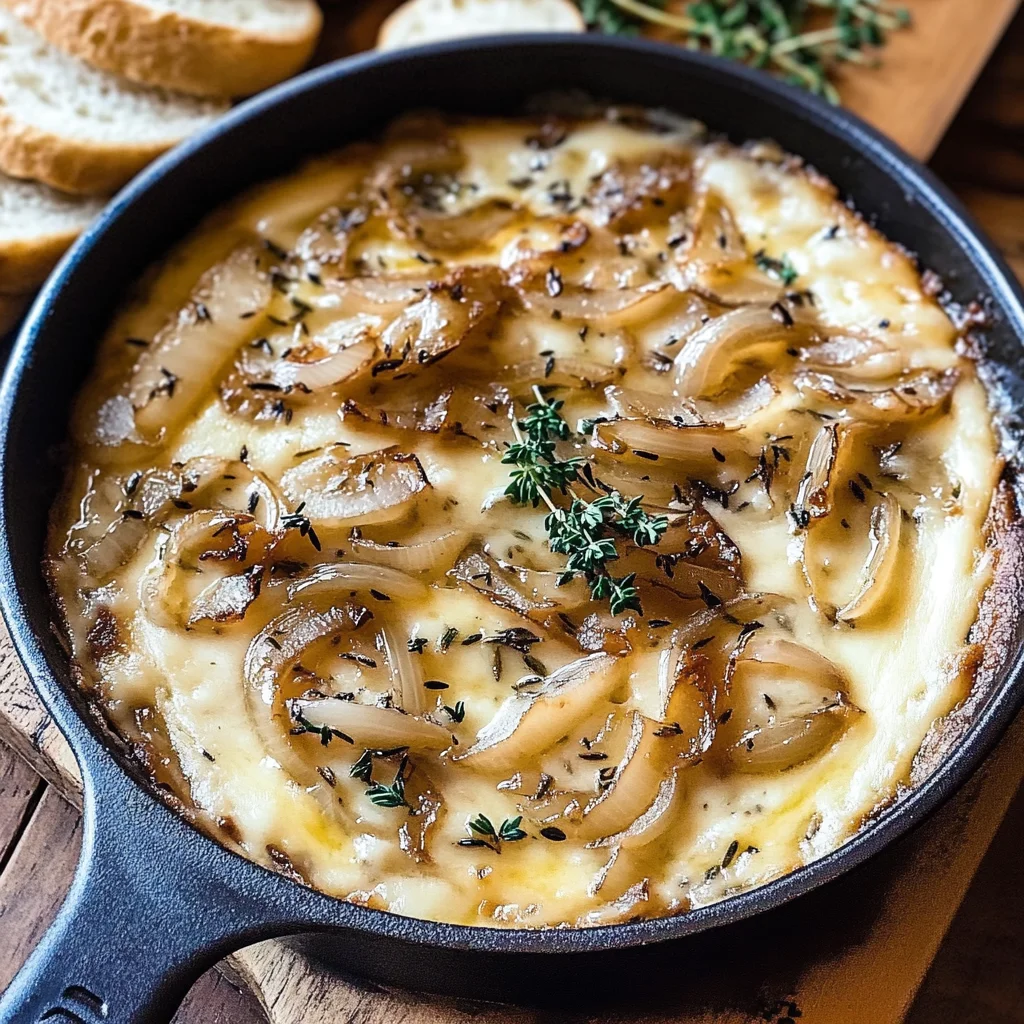
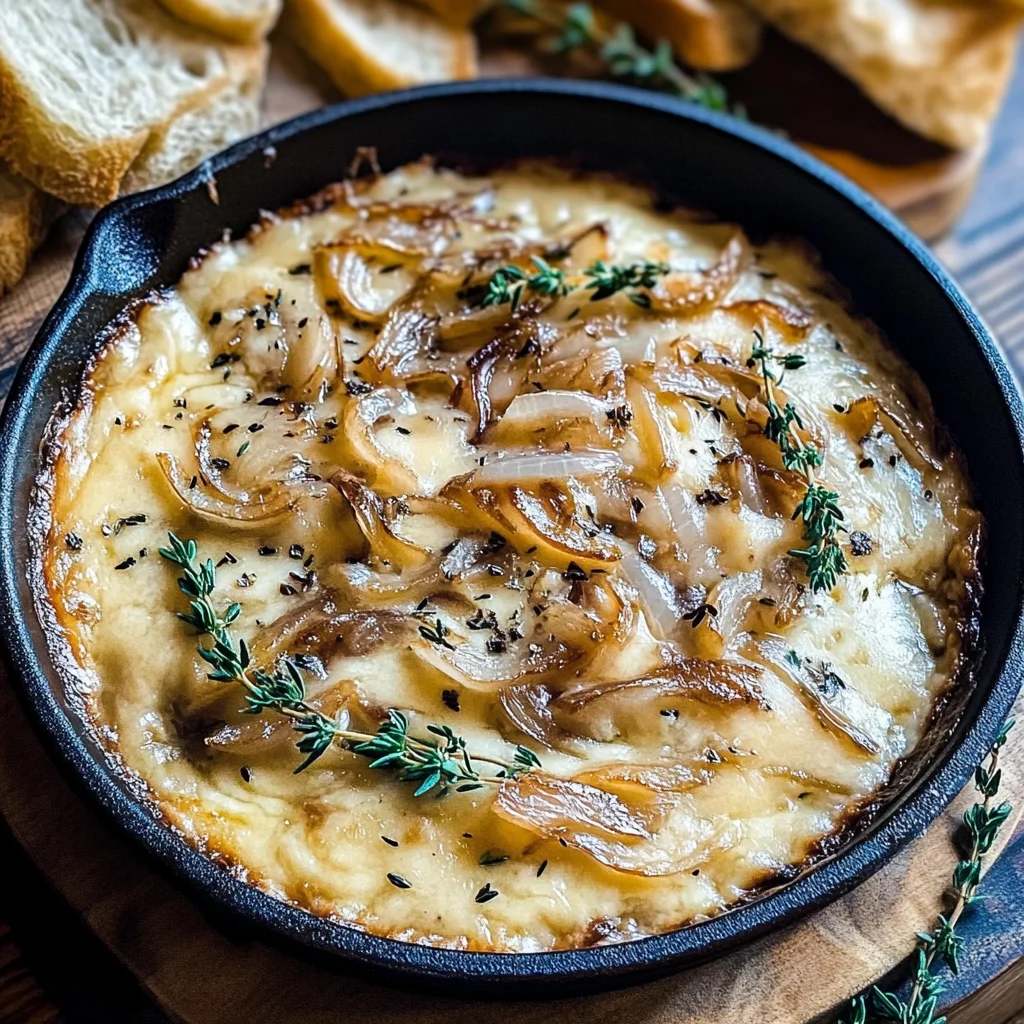
Step 3: Melt in the Brie
Turn off the heat and add in your chunks of brie cheese. Stir well until it’s melted and beautifully blended with those sweet onions. Don’t forget to season with salt and pepper! Finally, sprinkle fresh thyme on top before serving. This delicious mixture is best enjoyed warm alongside your favorite breads, chips, fruits, or veggies!
Now you’re ready to impress everyone at your next gathering with this delightful Brie and Caramelized Onion Dip! Enjoy every cheesy bite!
Pro Tips for Making Brie and Caramelized Onion Dip
Creating the perfect Brie and Caramelized Onion Dip is all about attention to detail. Here are some pro tips to ensure your dip turns out absolutely delicious!
- Choose the Right Onion: Opting for yellow onions is ideal since they caramelize beautifully, adding that sweet flavor we love in dips.
- Patience is Key: Allow the onions to cook slowly over low heat. Rushing this step can lead to burnt bits rather than the rich, golden sweetness we’re aiming for.
- Deglaze Thoroughly: When adding white grape juice, make sure to scrape up all those flavorful bits stuck to the pan. This adds depth and complexity to your dip.
- Serve Hot: This dip is best enjoyed warm right after making it. If it cools down, consider reheating it gently in the oven or microwave before serving to maintain its creamy texture.
- Experiment with Herbs: While thyme is a great choice, feel free to try other herbs like rosemary or chives for a different flavor profile!
How to Serve Brie and Caramelized Onion Dip
Presenting your Brie and Caramelized Onion Dip in an appealing way can elevate your appetizer spread. Here are a few creative ideas!
Garnishes
- Fresh Thyme Sprigs: A few sprigs of fresh thyme not only enhance the visual appeal but also add a fragrant touch that complements the dip perfectly.
- Chili Flakes: For those who enjoy a little kick, sprinkle some chili flakes on top before serving for added color and heat.
Side Dishes
- Crusty Baguette: Slices of warm, crusty baguette serve as the perfect vessel for scooping up the creamy dip while adding a satisfying crunch.
- Vegetable Platter: Fresh veggies such as carrots, cucumbers, and bell peppers provide a refreshing contrast to the richness of the dip and add vibrant color to your table.
- Pita Chips: These crunchy chips are not only delicious but also provide a delightful crunch that pairs wonderfully with the creamy texture of the dip.
- Apple Slices: Sweet apple slices offer an unexpected yet delightful pairing with the savory dip, balancing flavors beautifully!
With these serving suggestions and tips, your Brie and Caramelized Onion Dip will surely be a hit at your next gathering! Enjoy every cheesy bite!
Make Ahead and Storage
This Brie and Caramelized Onion Dip is perfect for meal prep! You can make it ahead of time and store it, so you’re ready to impress your guests at a moment’s notice.
Storing Leftovers
- Allow the dip to cool completely before transferring it to an airtight container.
- Store in the refrigerator for up to 3 days.
- When ready to enjoy, check for freshness before serving.
Freezing
- While this dip is best fresh, you can freeze it if needed.
- Place the cooled dip in a freezer-safe container, leaving some headspace for expansion.
- Freeze for up to 2 months.
Reheating
- Thaw in the refrigerator overnight before reheating.
- To reheat, place the dip in a skillet over low heat, stirring until warmed through. You can also use a microwave in short intervals until hot.
FAQs
Here are some common questions about making Brie and Caramelized Onion Dip.
Can I make Brie and Caramelized Onion Dip without thyme?
Absolutely! If you don’t have fresh thyme on hand or prefer not to use it, feel free to skip it or substitute with another herb like rosemary or oregano for a different flavor profile.
What should I serve with Brie and Caramelized Onion Dip?
This dip pairs beautifully with an assortment of items like sliced baguette, pita chips, fresh vegetables such as carrots and celery sticks, or even fruit slices like apples and pears for a sweet contrast.
How do I know when my onions are properly caramelized?
You’ll know your onions are perfectly caramelized when they turn a deep golden brown color and develop a rich, sweet flavor. This process typically takes about 45 minutes on low heat; patience is key!
Can I make this dip in advance?
Yes! You can prepare the Brie and Caramelized Onion Dip ahead of time. Just store it in an airtight container in the fridge and reheat before serving.
Final Thoughts
This Brie and Caramelized Onion Dip is truly a delightful addition to any gathering! Its rich flavors combined with creamy brie create an experience that’s both comforting and indulgent. I hope you find joy in making this recipe as much as I do. Gather your friends or family around, dig into this scrumptious dip, and create lasting memories together. Happy cooking!
Brie and Caramelized Onion Dip

If you’re searching for an irresistible appetizer that will wow your guests, look no further than this Brie and Caramelized Onion Dip. This creamy, savory dip blends the richness of melted brie with the sweet, deep flavors of caramelized onions, creating a gourmet experience that’s deceptively simple to make. Perfect for cozy family nights or festive gatherings, this dip can be paired with an array of dippers such as crusty bread, pita chips, or fresh veggies. With minimal ingredients and straightforward instructions, you’ll have a crowd-pleasing dish that disappears faster than you can say ‘delicious!’
- Prep Time: 10 minutes
- Cook Time: 45 minutes
- Total Time: 55 minutes
- Yield: Serves 8
- Category: Appetizer
- Method: Cooking
- Cuisine: French
Ingredients
- 1 yellow onion (sliced thinly)
- 2 tablespoons olive oil
- 14 ounces French brie cheese (rind removed and cut into small chunks)
- 1/4 cup white grape juice
- 3 tablespoons fresh thyme (stems removed)
- Salt and pepper (to taste)
Instructions
- Heat olive oil in an eight-inch cast iron skillet over medium heat. Add sliced onions and reduce heat to low.
- Cook slowly for about 45 minutes, stirring every five to ten minutes until onions are deep golden brown.
- Deglaze the pan with white grape juice after about 30 minutes, scraping up browned bits for added flavor.
- Turn off the heat and mix in brie cheese until fully melted and combined with the onions. Season with salt and pepper to taste.
- Serve warm garnished with fresh thyme alongside your choice of dippers.
Nutrition
- Serving Size: 1 serving
- Calories: 190
- Sugar: 2g
- Sodium: 210mg
- Fat: 15g
- Saturated Fat: 7g
- Unsaturated Fat: 7g
- Trans Fat: 0g
- Carbohydrates: 12g
- Fiber: 1g
- Protein: 6g
- Cholesterol: 30mg