Apricot and almond traybake
There’s something undeniably magical about creating a dish that transcends mere sustenance and transforms into an experience that envelops your senses and nourishes your soul. As I sit down to share this cherished recipe for Apricot and Almond Traybake, I can’t help but recall the first time I made it. The kitchen filled with a warm, buttery aroma as the batter came together, promising delightful bites ahead. Each ingredient plays its part in this symphony of flavors—rich butter meets sun-kissed apricots, while ground almonds add a nutty depth that dances gracefully alongside the sweetness of summer fruit. This traybake isn’t just food; it’s a delicious connection to sunny afternoons spent outdoors, laughter shared with friends, and the simple joy of baking something beautiful.
The beauty of this Apricot and Almond Traybake lies not only in its taste but also in its versatility. Perfect for any gathering or simply as an everyday dessert, it brings a little sunshine to your table no matter the season. Its moist sponge is lovingly embedded with juicy apricot halves that soften beautifully during baking, creating a delightful contrast between the tender cake and the luscious fruit. This recipe is an ode to simplicity—a bridge between childhood memories of family gatherings and modern-day comforts we all crave. So grab your mixing bowl, and let’s embark on this sweet journey together!
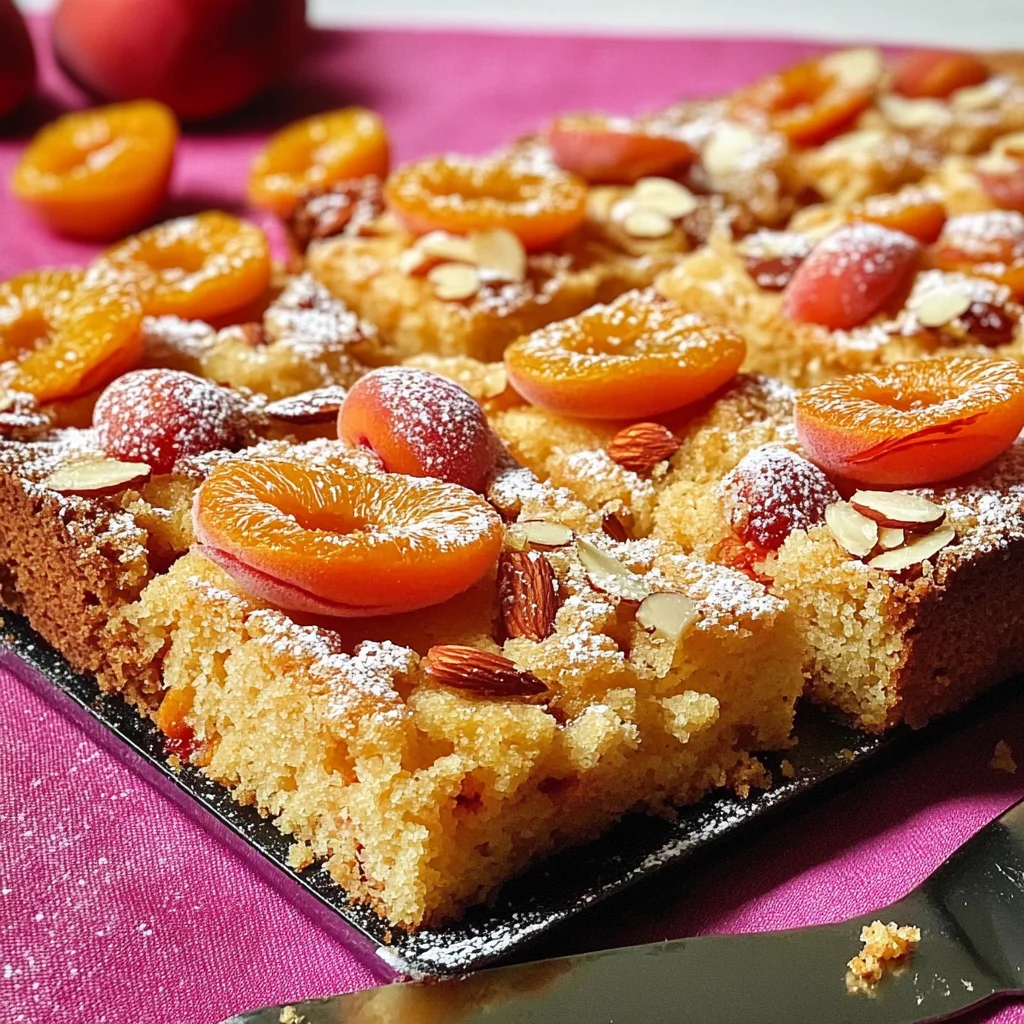
Apricot and Almond Traybake: A Slice of Summer Bliss
This Apricot and Almond Traybake is more than just a dessert; it’s a celebration of flavor, texture, and nostalgia wrapped in one easy-to-make treat. With just a handful of ingredients, you can create something truly extraordinary—each bite promising a taste of summer bliss that will surely leave you longing for more.
Ingredients:
As we dive into this baking adventure, let’s take a moment to understand what each ingredient brings to our delightful traybake. Each component is like a note in our flavor symphony, contributing to the overall harmony we’re aiming for.
- 220 g butter: Butter is the heart of this recipe, providing richness that elevates the cake’s texture from good to utterly divine. When properly creamed with sugar, it creates tiny air pockets that transform into lightness during baking—a crucial step for achieving that perfect sponge. Aim for high-quality unsalted butter; its fresh creaminess can make all the difference in flavor. If you prefer a dairy-free option, coconut oil could serve as an excellent substitute, giving your bake an exotic hint while maintaining moistness.
- 220 g caster sugar (superfine sugar): This sugar dissolves quickly when creamed with butter, helping to create that fluffy texture we all desire in cakes. Caster sugar also contributes to the lovely caramelization during baking, enhancing flavor without making it overly sweet. If you can’t find caster sugar at your local store, you can easily pulse granulated sugar in a blender until fine—it works like a charm!
- 4 medium eggs: Eggs are essential for binding our ingredients together while also offering moisture and structure to our cake. They act as leavening agents when whipped up properly—this means more lift! For those seeking alternatives due to dietary choices or allergies, flaxseed meal mixed with water can serve as an excellent egg replacement here.
- 50 g ground almonds: Ground almonds bring a wonderful nutty flavor along with moisture to our traybake. They contribute not only to texture but also add protein and healthy fats—a win-win! If you’re feeling adventurous or need an alternative due to dietary restrictions, try substituting with oat flour or another nut flour for similar results.
- 170 g self-raising flour: This magical ingredient combines regular flour with baking powder already mixed in—perfect for us bakers who want convenience without sacrificing quality! The self-raising flour ensures our cake rises beautifully during baking while keeping it light as air. Make sure it hasn’t expired; fresh leavening agents are absolutely paramount for achieving that fluffy sponge.
- 1 tsp baking powder: While self-raising flour contains some rising agents already, adding extra baking powder gives us peace of mind that our cake will rise perfectly every time! It serves as insurance against dense bakes—trust me; you don’t want to skip this step!
- 1 tsp vanilla extract: This aromatic addition infuses warmth and depth into every bite of our cake. Vanilla enhances all other flavors without overpowering them; think of it as the secret handshake between ingredients! Always choose pure vanilla extract over synthetic options if possible—the difference is extraordinary.
- 8 halved apricots: Oh! The star of our show—the juicy apricots! Their sweet-tart profile shines through beautifully once baked; they become soft and caramelized while releasing their juices into the batter below—pure bliss! When selecting apricots at the market or grocery store, look for ones that yield slightly under pressure but aren’t overly soft—this indicates perfect ripeness.
- Caster sugar (to sprinkle over the fruit): A light dusting of caster sugar over those lovely apricots before baking elevates their sweetness even further while creating a gorgeous glaze during cooking—a small touch that makes all the difference!
- Icing sugar (to serve): Finally, icing sugar adds an elegant finish when dusted over your baked traybake before serving—it not only looks beautiful but adds just enough sweetness to balance out any tartness from the fruit.
Equipment You’ll Need:
Having the right tools at hand is essential for any successful baking endeavor; they make each step smoother while ensuring nothing stands between you and your scrumptious creation! Here are some key pieces you’ll want by your side:
- Mixing bowl: A large mixing bowl is vital since we’ll be combining multiple ingredients at once. Opt for glass or stainless steel bowls—they retain heat well if needed later on—and ensure they’re deep enough so nothing spills over while mixing!
- Electric mixer or whisk: For creaming butter and sugar effectively (and avoiding sore arms!), an electric mixer saves time while providing fluffiness beyond what manual whisking can achieve alone! If using hand-held methods instead (good exercise!), be prepared for quite some arm workout!
- Spatula: A good spatula is indispensable when folding in dry ingredients gently without deflating our precious batter too much—it’s crucial here!
- Stoneware dish or rectangular baking tin: Baking dishes come in many materials—glass or metal work well too—but I personally adore stoneware due to how evenly they distribute heat throughout my bakes! Just remember proper greasing before pouring in batter if using non-stick varieties.
Preparing the Apricot and Almond Traybake
Step 1: Cream Together Butter and Sugar
Let’s start by creaming together our butter and caster sugar until they transform into a light, fluffy mixture—the foundation upon which our delightful traybake will rest. This process is known as creaming and is absolutely paramount because it incorporates air into the mixture which subsequently helps create volume within our sponge during baking. To begin this step successfully, ensure your butter has reached room temperature—the ideal consistency should be soft but not melted—that way you’ll achieve maximum fluffiness when beating it together with sugar! Use your electric mixer on medium speed until everything looks pale yellow and airy—usually around 3–5 minutes will do wonders here! Don’t rush through this stage; patience pays off big time!
Step 2: Add Eggs One by One
Next comes adding those precious eggs one at a time—this method allows each egg’s goodness to fully incorporate before introducing another member into our cake family! Trust me on this—it prevents curdling which can happen if you dump them all in at once due their cold temperature from being stored prior—they must acclimatize gradually instead! After adding each egg individually mix well until fully combined before proceeding onto subsequent ones—you’ll notice how rich golden color develops gradually here too!
Step 3: Fold In Dry Ingredients
Now we’re ready for one of my favorite parts—folding in those dry ingredients which includes self-raising flour mixed with ground almonds along with vanilla extract! Gently combining these dry elements rather than vigorously stirring ensures we maintain all that lovely air we’ve worked hard incorporating earlier—it keeps things light yet still results in beautiful structure throughout every slice served later on! Use gentle motions folding from underneath so everything blends seamlessly without losing volume—this step should feel almost meditative as you watch batter transform ever so slightly but meaningfully into something truly special!
Step 4: Prepare Your Baking Dish
Before we pour this luscious batter into its home sweet home (our prepared dish), let’s take care of ensuring nothing sticks later down road—we want clean slices after all! I recommend spraying my stoneware dish lightly using Lurpak cooking spray which provides both convenience while protecting against sticking issues commonly faced otherwise especially when working alongside fruits like apricots—they tend towards juiciness post-baking making greasing crucially important here too!
With these initial steps laid out before us—I hope you’re feeling inspired because trust me once baked there’s simply nothing else quite like enjoying freshly made Apricot & Almond Traybake straight outta oven paired alongside cup tea on cozy afternoon—or perhaps served alongside scoop ice cream during warm summer nights? Either way—you’re bound to leave everyone asking for seconds after tasting such heavenly morsels created by own hands… now onward towards pressing those beautiful halved apricots atop batter next where magic awaits!
Step 5: Preparing the Dish for Baking with Care
Now that you have your luscious batter ready, it’s time to prepare your baking dish. I personally love using a stoneware dish for this Apricot and almond traybake because it retains heat beautifully, leading to an evenly baked cake that has a golden crust while keeping the interior moist and tender. If you’re using a stoneware dish like I do, simply spraying it with some Lurpak cooking spray is a game changer. This non-stick spray ensures that every delightful crumb releases effortlessly after baking, which is absolutely paramount when you’re excited to share this treat with friends and family.
Make sure to coat the dish thoroughly; you want every inch covered so that there’s no sticky surprise when it comes time to serve. Trust me on this—nothing is more disappointing than a beautiful cake sticking to the pan! After you’re satisfied with the spray coverage, gently pour your cake batter into the dish, using a spatula to smooth it out evenly. This step is crucial as an even surface will aid in uniform baking, helping each bite to be just as satisfying as the last.
Step 6: Gorgeous Apricot Placement
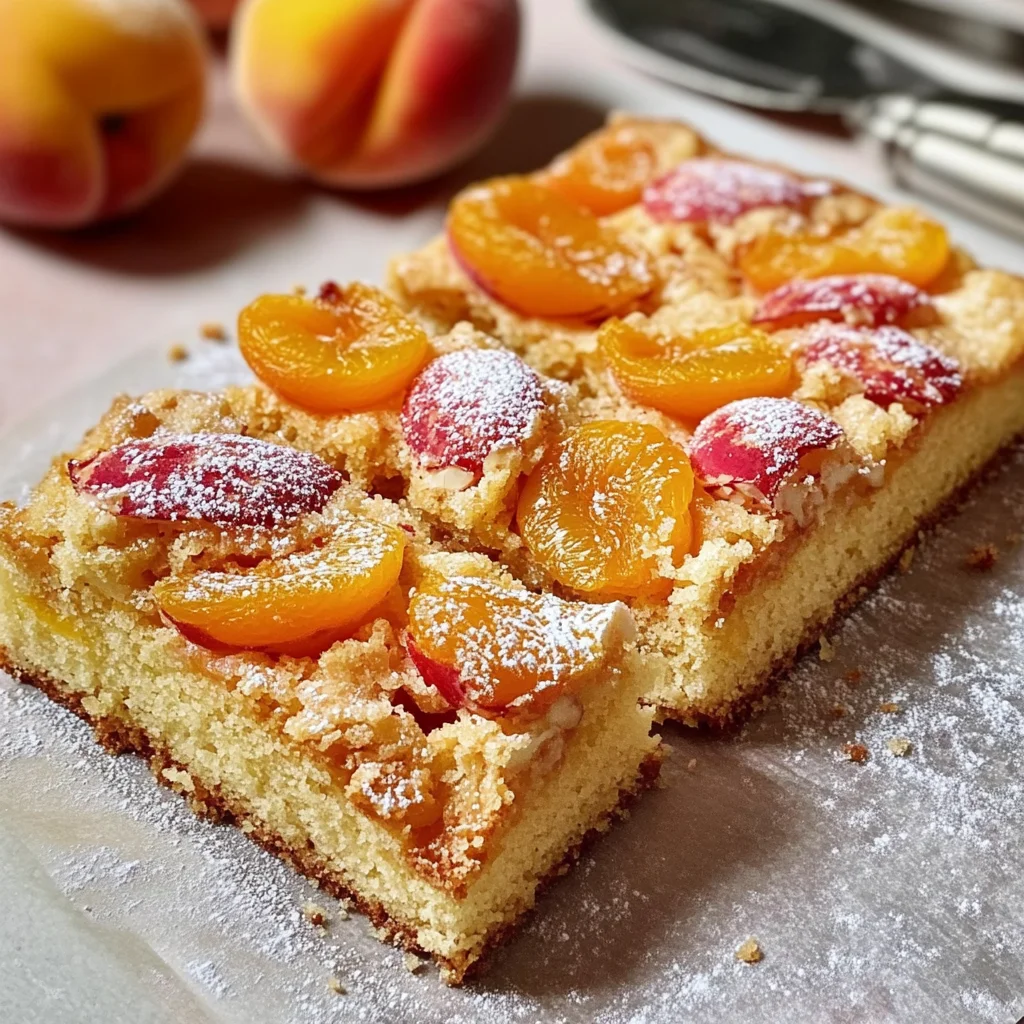
Now we come to one of my favorite parts of this entire process: placing those gorgeous apricots right into the batter. Take your halved apricots and start arranging them in a pattern that feels good to you—my go-to method is alternating between one half turned up and one half turned down. This not only creates a visually stunning display but also allows those sweet juices from the fruit to seep into the sponge as it bakes, creating an utterly intoxicating flavor experience where every bite bursts with summer essence.
As you press them gently into the batter, think about how their natural sweetness will complement and elevate the almond flavor of your traybake. It’s like crafting a beautiful work of art! Don’t worry if they sink slightly; that’s perfectly normal and part of their charm. Just make sure they’re nestled snugly within the batter without being completely submerged; we want them to crown your creation beautifully rather than hide beneath its surface.
Step 7: Sweetening Those Apricots
Once you’ve arranged your apricots like little jewels atop your batter, it’s time for a sprinkle of extra sweetness. Grab some caster sugar (superfine sugar) and lightly dust it over the exposed surfaces of those lovely apricot halves. This extra layer of sugar will caramelize as it bakes, transforming those fruits into sweet little pockets of flavor that contrast beautifully with the soft almond sponge underneath.
This step may seem simple, but I promise you, it’s truly significant! The sugar not only enhances their natural sweetness but also helps create a delightful glaze on top during baking—think of it as giving your apricots their very own golden halo. Plus, watching those sugary droplets melt into the fruit while baking adds an exciting texture that makes each bite all the more special.
Step 8: Baking Your Perfect Apricot and Almond Traybake
With everything beautifully assembled and ready to go, it’s finally time for our Apricot and almond traybake to take its place in the oven! Preheat your oven to 180℃ / 350℉ if you haven’t done so already; this ensures that once you place your traybake inside, it immediately starts cooking evenly right from the get-go—a vital factor in achieving that perfect rise and color.
Bake for about 35-40 minutes or until you see that glorious golden brown color gracing the top of your cake. The edges should begin pulling away slightly from the sides of the dish, creating that enticing visual cue telling you it’s almost ready! You can also perform a doneness test by inserting a skewer or toothpick into the center; if it comes out clean or with just a few moist crumbs clinging onto it (but no wet batter), then congratulations—you’ve nailed it!
But remember: every oven behaves differently! If yours tends to run hot or cold, check on your traybake around the 30-minute mark just in case adjustments are needed. It’s important not to rush this step; patience here pays off big dividends because undercooked cake can lead to disappointment later when slicing into what should be an utterly satisfying dessert experience.
Conclusion:
As we wrap up our delightful journey making this Apricot and almond traybake, I hope you feel as inspired as I do every time I bake this beloved recipe. There’s something truly magical about combining summer fruits with the nutty richness of almonds—it creates such a beautiful symphony of flavors that dances on your palate! Each bite offers not only sweetness but also that deeply comforting texture that makes every gathering feel special. The golden crust cradles moist sponge infused with vanilla, while the apricots add bursts of juicy brightness… It’s simply extraordinary!
This recipe is absolutely a must-try because it’s approachable yet rewarding—perfect for novice bakers and seasoned pros alike. Imagine pulling this beauty from the oven: golden brown with caramelized edges glistening under a dusting of icing sugar—it’s hard not to smile! Whether you’re serving it at an afternoon tea party or as a sweet finale at dinner with loved ones, this traybake will surely steal the show. Plus, its versatility means you can whip it up any day of the week without feeling overwhelmed.
For serving suggestions, imagine savoring one warm slice alongside a dollop of freshly whipped cream or perhaps some silky yogurt—both complementing those sweet apricots beautifully. For an afternoon pick-me-up with coffee or tea, enjoy your square just as is; it’s pure delight. And if you’re looking for something truly decadent, why not drizzle some warm chocolate sauce over each piece? The combination of rich chocolate against fruity sweetness takes indulgence to another level entirely!
Feeling adventurous? This recipe is wonderfully adaptable! You could swap out apricots for peaches or even plump cherries—each variation breathes new life into this classic dish while still staying true to its essence. Or try adding spices like cardamom or cinnamon for a warm twist during colder months; trust me on this one—it elevates everything beautifully! So go ahead; embrace your creativity in the kitchen, share your experiences with friends and family, and let them fall in love with baking just like you have!
Apricot and Almond Traybake

Indulge in the delightful flavors of summer with this Apricot and Almond Traybake. This easy-to-make dessert combines juicy apricots and nutty ground almonds, creating a moist and satisfying cake that’s perfect for any occasion. With a light, fluffy sponge enriched by rich butter and the warmth of vanilla, every bite transports you to sun-kissed afternoons filled with laughter and joy. Whether served at a casual gathering or enjoyed as an everyday treat, this traybake is sure to impress friends and family alike.
- Prep Time: 20 minutes
- Cook Time: 40 minutes
- Total Time: 1 hour
- Yield: Approximately 12 servings 1x
- Category: Dessert
- Method: Baking
- Cuisine: British
Ingredients
- 220 g butter (or coconut oil for a dairy-free option)
- 220 g caster sugar
- 4 medium eggs (or flaxseed meal mixed with water as an egg substitute)
- 50 g ground almonds (or oat flour)
- 170 g self-raising flour
- 1 tsp baking powder
- 1 tsp vanilla extract
- 8 halved apricots
- Caster sugar for sprinkling over apricots
- Icing sugar for serving
Instructions
- Preheat your oven to 180°C / 350°F. Grease a stoneware dish or rectangular baking tin.
- Cream together the butter and caster sugar until light and fluffy.
- Add the eggs one at a time, mixing well after each addition.
- Gently fold in the ground almonds, self-raising flour, baking powder, and vanilla extract until just combined.
- Pour the batter into the prepared dish and smooth it out evenly.
- Arrange the halved apricots on top of the batter and sprinkle with caster sugar.
- Bake for 35-40 minutes or until golden brown and a skewer comes out clean.
- Cool slightly before dusting with icing sugar and serving.
Nutrition
- Serving Size: 1 square (70g)
- Calories: 250
- Sugar: 14g
- Sodium: 120mg
- Fat: 12g
- Saturated Fat: 7g
- Unsaturated Fat: 4g
- Trans Fat: 0g
- Carbohydrates: 34g
- Fiber: 1g
- Protein: 5g
- Cholesterol: 50mg