Quick & Easy Orange Chicken
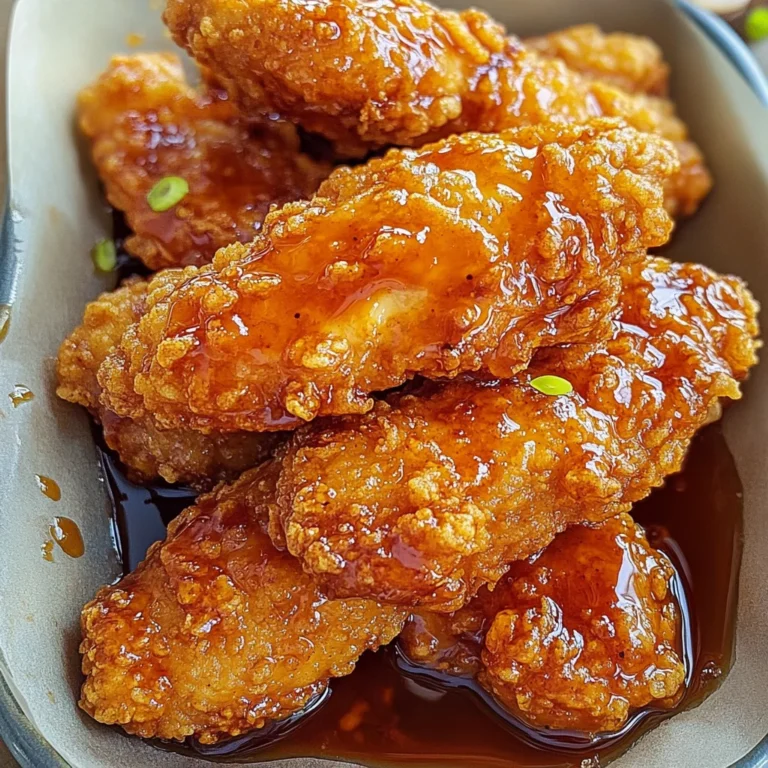
There’s something truly magical about crafting a dish that warms your heart and your home, isn’t there? The aroma of sweet citrus dancing with savory notes, the crispy texture of chicken that practically sings as you bite into it—this isn’t just a meal; it’s an experience. Our Quick & Easy Orange Chicken is more than just food; it’s a beautiful blend of tradition and innovation, a bridge that connects those cherished takeout moments to the comfort of homemade goodness. Picture this: tender chicken thighs coated in a delicate layer of cornstarch, sizzling away in hot oil until they’re golden brown and begging to be tossed into a bright, sticky-sweet orange sauce. I promise you, the first bite will transport you to your favorite Chinese restaurant while reminding you of home-cooked love.
This recipe has been my go-to for busy weeknights, family gatherings, or even when I need a little pick-me-up. You see, there’s something profoundly satisfying about creating a meal that is both quick and delicious—ready in just 30 minutes! It’s like having a secret weapon in your culinary arsenal. As we embark on this journey together to make our Quick & Easy Orange Chicken, let me assure you that it’s not just about following the steps but also about enjoying the process. Trust me on this one; every moment spent in the kitchen is an opportunity to infuse love and creativity into what you serve.
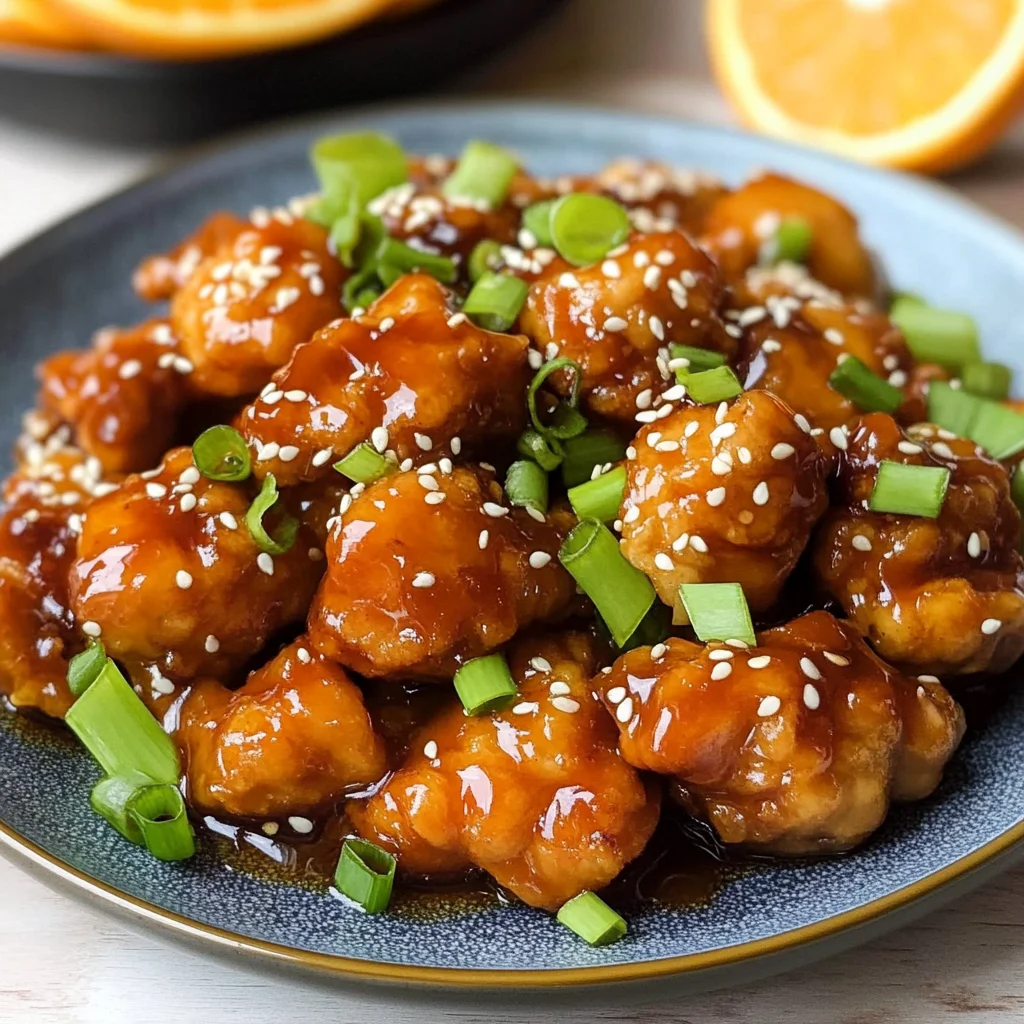
Quick & Easy Orange Chicken: A Delightful Taste of Home
Let’s dive into this beautiful recipe that marries crispy fried chicken with an utterly intoxicating orange sauce. This dish is not only easy to prepare but also brimming with flavor—a perfect choice for any day of the week!
Ingredients:
As we begin our culinary adventure, let’s gather our ingredients. Each component plays a vital role in creating that symphony of flavors we’re aiming for in our Quick & Easy Orange Chicken.
- 1 lb skinless boneless chicken thighs. Chicken thighs are my absolute favorite for this recipe because they are juicy and tender, offering incredible flavor without drying out during cooking. Their higher fat content compared to breasts ensures each bite is succulent and satisfying—perfect for soaking up all that luscious sauce! When selecting your chicken, look for pieces that are plump and have a slight sheen; freshness is key here. If you’re looking for alternatives, boneless chicken breasts will work as well but may yield less moisture.
- 1/4 cup cornstarch (or potato starch). This ingredient is crucial for achieving that delightful crunch on our chicken! Coating the chicken in cornstarch creates a barrier that locks in moisture while allowing it to crisp beautifully when fried. If you can find potato starch, it’s an excellent substitute with a slightly different texture—but either will give you that coveted crunch. Make sure to toss the chicken well so every piece is evenly coated; this ensures maximum crispiness!
- 1/3 cup vegetable oil (or any neutral oil). The choice of oil isn’t just about frying; it sets the stage for how crispy our chicken will become. Neutral oils like canola or grapeseed oil have high smoke points and won’t interfere with the flavors we’re building—absolutely paramount for deep-frying success! Heat your oil until it’s shimmering before adding the chicken; if it’s too cool, it will absorb too much oil and become greasy instead of golden and crunchy.
- 1/2 green onion (finely chopped, optional garnish). While technically optional, I highly recommend adding green onions as they bring a fresh finish to our dish! Their mild onion flavor complements the sweetness of the sauce beautifully and adds vibrant color to your plate. Whenever possible, use fresh green onions rather than dried or pre-chopped versions because their flavor is far superior.
- 1 tbsp orange zest (grated, optional garnish). Ahh, orange zest—the liquid gold of flavor! This tiny addition brings an aromatic brightness that enhances our dish’s citrus elements exponentially. When zesting oranges, be sure to only take the outermost layer; the white pith underneath can be bitter and unpleasant. Freshly zested oranges offer unparalleled flavor compared to bottled zest or extracts.
- 1 tsp sesame seeds (toasted, optional garnish). These little seeds add not only visual appeal but also a lovely nutty crunch when toasted lightly before sprinkling over your finished dish! Toasting intensifies their flavor—just be careful not to let them burn as they can go from perfectly toasted to charred in seconds!
- 1 cup orange juice (freshly-squeezed, pulp removed – about 4-5 medium-sized oranges). Freshly squeezed orange juice is non-negotiable here! Store-bought varieties often contain preservatives or additives that dilute their vibrant flavor profile. By squeezing your own oranges—you’ll capture all those bright notes that make this dish sing! Aim for juicing medium-sized oranges for optimal results; if you’re feeling adventurous, mix varieties like navel and blood oranges for added depth.
- 2 tbsp white vinegar (or rice vinegar/apple cider vinegar). This tangy element balances out the sweetness from our brown sugar and orange juice perfectly—creating harmony within our sauce! While I prefer white vinegar for its neutral taste, feel free to substitute with rice vinegar or apple cider vinegar if that’s what you have on hand; each offers its unique twist on acidity without overwhelming other flavors.
- 6 tbsp brown sugar. Sweetness plays such an integral role in this dish—it’s what transforms ordinary ingredients into something memorable! Brown sugar adds a caramelized depth due to its molasses content compared to granulated sugar; this subtle complexity enhances every bite while complementing citrus beautifully.
- 2 tbsp regular soy sauce (or light soy sauce). The umami punch from soy sauce rounds out our flavors delightfully! Regular soy sauce provides robust depth while light soy sauce offers milder notes—so choose based on your preference! Just keep an eye on sodium levels if using light options as they can sometimes be saltier than expected.
- 2 garlic cloves (minced). Garlic adds warmth and richness—a must-have aromatic ingredient in this dish! Be sure to mince finely so it integrates seamlessly into our sauce rather than presenting large chunks when served.
- 1/4 tsp ginger powder (or grated ginger). Ginger brings spicy warmth—a true standout layer within Asian-inspired dishes like ours! Powdered ginger is convenient but fresh grated ginger delivers an intensity that’s hard to beat—plus its vibrant color adds visual appeal!
- 1 tbsp cornstarch (or potato starch/tapioca starch). We’ll use another tablespoon later on as part of thickening our luscious orange sauce at the end—ensuring perfect adherence onto each piece without being runny!
- 1/2 tsp red chili flakes (optional if you prefer it spicy). A sprinkle of chili flakes elevates flavors by introducing heat—it’s entirely optional depending on personal preference but can transform this dish from sweetly delightful into something excitingly bold! Adjust according to taste preferences; I often opt for half a teaspoon myself!
Equipment You’ll Need:
As we prepare to whisk up some magic in our kitchens together, having the right tools at hand makes all the difference between good cooking and great cooking! Each piece serves as an essential partner alongside us throughout this journey toward making delicious memories over dinner tables everywhere.
- Large mixing bowl – This versatile bowl is where all those beautiful ingredients come together harmoniously before heading off into their next adventure! Look for one that’s sturdy yet lightweight enough so moving around won’t feel cumbersome—plastic or glass works wonderfully here!
- Sharp knife – A reliable knife not only makes prep work easier but ensures clean cuts through tender meat without bruising fibers or tearing apart textures unnecessarily—guaranteeing consistent cooking times across each piece!
- Cutting board – Choose one suitable for meat preparation; wooden boards lend themselves well due their ease-of-cleaning properties while keeping blades intact longer than plastic counterparts over time!
- Frying pan or wok – This vessel becomes home base during frying operations! Opting-for non-stick cookware helps prevent sticking problems altogether without needing excessive amounts oil which could lead towards greasiness rather than crispiness desired within finished product!
- Wire rack/paper towels – Having these handy allows us drain excess grease after frying ensuring crispy results upon serving instead sogginess ensuing from sitting too long post-cooking session!
Now we’re ready to dive right into preparing our Quick & Easy Orange Chicken—a delightful journey awaits us ahead filled with joyful aromas wafting through kitchen air bringing families closer together around shared plates bursting forth colors appetites yearning satisfaction fulfilled joyfully through each bite taken warmly amongst loved ones gathered nearby…
Step 1: Preparing Your Vibrant Sauce
Begin by combining all those fantastic liquid components—the freshly squeezed orange juice mixed harmoniously with brown sugar alongside soy sauces tangy elements accompanied by sharp garlic hits intermingling sweetly against sour notes introduced via white vinegars presence—a balance achieved through mere mixing motions performed gently within small bowl set aside awaiting integration shortly thereafter upon fried chickens arrival awaiting flavorful coating applied generously atop luscious crispy layers formed earlier during frying process throughout subsequent phases leading ultimately towards unification achieved through culinary artistry expressed brightly displayed plating arrangements presented proudly forth onto dining tables everywhere gleaming invitingly beckoning eager appetites longing satisfaction derived from splendid meals crafted lovingly shared amongst friends family alike…
Step 2: Unleashing Flavorful Aromatics
Next comes attention turning focus toward dicing those succulent thighs effortlessly transforming whole pieces sliced evenly measuring approximately 1½ inches cubes being mindful not patting them dry beforehand ensuring moisture retained vital step leading towards achieving ultimate tenderness throughout final results manifested later enjoyed upon plating once completed totality produced showcasing best efforts invested throughout time dedicated preparing meals meant cherished moments savored deeply held close hearts minds forevermore…
Step 3: Coating for Crisp Perfection
Once diced adequately place cubed portions directly into large mixing bowl previously reserved awaiting purpose intended now enhance sensual experience guaranteed exceeding expectations established early stages seen thus far unleashing potential hidden depths within flavors revealed upon preparation techniques employed diligently crafted expertly designed ensuring success followed closely guided instincts pushing boundaries exploring possibilities arising unexpectedly sourced inspiration igniting passions simmering beneath surface yearning expression found candid moments spent undertaking culinary endeavors shared amongst friends family alike creating bonds forged strengthened embraced fully amidst laughter joy conversation flowing freely accompanying dishes devoured wholeheartedly celebratory atmosphere created fostering connections lasting lifetime…
Step 4: Frying Until Golden Brown
With desire ignited heat vegetable oil thoroughly heating within chosen pan preferred vessel designated specifically fry operations ensuring temperatures rise appropriately reaching point shimmering brilliance observed carefully gauging readiness indicated signs await patiently allowing patience rewarded greatly fruitful outcomes achieved golden beauties emerging triumphantly greeted applause sounds echoing softly beneath whispers excitement lingering air anticipation building steadily growing heightened senses sharpened eager witnessing transformations occurring mere moments witnessed unfoldingly capture hearts minds souls forevermore encapsulated essence captured love infused lovingly crafted inspired journeys begun anew inspiring hope dreams reigniting passion pursuit seeking create unforgettable moments worth treasuring always remembering fondly…
Quick & Easy Orange Chicken: The Secret to a Flavorful Finale
Step 5: Frying the Chicken to Perfection
Now that we have our delightful chicken pieces coated in cornstarch, it’s time to bring them to life through frying. This step is truly a labor of love – the sound of sizzling oil is music to any cook’s ears! Begin by heating your vegetable oil in a large pan over medium-high heat. You’ll know the oil is ready when it shimmers and ripples like liquid gold; this is absolutely crucial as it ensures your chicken will fry beautifully rather than steam. Once the oil reaches that perfect temperature, carefully add your chicken pieces in small batches, making sure not to overcrowd the pan. This allows each piece to get an even coat of crispy goodness.
As you watch them fry, keep an eye out for that gorgeous golden brown color developing on each piece – this usually takes about 6-8 minutes per batch. It’s essential not to rush this step; the crispy texture cannot be hurried! If you try to flip them too early, they might stick to the pan or tear apart. Instead, let them do their thing until they naturally release themselves from the surface and can be flipped easily with tongs. Once they are perfectly cooked on both sides, remove them from the pan and transfer them onto a wire rack or a plate lined with paper towels. This little trick helps drain off excess oil and prevents sogginess; trust me, no one wants floppy fried chicken!
Step 6: Creating Your Irresistible Orange Sauce
With our crispy chicken set aside, it’s time for my favorite part – making the orange sauce! In a separate bowl, combine your freshly squeezed orange juice with white vinegar or whichever vinegar you chose (rice vinegar adds a unique tang!), brown sugar, soy sauce, minced garlic, ginger powder, and if you’re feeling adventurous, those fiery red chili flakes. Whisk everything together until it’s a harmonious blend; this process will create an incredibly fragrant mixture that dances around your kitchen like an intoxicating aroma of citrus and spice.
Once combined, transfer this vibrant concoction into your now-empty frying pan over medium-high heat. Here comes the magic! As you bring your sauce to a simmer, you’ll notice it thickening as it cooks – this transformation is nothing short of extraordinary. Let it bubble away gently for about one minute; don’t rush it! This simmering not only intensifies those flavors but also gives you a luscious texture that clings beautifully to every piece of chicken. Watch closely for that glossy sheen – it’s an indicator that you’re almost there!
Step 7: Marrying Chicken and Sauce
The moment has arrived! Once your orange sauce has thickened up nicely, it’s time to bring back those crispy chicken morsels into the party. Carefully add all your fried chicken back into the pan with the sauce—this part is where everything starts coming together in a symphony of flavors! Gently toss everything to ensure each piece gets generously coated in that sweet and tangy sauce. You want every bite bursting with flavor – I promise you’ll be amazed at how just a few moments can elevate simple ingredients into something truly extraordinary.
As you mix it all together, listen for that delightful sound of sauce meeting chicken – it’s like music! Keep cooking for another minute or two until everything is heated through and well-combined. This final toss not only ensures every piece is drenched in deliciousness but also allows those flavors to meld together beautifully. Don’t skip out on garnishing with fresh orange zest and toasted sesame seeds at this stage; these accents add layers of flavor and texture that make each bite even more exciting!
Step 8: The Final Touches Before Serving
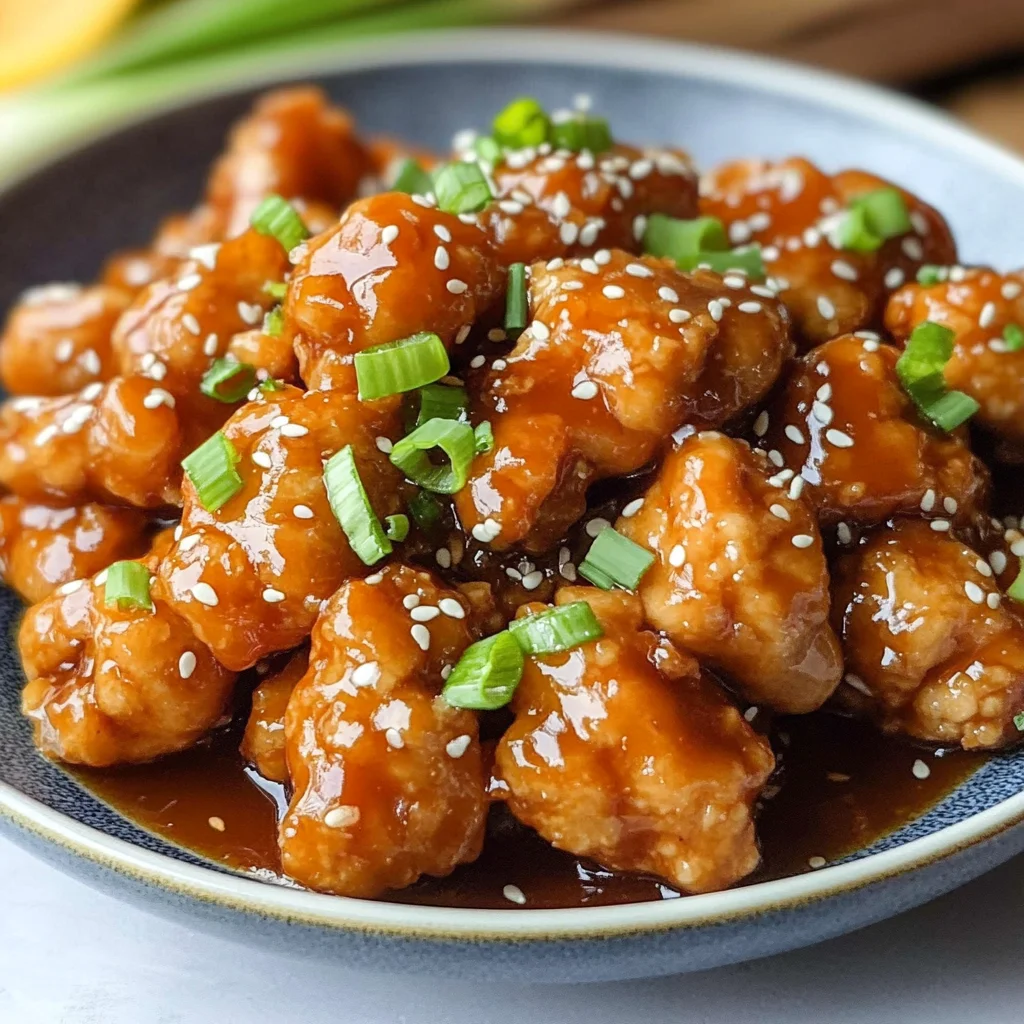
Before you serve up this divine creation, take one last moment to admire your work—the glossy coating glistens under the light as if begging someone to dig in! Now’s your chance to plate it up right: consider serving your Quick & Easy Orange Chicken over fluffy white rice or alongside stir-fried vegetables for a complete meal that’s not only visually appealing but also incredibly satisfying.
Remember how I mentioned garnishes earlier? Now’s when they really shine! Sprinkle some finely chopped green onions over the top for freshness and crunch—it brings brightness both in flavor and presentation. And let’s not forget about that optional drizzle of additional sesame seeds; they add such an irresistible crunch factor when biting into each tender piece of chicken.
As you gather everyone around the table (or perhaps just treat yourself), take a moment to relish in what you’ve created—a dish so delightful that it’ll make you feel like you’ve transported everyone straight into an Asian bistro without leaving home! I can’t stress enough how much joy this Quick & Easy Orange Chicken will bring you and your loved ones—it’s comfort food at its finest.
Conclusion:
As we wrap up our journey through this delightful recipe for Quick & Easy Orange Chicken, I hope you feel as excited about making it as I do sharing it with you. There’s something truly extraordinary about how simple ingredients come together to create such a symphony of flavors—the tangy brightness of fresh orange juice paired with savory soy sauce produces a dish that dances on your palate. Each bite delivers not just satisfaction but also joy, reminding us why cooking is such a cherished experience.
This recipe is an absolute must-try—not only because of its irresistible taste but also due to how accessible and fun it is to prepare. In just thirty minutes, you can transform humble chicken thighs into a meal that rivals your favorite takeout! Imagine pulling this vibrant dish from your kitchen, enticing friends and family with its mouthwatering aroma—it’s bound to be the star of any weeknight dinner or special occasion gathering! It’s perfect for everything from casual family dinners to impressing guests at gatherings.
When serving this beautiful creation, think about pairing it with fragrant jasmine rice or perhaps some lightly sautéed broccoli drizzled with sesame oil; these accompaniments harmonize beautifully with the sweet and tangy notes of the orange chicken. Or maybe use crispy spring rolls as an appetizer followed by this glorious main course—the combination feels like a warm embrace. For those who crave a bit more spice, consider serving it alongside some chili garlic sauce or pickled vegetables for contrasting textures and flavors that enhance each bite.
Feeling adventurous? This recipe is wonderfully adaptable! Want to try something new? Swap out oranges for tangy tangerines or add some pineapple chunks to bring in an extra layer of sweetness. You could even experiment by incorporating different proteins like tofu or seitan if you’re looking for plant-based options—each variation adds its own unique twist while still capturing the essence of what makes this dish so beloved. I encourage you to dive into this culinary adventure and make it your own! Share your experiences with me—I can’t wait to hear how you put your personal touch on this delightful recipe!
Quick & Easy Orange Chicken
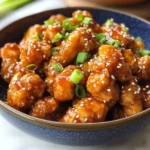
Quick & Easy Orange Chicken is a delightful dish that brings the comforting flavors of your favorite takeout right into your kitchen! Ready in just 30 minutes, this recipe features crispy chicken thighs coated in a luscious homemade orange sauce that’s both sweet and tangy. Each bite transports you to a world of vibrant flavors, making it perfect for busy weeknights or family gatherings. With simple ingredients and quick preparation, you’ll find that this dish not only satisfies your cravings but also fills your home with the tantalizing aroma of citrus and spices. Get ready to impress your loved ones with a meal that’s as enjoyable to make as it is to eat!
- Prep Time: 15 minutes
- Cook Time: 15 minutes
- Total Time: 30 minutes
- Yield: Serves 4
- Category: Main
- Method: Frying
- Cuisine: Asian
Ingredients
- 1 lb skinless boneless chicken thighs
- 1/4 cup cornstarch
- 1/3 cup vegetable oil
- 1 cup orange juice (freshly squeezed)
- 2 tbsp white vinegar
- 6 tbsp brown sugar
- 2 tbsp soy sauce
- 2 garlic cloves (minced)
- 1 tsp ginger powder
- Optional garnishes: green onions, sesame seeds, orange zest
Instructions
- Start by coating the chicken thighs in cornstarch, ensuring they're evenly covered.
- Heat vegetable oil in a large frying pan over medium-high heat until shimmering. Fry the chicken pieces in batches until golden brown (about 6-8 minutes each). Remove and drain on paper towels.
- In a bowl, whisk together orange juice, vinegar, brown sugar, soy sauce, garlic, and ginger.
- Pour the mixture into the frying pan and bring to a simmer for about one minute until slightly thickened.
- Add the fried chicken back into the pan and toss until well-coated with the sauce. Cook for an additional minute.
- Serve hot, garnished with green onions and sesame seeds.
Nutrition
- Serving Size: 1 serving
- Calories: 320
- Sugar: 20g
- Sodium: 640mg
- Fat: 16g
- Saturated Fat: 3g
- Unsaturated Fat: 12g
- Trans Fat: 0g
- Carbohydrates: 32g
- Fiber: 0g
- Protein: 18g
- Cholesterol: 120mg