Lemon Cheesecake Bites
There’s something magical about the way a simple recipe can transport us back to cherished moments in our lives. The scent of freshly baked treats wafting through the kitchen, the laughter of loved ones gathered around the table, and that first bite that ignites joy—all of these elements come together in a beautiful symphony when we create something special. Today, I’m thrilled to share with you my Lemon Cheesecake Bites, a delightful treat that feels like sunshine on your palate! These little bites are not just about satisfying a sweet tooth; they represent warmth, love, and a celebration of life’s sweetest moments.
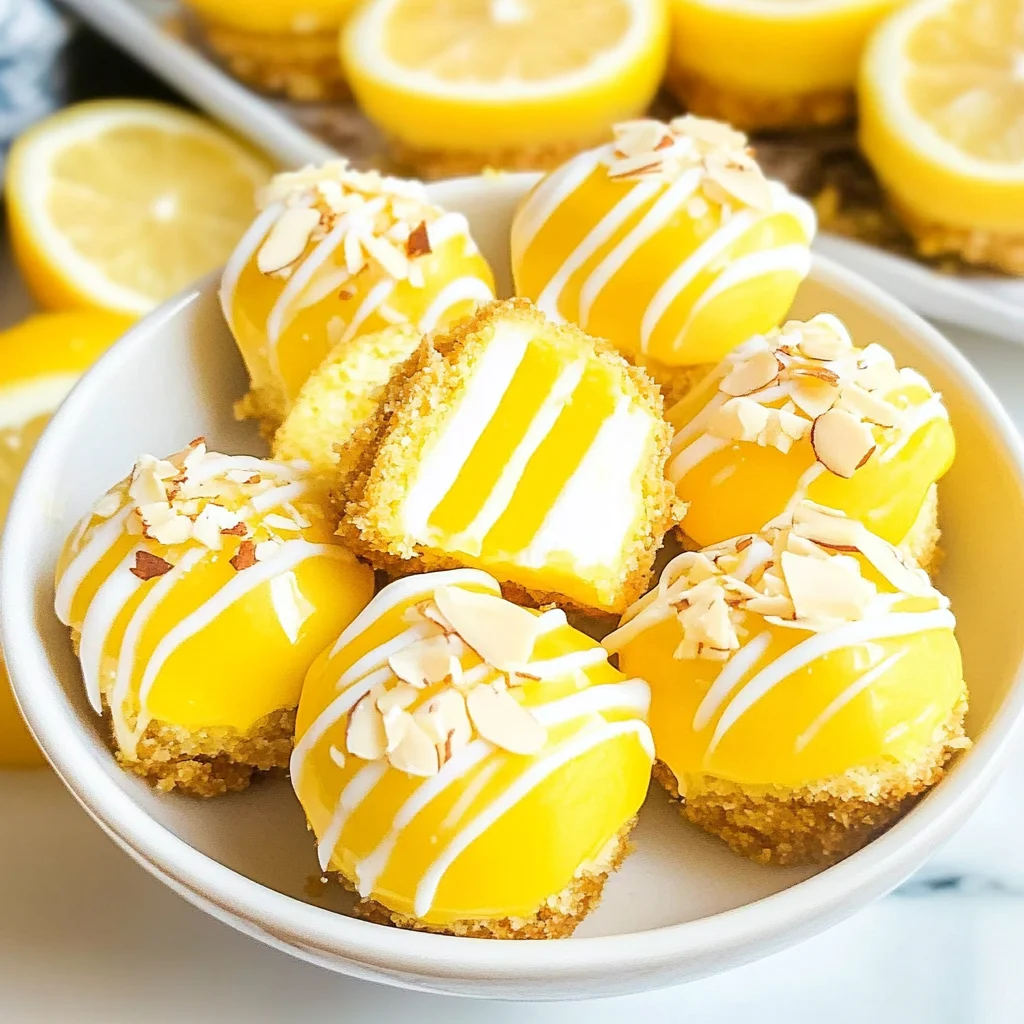
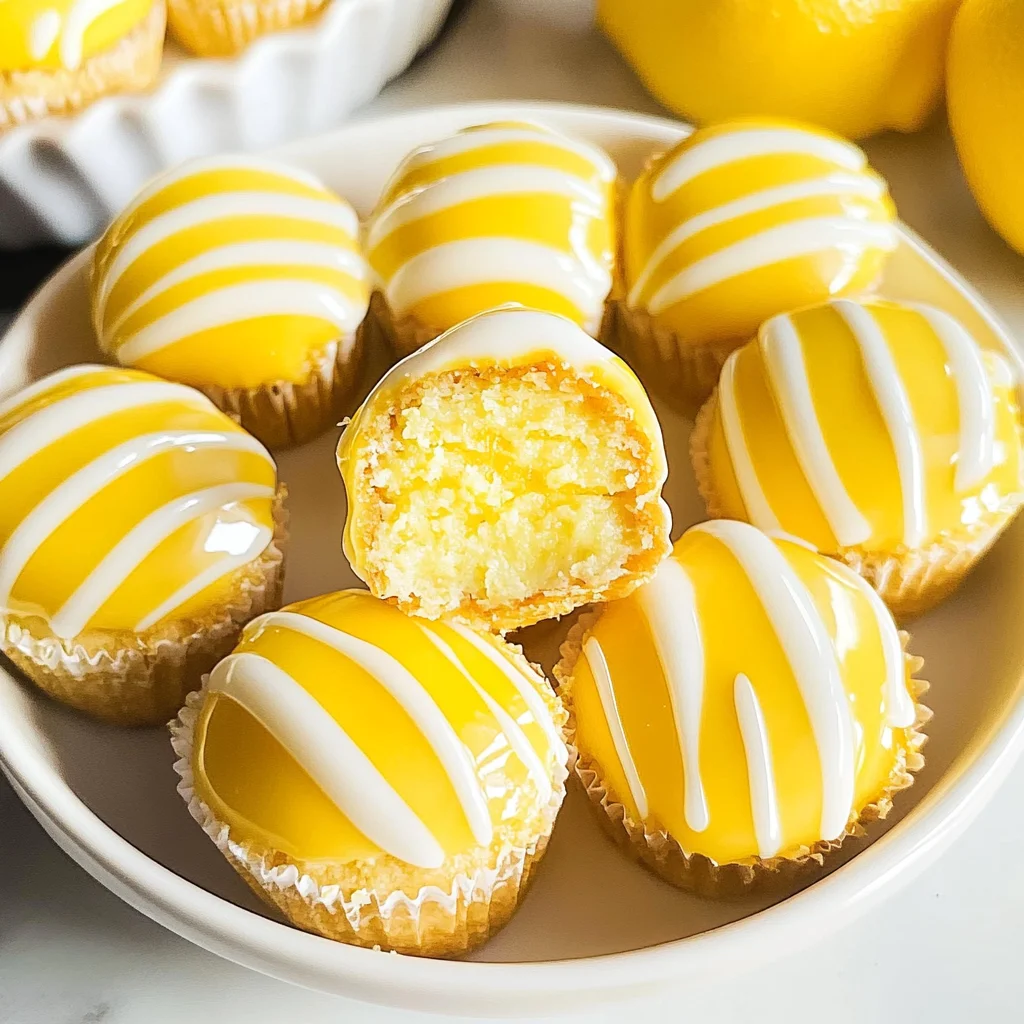
Imagine a creamy cheesecake filling nestled within a tender lemon cake exterior, each bite bursting with flavor that dances on your taste buds. The tartness of fresh lemon paired with the rich creaminess of cheesecake creates an experience that’s utterly intoxicating. Not only are these Lemon Cheesecake Bites perfect for gatherings or celebrations, but they also make for an indulgent afternoon snack or a charming dessert after dinner. I promise you, once you whip up this recipe and share it with friends and family, they’ll be asking for more!
Lemon Cheesecake Bites: A Little Bite of Sunshine
These cheerful lemon cheesecake bites encapsulate the essence of summer in one delicious morsel. With a luscious lemon cake base and creamy cheesecake filling that melts in your mouth, they’re bound to become a favorite treat in your home. Let’s embark on this culinary journey together!
Ingredients:
As we prepare to create these delectable bites, let’s take a moment to appreciate each ingredient that plays its part in crafting this delightful dessert.
- 15.25 ounces lemon cake mix (I used Betty Crocker Super Moist brand). This is the star of our show! The lemon cake mix provides not only flavor but also structure and moisture to our cheesecake bites. I always opt for the Betty Crocker brand because it consistently delivers that moist texture we all crave. If you’re feeling adventurous or prefer homemade options, you could create your own lemon cake mix from scratch using flour, sugar, baking powder, and zesty lemon juice—just ensure it maintains that delightful citrus tang!
- 8 ounces cream cheese (room temperature). This is absolutely paramount for achieving the dreamy cheesecake filling we’re after! Using cream cheese at room temperature allows it to beat smoothly into our mixture without lumps. Trust me on this—if it’s too cold, you’ll end up with an uneven texture that’s less than ideal. Opt for full-fat cream cheese for richness; light versions may compromise on flavor.
- 12 ounces yellow candy melts. These vibrant candy melts serve as our coating and add a touch of sweetness along with that gorgeous golden hue that makes each bite irresistible. When melted and used as a coating, they give our bites an appealing look while locking in all the delicious flavors inside. If yellow isn’t available or if you’re feeling creative, white candy melts can be colored with food-safe gel dyes to match any occasion!
- 4 ounces white vanilla almond bark. This lovely almond bark is another layer of decadence that adds both flavor and visual appeal when drizzled over the top of our treats. Its smooth consistency makes it easy to work with while providing an elegant finish that elevates these little bites from simple sweets to gourmet delights! If you’re looking for alternatives due to dietary preferences or allergies, feel free to use dairy-free chocolate chips instead; just remember they may require different melting techniques.
Equipment You’ll Need:
Before we dive into making these delightful Lemon Cheesecake Bites, let’s gather some essential tools that’ll make our baking experience smoother and even more enjoyable!
- Medium-sized heat-safe bowl – This will be necessary for heat-treating our dry cake mix before it becomes part of the cheesecake mixture. It’s important because heating helps eliminate any potential bacteria present in raw flour—a crucial step for safety!
- Handheld mixer – While you could use a whisk if you’re feeling energetic, I highly recommend using a handheld mixer for quick incorporation of ingredients into that beautifully smooth cream cheese base we desire.
- Parchment paper – Lining your baking sheet ensures easy removal of those cheesecake bites once they’re set! It also prevents sticking which can lead to heartbreak when you’re trying to present your lovely creations.
- Cookie scoop (1 tablespoon size) – This handy tool will help us portion out the cheesecake dough evenly so every bite is consistent in size—and we all know consistency is key when serving up treats!
Now that we’re equipped and ready to go, let’s dive into making these glorious little bites!
Step 1: Heat-Treating the Cake Mix
Before we begin mixing everything together to create our luscious filling, there’s one essential step we must not overlook: heat-treating our dry cake mix! Start by pouring your cake mix into a medium-sized heat-safe bowl; then pop it in the microwave for two 30-second intervals. Make sure to stir after each interval—this helps distribute the heat evenly throughout the mix and avoid any hot spots. Once done, allow it to cool completely before incorporating it into your cream cheese mixture. Why is this crucial? Heat-treating eliminates any potential bacteria lurking in raw flour while enhancing its flavor profile slightly by bringing out those charming notes we adore.
Step 2: Creaming the Cheese
With our cooled cake mix ready for action, it’s time to whip up some magic! In another medium-sized mixing bowl (my personal favorite), toss in your room-temperature cream cheese and start beating it using your handheld mixer set on medium-high speed. You’ll want to continue mixing until it’s completely smooth—about 2 – 2½ minutes should do the trick! This process is known as creaming; it’s vital because it incorporates air into the cream cheese which will help give us that light texture once everything comes together in harmony.
Step 3: Incorporating Cake Mix
Now comes one of my favorite parts—the union between flavors! After creaming your cream cheese until silky smooth (isn’t it beautiful?), gently sprinkle your previously heat-treated dry cake mix over the top. Continue mixing just until fully incorporated—don’t rush this step! Overmixing could lead to dense bites instead of those fluffy morsels we’re aiming for here! Patience really pays off as you watch everything blend seamlessly into one lovely batter full of promise.
Step 4: Chilling Out
Once you’ve achieved that velvety consistency we adore, tightly cover your cream cheese mixture with plastic wrap or transfer it into an airtight container before placing it in the refrigerator for at least two hours (or longer if you can resist!). Why chill? This crucial step allows flavors to meld beautifully while giving us time to firm up our mixture enough so we can easily roll them into heavenly little balls later on.
Are you getting excited yet? Just wait until you see how simple yet rewarding making these Lemon Cheesecake Bites truly is! Stay tuned as we’ll continue this journey together through every delectable step toward creating these stunning treats!
Step 5: Chill Out for Creamy Perfection
Now that your cream cheese mixture is ready, it’s time to give it a little TLC in the fridge. Cover the bowl tightly with plastic wrap or a lid and let it chill for a full 2 hours. You might be wondering why we need to wait this long—trust me, this step is absolutely crucial! Chilling allows the flavors to meld beautifully, enhancing that delightful lemony profile and giving the mixture time to firm up just enough for shaping. What you’re looking for is a creamy, spreadable consistency that holds its shape when scooped. If you skip this chilling phase, you risk ending up with a mixture that’s too soft to form into those lovely bites. So, while you’re waiting, take a moment to imagine how these bites will taste—each one bursting with zesty brightness and rich creaminess.
Step 6: Scoop and Shape with Love
Once those two hours have passed (and I know it feels like an eternity!), it’s time to bring your chilled cheesecake mixture back out into the spotlight. Line a baking sheet with parchment paper—you want this surface to be smooth and non-stick, allowing our little bites to slide off effortlessly later. Now comes the fun part: using a 1 tablespoon cookie scoop, portion out the cheesecake dough. As you scoop, let your excitement build! Roll each scoop into a smooth ball between your palms; this step is where your hands can work their magic, transforming that luscious filling into bite-sized treasures. If you find that the mixture is sticking too much, don’t hesitate to lightly dust your hands with powdered sugar or keep them slightly damp—this will help prevent any frustration. Place each ball onto your prepared baking sheet with enough space in between; we want them to have room to breathe!
Step 7: Melted Candy Magic
This next step is where things get really exciting! Grab yourself a heat-safe mixing bowl and fill it with those vibrant yellow candy melts. Now it’s time for some kitchen wizardry as we melt these beauties down in 30-second intervals in the microwave. Stir vigorously after each interval—this helps distribute the heat evenly and prevent any scorching of those delicate melts. What you’re aiming for is a silky-smooth consistency that flows like liquid gold; perfect for coating those cheesecake bites. Keep an eye on them because they can go from beautiful and melted to scorched in just seconds! Once you achieve that dreamy texture, you’ll notice how truly intoxicating the aroma of sweet vanilla wafts through your kitchen—it’s pure bliss! The melted candy coating not only adds flavor but also creates that delightful contrast between crisp exterior and creamy interior.
Step 8: Dress Your Bites in Sweet Coating
Now comes the moment of truth! Take each cheesecake ball and roll it gently in the melted candy coating until fully covered—this is where they transform from simple treats into something utterly extraordinary! Use a fork for this process; it’ll help keep things neat and tidy while also allowing excess candy coating to drip off easily. If you notice any bare spots peeking through, don’t worry—just use a spoon to drizzle more melted candy over those areas until they’re completely cloaked in sweetness. A little patience goes a long way here; ensure every bite gets its fair share of that luscious coating so every taste is equally delightful! Once coated, return each bite back onto the parchment-lined baking sheet. And while you’re working through this step, take a moment to admire how these cheerful lemon cheesecake bites are coming together—a true testament to your hard work and love in the kitchen!
Conclusion:
As we wrap up our delightful journey through making these Lemon Cheesecake Bites, I can’t help but feel an overwhelming sense of joy at sharing such a cherished recipe with you! From the moment you mix that vibrant lemon cake flavor into whipped cream cheese until the final drizzle of sweet almond bark graces each bite, everything about this process is truly magical. What makes these treats stand out is not just their cheerful appearance but also that heavenly balance of sweet and tangy flavors combined with an irresistibly creamy texture—it’s like sunshine wrapped in a bite-sized package!
This recipe is an absolute must-try—not merely for its incredible taste but also for the sheer joy it brings during preparation. The simplicity of mixing ingredients together while feeling that rush of excitement as each step unfolds makes it accessible for all skill levels. Whether you’re celebrating a special occasion or enjoying an ordinary day, serving these Lemon Cheesecake Bites will undoubtedly elevate your experience. Imagine pulling them from the refrigerator and watching your friends’ eyes light up as they take their first bite; it’s moments like these that create lasting memories!
For serving suggestions, imagine savoring one alongside a steaming cup of chamomile tea during an afternoon get-together or pairing it with fresh berries for an elegant dessert spread after dinner. For an extra touch of indulgence, consider enjoying one with a scoop of vanilla ice cream or atop a graham cracker crust—oh my goodness! Each combination brings its own unique spin on those bright flavors while keeping your guests coming back for more.
Feeling adventurous? This recipe is wonderfully adaptable! You could swap out lemon cake mix for another citrus flavor like orange or lime, or even add some crushed cookies into the mix for added crunch! If you’re looking for something extra special, try using flavored candy melts to create colorful variations that are perfect for any celebration—rainbow sprinkles anyone? I encourage you to embrace your creativity with this recipe; share your experiences and adaptations with friends and family because food has this beautiful way of connecting us all. So go ahead—try making these Lemon Cheesecake Bites today; I promise you won’t regret it!
Lemon Cheesecake Bites

Lemon Cheesecake Bites are an enchanting dessert that captures the essence of summer in every creamy, zesty morsel. These delightful treats feature a luscious lemon-flavored cheesecake filling enveloped in a soft cake exterior and finished with a colorful candy coating. Perfect for gatherings or as an indulgent afternoon snack, they evoke cherished memories and bring joy with each bite. The combination of tart lemon and rich cream cheese creates a refreshing explosion of flavor, making them irresistible to all who taste them. Easy to prepare and beautifully presented, these Lemon Cheesecake Bites are sure to become a favorite at your table!
- Prep Time: 30 minutes
- Cook Time: 15 minutes
- Total Time: 45 minutes
- Yield: Approximately 24 servings 1x
- Category: Dessert
- Method: Baking
- Cuisine: American
Ingredients
- 15.25 ounces lemon cake mix
- 8 ounces cream cheese, room temperature
- 12 ounces yellow candy melts
- 4 ounces white vanilla almond bark
Instructions
- Heat-treat the lemon cake mix by microwaving it in a heat-safe bowl for two intervals of 30 seconds, stirring in between until cooled.
- In another bowl, beat the room-temperature cream cheese with a handheld mixer until smooth (about 2–2½ minutes).
- Gradually add the cooled cake mix to the cream cheese, mixing just until combined.
- Chill the mixture in the refrigerator for at least 2 hours.
- Scoop and roll the chilled mixture into tablespoon-sized balls and place them on a parchment-lined baking sheet.
- Melt yellow candy melts in 30-second intervals in the microwave and coat each ball thoroughly before placing them back on the sheet.
- Melt white vanilla almond bark and drizzle over the coated bites for an elegant finish.
Nutrition
- Serving Size: 1 Lemon Cheesecake Bite (approx. 40g)
- Calories: 160
- Sugar: 14g
- Sodium: 120mg
- Fat: 8g
- Saturated Fat: 4g
- Unsaturated Fat: 3g
- Trans Fat: 0g
- Carbohydrates: 20g
- Fiber: 0g
- Protein: 2g
- Cholesterol: 20mg