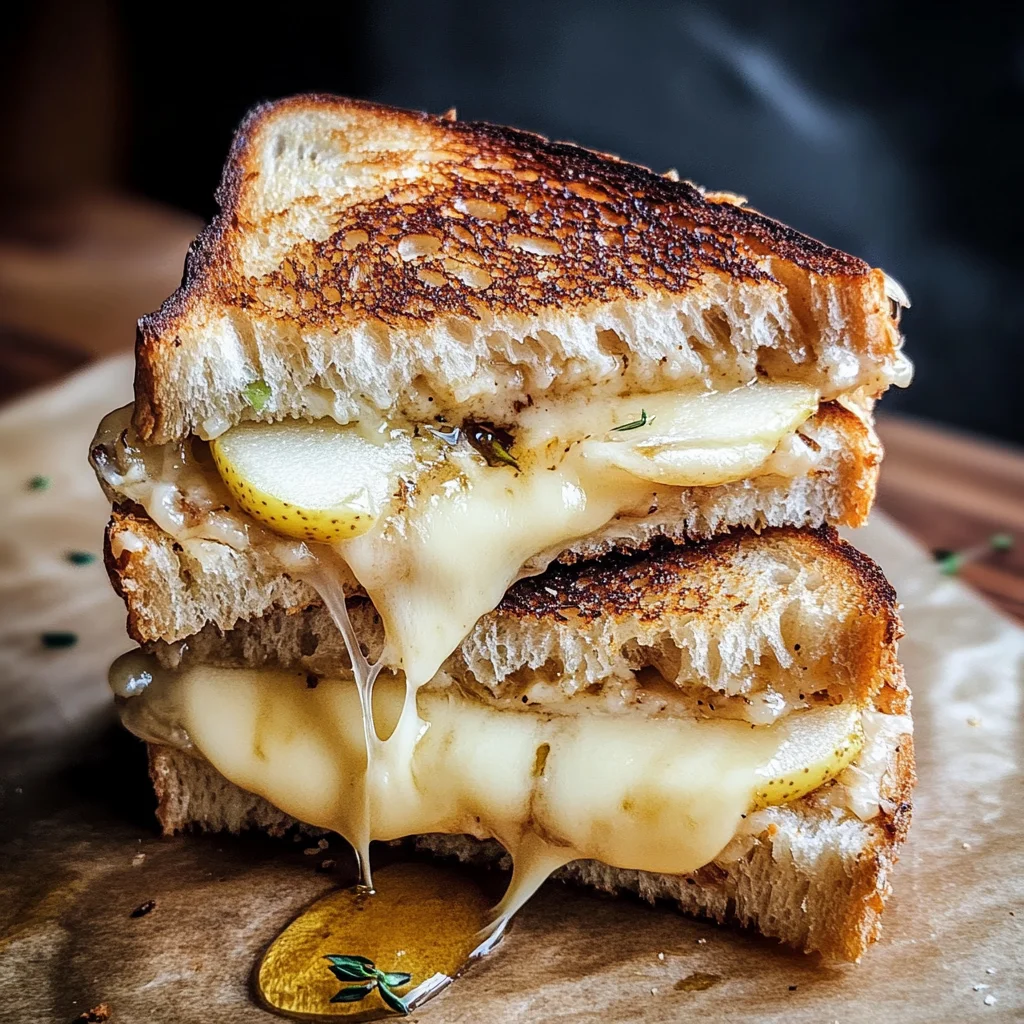
Brie & Pear Grilled Cheese Sandwich
The beauty of cooking lies not just in the ingredients or the techniques, but in the stories we weave and the moments we create around our meals. When I think about the Brie & Pear Grilled Cheese Sandwich, I’m transported back to cozy afternoons spent with friends and family, gathered around a table filled with laughter and warmth. This isn’t just a sandwich; it’s an experience that invites you to savor each bite, where the creamy richness of Brie meets the delicate sweetness of ripe pears, all kissed by a drizzle of honey. It’s a symphony of flavors that dances on your palate and fills your heart with joy. Trust me when I say, once you’ve tasted this creation, your regular grilled cheese days will be forever changed.
In our fast-paced lives, finding moments to connect over food can feel like a challenge. Yet, this Brie & Pear Grilled Cheese Sandwich is perfect for those intimate gatherings or even for a quiet night in when you want something special without spending hours in the kitchen. The contrast between the savory notes of melted cheese and the sweet juiciness of pears creates a delightful balance that captivates everyone who takes a bite. It’s also incredibly simple to make while allowing room for creativity—feel free to add your favorite herbs or switch up the cheeses based on what you have on hand! Let’s dive into this culinary adventure together.
Brie & Pear Grilled Cheese Sandwich: A Sweet Symphony of Flavor
This recipe is one I hold dear to my heart, and I’m excited to share it with you. The combination of Brie cheese and fresh pears is nothing short of magical; they meld beautifully when grilled, creating an ooey-gooey masterpiece that feels both indulgent and comforting. So grab your apron and let’s embark on this delicious journey!

Ingredients:
As we prepare to create our Brie & Pear Grilled Cheese Sandwich, let’s take a moment to appreciate each ingredient. Each one plays its own unique role in crafting this delightful dish.
- 2-3 tablespoons unsalted butter (room temperature). Butter is not just an ingredient; it’s essential for achieving that golden-brown crust we crave in grilled cheese sandwiches. Room temperature butter spreads easily over bread without tearing it apart—a crucial step for ensuring even browning and flavor throughout your sandwich. When shopping for butter, opt for high-quality unsalted varieties so you can control the saltiness of your dish better. This buttery goodness acts as a barrier against moisture while providing rich flavor as it melts into the bread during grilling.
- 2 slices bread (preferably from a bakery quality loaf). The choice of bread is non-negotiable when it comes to elevating your grilled cheese experience. Look for something hearty yet soft enough to cradle all that delicious filling without falling apart—think sourdough or artisan-style loaves from your local bakery. These breads are often made with fewer preservatives and have more flavor than standard supermarket options. A good loaf doesn’t just hold everything together; it contributes texture and depth to each bite.
- 3-4 slices Brie cheese. Ah, Brie—a cheese that brings elegance to any dish! Its creamy texture melts beautifully under heat, creating that dreamy gooeyness we all adore in a grilled cheese sandwich. When selecting Brie, look for wheels that are slightly soft to the touch but not too runny; this indicates freshness and optimal creaminess. The mild yet rich flavor profile complements sweet ingredients like pears perfectly while adding sophistication to our sandwich.
- 2-3 slices firm but ripe pear. Pairing fruit with savory dishes is one of life’s most delightful revelations! When choosing pears for this recipe, go for firm yet ripe varieties such as Anjou or Bosc—they should yield slightly under gentle pressure but still retain their shape when sliced thinly. Their natural sweetness contrasts beautifully with the savory cheeses, providing refreshing bursts of flavor that make every mouthful exciting.
- Pinch of fresh thyme leaves. Fresh herbs are like magic wands in cooking; they elevate flavors in ways you wouldn’t believe! Thyme brings an earthy note that balances out the sweetness from both honey and pears while enhancing the overall complexity of our sandwich’s flavor profile. A little goes a long way here—just sprinkle some leaves on before grilling to allow their aroma to infuse everything deliciously.
- 2 slices Gruyere cheese. Gruyere adds another layer of richness and depth that complements our ingredients beautifully! This Swiss cheese has nutty undertones which pair harmoniously with both Brie and pear while providing excellent melting qualities—absolutely essential in achieving maximum gooeyness in our grilled cheese creation! If Gruyere isn’t available or you’re seeking alternatives based on preferences, consider Emmental or even aged cheddar as substitutes!
- Honey (for drizzling). Honey isn’t merely an afterthought here; it transforms this sandwich from delicious into something extraordinary! A drizzle right before serving enhances sweetness while adding moisture—a beautiful contrast against crispy bread and melty cheeses! Opt for high-quality raw honey if possible—the taste will be far superior compared to processed versions!
Equipment You’ll Need:
Before we plunge into making our scrumptious sandwich, let’s ensure we have all our trusty tools ready at hand—the right equipment can make all the difference!
- Small skillet or frying pan: A small skillet is ideal for controlling heat effectively while allowing you space to flip your sandwich without worry! Using a non-stick option makes cleanup easier too—look for one with good heat distribution properties so everything cooks evenly!
- Spatula: This tool becomes vital when flipping your beautifully crafted sandwich halfway through grilling! Choose one with a wide edge so you can slide it under without disturbing any fillings—it’ll help maintain structural integrity!
- Knife: A sharp knife does wonders not only in slicing bread neatly but also in cutting through creamy cheeses effortlessly! Make sure it’s well-maintained—dull knives require more pressure which could lead to mishaps during preparation!
With these essentials lined up alongside us as partners-in-cooking-adventure mode activated—let’s dive into making this delectable Brie & Pear Grilled Cheese Sandwich together!
Step 1: Butter Up That Bread
To begin crafting our magnificent sandwich, take those slices of bakery-quality bread—this is where we start building layers upon layers of flavor! Lightly spread room temperature butter onto one side of each slice using an offset spatula or regular knife; don’t rush through this step as every corner deserves attention! This buttery layer serves two vital purposes: first off, it creates an inviting crispiness when heated; secondly—and equally important—it acts like armor shielding against moisture seeping from fillings during cooking time—you want everything nicely toasted rather than soggy!
Next comes layering: flip one slice over so its unbuttered side faces up—this will be where we build our filling masterpiece before sealing things off with another slice later on top (buttered side facing out!).
Step 2: Assemble Your Flavor Explosion
Now let’s get creative by layering those luscious ingredients—the fun part begins here! Start by placing 3-4 generous slices of creamy Brie directly atop the unbuttered side—you want them spaced evenly across because melting means some areas might get gooier than others if crowded too closely together (and who wants uneven melty goodness?). On top of those cheesy delights comes 2-3 beautiful pear slices arranged artistically amidst aromatic thyme sprigs scattered throughout—trust me; they’ll dance together harmoniously once heated up!
Finally, crown all these fabulous components with 2 slices Gruyere resting gently atop everything else before placing another slice over (buttered side facing out) thus encasing our glorious creation within protective layers—think about how much love went into prepping each element here!
Step 3: Heat Things Up
With everything assembled perfectly within reach now—the time has come to introduce some heat! Carefully place your assembled sandwich onto preheated medium-low skillet after melting down one tablespoon unsalted butter until bubbles form lightly at edges—this tells us we’re ready to rock ‘n roll! Letting things cook slowly allows flavors meld together beautifully rather than burning outside before inside warms adequately; patience truly pays off here as aromas waft around enticing everyone nearby!
Keep an eye on timing: grill away for approximately 2-3 minutes per side until golden brown appears along edges—you’ll know it’s time when audible sizzling sounds fill air signaling progress made towards perfection (I promise!). If needed during flipping process due dryness around skillet area appears alarming simply add remaining tablespoon butter back into mix—it’ll help maintain desired moisture levels while ensuring gorgeous results consistently achieved each time around!
Step 4: The Sweet Finishing Touch
Once both sides achieve stunning golden color along with heavenly aromas wafting through kitchen air hinting at something special happening inside—that’s when you’ll know it’s finally done cooking! Remove from skillet gently using spatula ensuring not disturb any filling nestled inside snugly—we don’t want anything spilling out prematurely after all efforts put forth thus far!
Now comes perhaps my favorite part: drizzling warm honey atop freshly cooked surface right before serving allows sweetness shine bright amidst savory toppings creating balance akin poetry written within culinary realm—it truly elevates experience beyond ordinary meals shared amongst loved ones seated nearby waiting eagerly anticipating what awaits next bite ahead…
And there you have it folks—the unforgettable journey leading towards making your very own Brie & Pear Grilled Cheese Sandwich has come full circle now standing proudly ready serve among eager hearts gathered ’round table sharing moments filled laughter joyfully savoring delicious bites throughout evening spent connected together warmth love surrounding us all… Enjoy every moment because food tastes better shared among friends family alike!
Step 5: The Art of Melting Cheese to Perfection
Now that your sandwich is nestled in the skillet, it’s time to embrace the magic of cooking. You’ll want to maintain a medium-low heat as you gently coax the flavors together. This is crucial because melting cheese is an art form; if you crank up the heat too high, you risk burning the bread before the cheese has a chance to become that beautifully gooey texture we all crave. Picture this: as the sandwich warms, the Brie begins to soften and ooze, mingling with the sweet notes of pear and fragrant thyme. It’s like a symphony of flavors unfolding, and trust me, you’ll want to savor every moment.
As you let it cook for 2-3 minutes on one side, keep an eye on the color of your bread; it should transform into a luscious golden hue that beckons you closer. If you’re not seeing that beautiful browning, give it another minute or so but don’t rush this step! Letting it sit just long enough ensures that delightful crunch on the outside while keeping everything inside perfectly melted. When you’re ready to flip—here’s where patience pays off—you should hear a satisfying sizzle as it releases from the skillet.
Step 6: Flipping with Confidence
It’s time for one of those pivotal moments in cooking—the flip! Gently slide a spatula beneath your sandwich and lift it with care. This is where finesse meets excitement; it’s almost like turning over a delicate work of art. You want to see that gorgeous golden crust on the first side before lowering it back into the skillet for another few minutes of blissful cooking. As you do this, take a moment to appreciate what’s happening inside your sandwich—the combination of Brie and Gruyere cheeses melting together creates an utterly intoxicating aroma that fills your kitchen with warmth and comfort.
After flipping, allow it to cook for another 2-3 minutes until both sides are equally toasted and golden brown. Keep checking in on your masterpiece; if at any point it seems too dry or starts sticking to the pan, you can add just a touch more butter—think of it as a little insurance policy against any possible mishaps! The goal here is not just about achieving perfection but creating something profoundly satisfying that will warm both your belly and heart.
Step 7: The Final Countdown
Ah, we’re nearing that delicious finish line! Once both sides are beautifully toasted and you’ve achieved that perfect meltiness in your cheeses (this is non-negotiable!), it’s time to remove your sandwich from heat. Carefully transfer it onto a cutting board; I recommend letting it rest for about a minute before cutting into it. Why wait? Well, this brief pause allows all those fabulous flavors to settle together, enhancing their richness even further. Plus, cutting right away could lead to molten cheese lava spilling out everywhere—and while deliciously gooey cheese sounds enticing, nobody wants that kind of mess!
As you let your sandwich rest, take a moment to admire its glory—the way those layers meld together is truly extraordinary. And don’t forget about visual cues; look for any oozy bits peeking out around the edges—that glorious sight means you’re in for something special when you slice into it!
Step 8: Drizzle with Honey – The Sweet Finale
Now comes one of my favorite parts—the drizzle! Just before serving, grab some honey and give your sandwich a lovely drizzle across the top—this simple step adds an entirely new dimension to your Brie & Pear Grilled Cheese Sandwich. The sweetness of honey enhances both the creamy cheese and fresh pear while balancing out their savory notes with its subtle floral undertones. Trust me on this—it turns an already incredible dish into something absolutely magical.
You might be tempted to skip this step if you’re feeling rushed or if you’re not sure about mixing sweet with savory—but I promise you, it’s worth every drop! Allowing that honey to seep into every nook and cranny transforms each bite into an experience that’s nothing short of divine. So don’t hold back! Embrace this final touch with enthusiasm because it’s these little things that make our meals memorable.
Conclusion:
As we wrap up this culinary adventure with our Brie & Pear Grilled Cheese Sandwich, I can’t help but feel excited for you! We’ve journeyed through layers of buttery bread and creamy cheeses infused with sweetness and aromatic herbs that elevate this humble grilled cheese into something truly extraordinary. The contrast between the rich Brie melting into luscious goo and the firm yet succulent pear creates an experience that’s profoundly satisfying—each bite transports you into a realm where comfort food meets gourmet elegance.
This recipe isn’t just about taste; it’s about joy—the joy of cooking something simple yet remarkable that warms both body and soul. Picture yourself making this sandwich on a rainy afternoon or serving it at a casual gathering with friends; its versatility shines through every occasion. Whether it’s paired with a warm bowl of soup or enjoyed solo alongside a glass of crisp apple cider, this sandwich guarantees smiles all around as it fills the air with its utterly intoxicating aroma.
Imagine savoring one with a side salad dressed lightly with vinaigrette for lunch or indulging in an afternoon pick-me-up with freshly brewed tea—it’s delightful any way you slice it! For an elevated dining experience, serve it alongside roasted vegetables drizzled with balsamic glaze; I promise you’ll feel like you’re dining at an upscale café right at home!
Feeling adventurous? This recipe is wonderfully adaptable! Swap out pears for apples or even figs if you’re feeling fancy; each variation brings its own charm while still celebrating that iconic melt-in-your-mouth quality we love so much about grilled cheese. And let’s not forget about adding toppings—think caramelized onions or walnuts for extra texture and depth! So go ahead—try these variations, share your experiences with friends and family, and let this recipe become part of your culinary story. I can’t wait to hear how yours turns out!
Brie & Pear Grilled Cheese Sandwich

Discover the ultimate comfort food with our Brie & Pear Grilled Cheese Sandwich—a delightful fusion of creamy Brie and sweet pears, all nestled between perfectly toasted bread. This gourmet twist on the classic grilled cheese elevates your dining experience, making it perfect for cozy evenings or casual gatherings. Each bite delivers a symphony of flavors, with the richness of melted cheese complemented by the fresh juiciness of ripe pears and a hint of thyme. Drizzled with honey for an extra touch of sweetness, this sandwich is not just a meal; it’s a heartwarming culinary journey. Whether enjoyed solo or paired with a light salad, this dish promises to impress and satisfy.
- Prep Time: 10 minutes
- Cook Time: 8 minutes
- Total Time: 18 minutes
- Yield: Serves 1 sandwich 1x
- Category: Lunch
- Method: Frying
- Cuisine: American
Ingredients
- 2–3 tablespoons unsalted butter (room temperature)
- 2 slices bakery-quality bread (sourdough or artisan)
- 3–4 slices Brie cheese
- 2–3 slices firm but ripe pear (Anjou or Bosc)
- Pinch of fresh thyme leaves
- 2 slices Gruyere cheese
- Honey (for drizzling)
Instructions
- Butter one side of each slice of bread evenly.
- Place one slice butter-side down in a skillet over medium-low heat.
- Layer with Brie, sliced pear, thyme, and Gruyere.
- Top with the second slice of bread butter-side up.
- Cook for 2-3 minutes until golden brown; flip carefully and cook another 2-3 minutes.
- Remove from heat, drizzle with honey, and let rest before slicing.
Nutrition
- Serving Size: 1 sandwich (200g)
- Calories: 570
- Sugar: 12g
- Sodium: 850mg
- Fat: 36g
- Saturated Fat: 20g
- Unsaturated Fat: 14g
- Trans Fat: 0g
- Carbohydrates: 42g
- Fiber: 2g
- Protein: 22g
- Cholesterol: 70mg