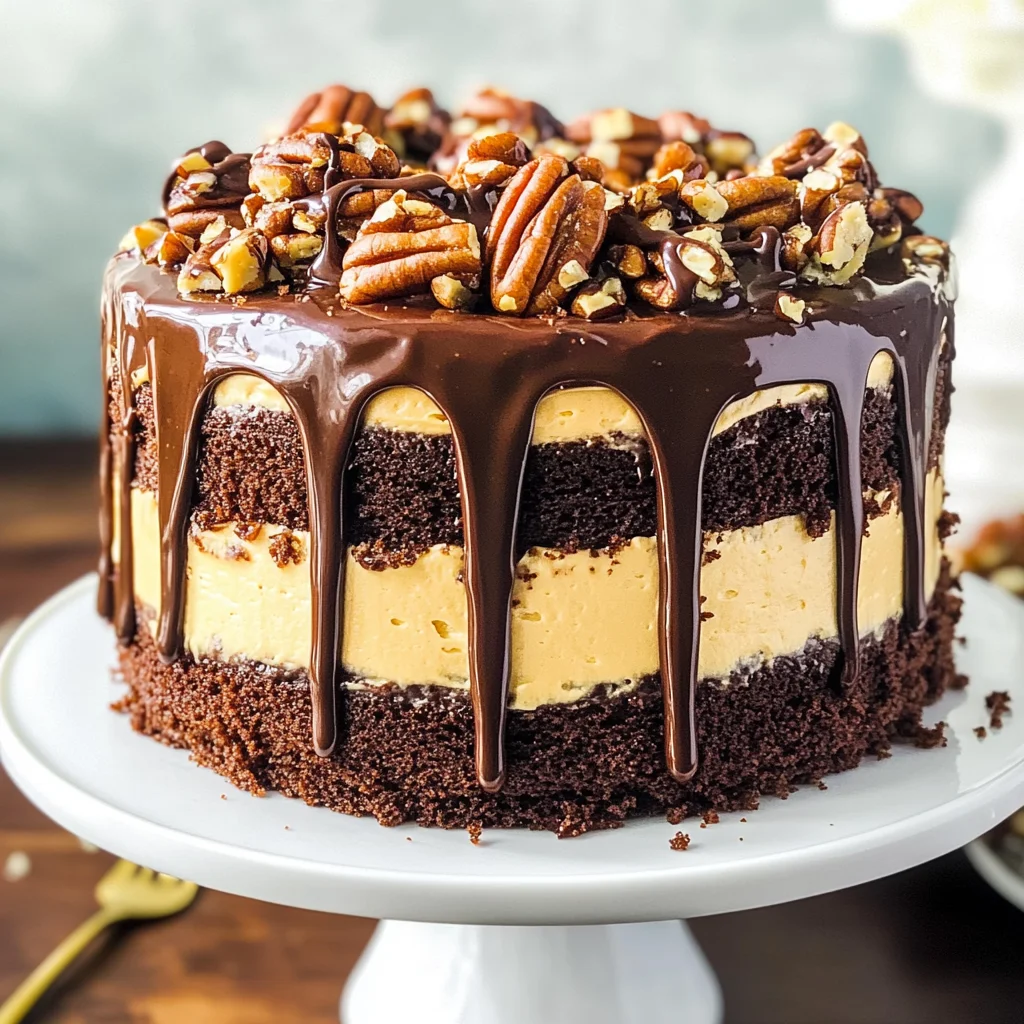
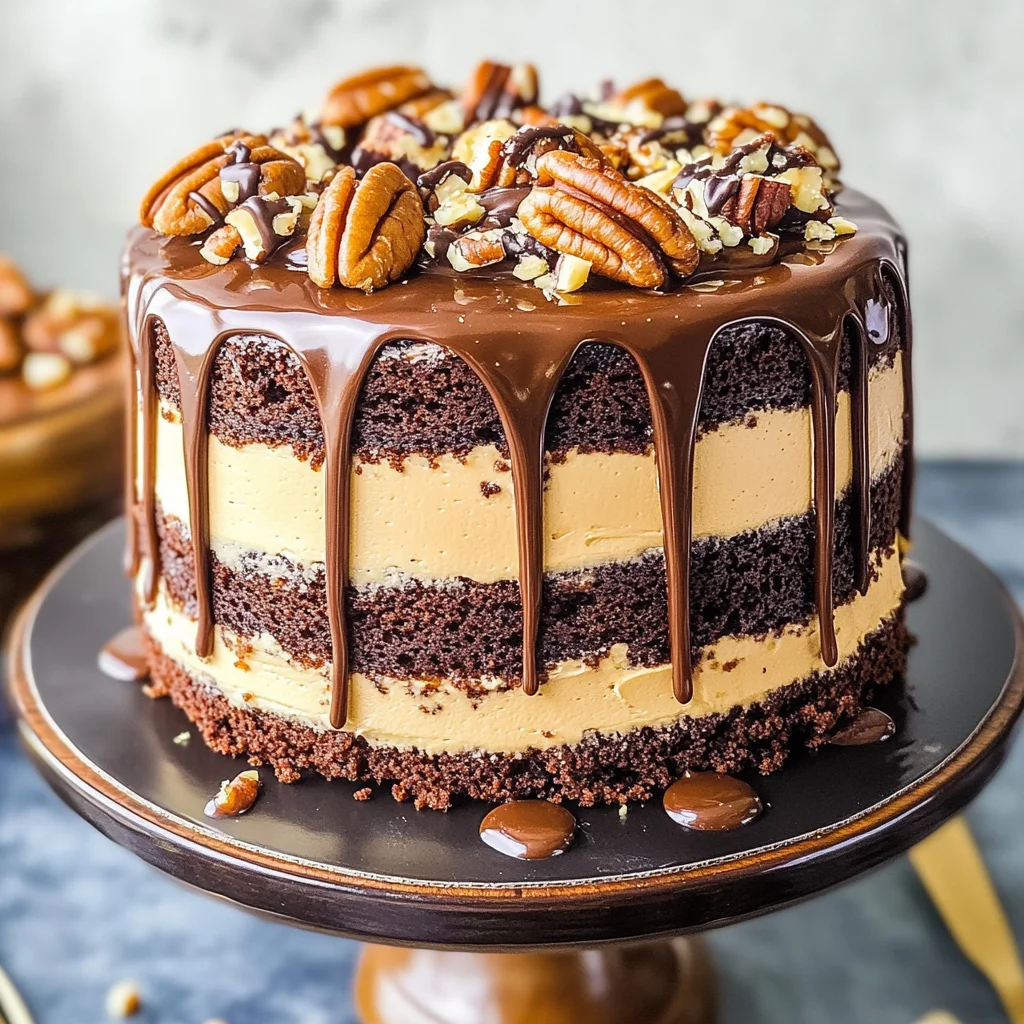
Turtle Chocolate Layer Cake
If you’re looking for a cake that’s as delightful as it is decadent, you’ve come to the right place! This Turtle Chocolate Layer Cake is a showstopper, perfect for birthdays, anniversaries, or just because you deserve a treat. With layers of moist chocolate cake, rich caramel buttercream, and luscious chocolate ganache, this cake is sure to bring smiles all around. The combination of flavors and textures makes it a favorite in my home, and I can’t wait to share it with you!
Whether it’s a family gathering or a cozy evening at home, this cake fits every occasion. Plus, the process of making it is just as enjoyable as indulging in the final product. So roll up your sleeves and let’s get started on creating something truly special together!
Why You’ll Love This Recipe
- Decadent Layers: Each slice features rich chocolate cake layered with creamy caramel buttercream and topped with silky ganache—pure bliss!
- Perfect for Celebrations: Whether it’s a birthday or holiday party, this Turtle Chocolate Layer Cake is sure to impress everyone.
- Make Ahead Friendly: You can prepare the components in advance, allowing the flavors to meld beautifully before assembling.
- Family Favorite: Kids and adults alike will adore this sweet treat, making it great for gatherings.
- Customizable: Feel free to get creative with toppings or flavors to make it your own!
Ingredients You’ll Need
These ingredients are simple yet wholesome, making this recipe approachable even for novice bakers. Gather these essentials before we dive into the baking fun!
For the Chocolate Cake
- 2 cups (414g) granulated sugar
- 3/4 cup (85g) natural unsweetened cocoa powder
- 2 cups (260g) all-purpose flour
- 2 tsp baking soda
- 1 tsp salt
- 2 large eggs
- 1 cup (240ml) milk
- 1 cup (240ml) vegetable oil
- 1 1/2 tsp vanilla extract
- 1 cup (240ml) hot water
For the Caramel Sauce
- 2 cups (414g) granulated sugar
- 1 cup (240ml) water
- 1/2 cup (112g) unsalted butter
- 1 cup (240ml) heavy whipping cream
- 1 tbsp vanilla extract
- Salt, to taste
For the Caramel Buttercream
- 2 1/2 cups (560g) unsalted butter, room temperature
- 10 cups (1150g) powdered sugar
- 1/2 – 3/4 cup caramel sauce from above
For Decoration
- 1/2 cup chopped pecans, toasted
- 6 oz (1 cup | 169g) semi-sweet chocolate chips
- 1/2 cup (180ml) heavy whipping cream
Variations
This recipe is wonderfully flexible! Feel free to switch things up based on your preferences or what you have on hand.
- Try Different Nuts: Use walnuts or almonds instead of pecans for added crunch and flavor.
- Add Flavor Extracts: Experiment with almond extract in place of some vanilla in the frosting for a unique twist.
- Make It Gluten-Free: Substitute all-purpose flour with a gluten-free blend if you need a gluten-free version.
- Layer with Fruit: Add fresh fruit like bananas or raspberries between layers for a fruity surprise.
How to Make Turtle Chocolate Layer Cake
Step 1: Make the Caramel Sauce
Start by combining the granulated sugar and water in a medium-sized saucier pan over medium-low heat. Stir until the sugar completely dissolves—this usually takes about 3-5 minutes. Once dissolved, add in the butter and let it melt. Bringing this mixture to a boil without stirring is crucial; this will help prevent crystallization. Watch closely as it cooks until it turns a deep golden copper color—about 15-20 minutes.
Step 2: Combine Cream and Flavor
After removing from heat, slowly pour in the heavy whipping cream while whisking continuously. Be careful here; it’s going to bubble up! Once combined well, add your vanilla extract and half a teaspoon of salt. Taste and adjust saltiness if desired. Set aside in the fridge to cool—this caramel will thicken up nicely as it chills.
Step 3: Prepare Your Cake Layers
Preheat your oven to 300°F (148°C). Prepare three 8-inch cake pans by lining them with parchment paper circles and greasing their sides. In a large bowl, whisk together all dry ingredients: flour, cocoa powder, baking soda, sugar, and salt. Then add eggs, milk, vegetable oil, boiling water, and vanilla extract. Mix until everything is well combined!
Step 4: Bake Your Cakes
Divide the batter evenly across your prepared cake pans. Bake for about 30-33 minutes or until a toothpick inserted comes out with just a few crumbs attached. Once done baking, allow them to cool in the pans for about 10 minutes before transferring them onto cooling racks.
Step 5: Whip Up Caramel Buttercream
While your cakes cool down completely, let’s make that luscious caramel buttercream! In a large mixing bowl, beat room temperature butter until smooth. Gradually mix in half of your powdered sugar until combined smoothly. Then mix in about half a cup of cooled caramel sauce until everything is well blended.
Step 6: Finish Buttercream
Add the remaining powdered sugar gradually while beating until smooth again. Adjust consistency by adding more caramel sauce if needed—just ensure it doesn’t get too thin so that your frosting stays put when layered on the cake.
Step 7: Assemble Your Cake
Once everything has cooled down completely and your frosting is ready, level off any domed tops from your cakes using a serrated knife carefully. Place one layer on your serving plate and spread about two-thirds of a cup of frosting evenly on top. Pipe a dam around its edge using some frosting—it keeps our delicious caramel filling contained!
Step 8: Add Filling Layers
Spread about half a cup of that beautiful caramel sauce over your first layer followed by sprinkling some chopped pecans on top. Repeat these steps with another layer of cake—frosting then filling—until all layers are stacked.
Step 9: Crumb Coat & Chill
After stacking all three layers together with filling between them, apply a thin crumb coat around the whole cake using remaining frosting. Refrigerate for about 30 minutes so everything firms up nicely before finishing off with more frosted goodness!
Step 10: Decorate With Ganache
To make ganache topping—heat heavy cream just until boiling then pour over chocolate chips in bowl letting it sit for about two minutes before whisking smooth! Drizzle around edges first before covering entire top surface evenly too.
Finally pipe any leftover frosting decoratively along top edges if desired while finishing touches can include additional drizzles of caramel sauce over top along with extra pecans sprinkled on!
Refrigerate until ready to serve—you’ll want those flavors melded nicely! Serve chilled or at room temperature; trust me when I say this Turtle Chocolate Layer Cake will be best enjoyed within three-four days after prep!
Pro Tips for Making Turtle Chocolate Layer Cake
Making Turtle Chocolate Layer Cake can feel like a real treat, and with these simple tips, you’ll be able to create a masterpiece that will impress your friends and family!
- Use room temperature ingredients: Starting with room temperature eggs and butter helps to create a smoother batter, ensuring your cake layers are moist and evenly risen.
- Don’t skip the cooling time: Allowing the cake layers to cool completely before frosting is crucial. This prevents the frosting from melting and keeps your layers intact, giving you a beautiful cake.
- Level your cake layers: Use a serrated knife to trim the tops of your cakes if they have domed. This ensures that each layer sits evenly on top of one another, creating a stable structure for your cake.
- Warm caramel sauce for easier spreading: If your caramel sauce has thickened too much after refrigeration, gently warm it up in the microwave or over low heat. This makes it much easier to spread without disrupting the frosting.
- Let ganache cool slightly before pouring: Allowing the ganache to cool just enough before pouring it on the cake prevents it from sliding off the edges. A thicker ganache will stay put better and create that gorgeous drip effect.
How to Serve Turtle Chocolate Layer Cake
When it’s time to share this delightful Turtle Chocolate Layer Cake, presentation can make all the difference! Here are some ideas on how to serve this decadent dessert:
Garnishes
- Chopped pecans: A sprinkle of toasted chopped pecans on top adds crunch and complements the flavors beautifully.
- Caramel drizzle: A light drizzle of extra caramel sauce not only enhances flavor but also makes for a visually appealing finish.
- Chocolate shavings: Adding chocolate shavings or curls provides an elegant touch and makes the cake look even more indulgent.
Side Dishes
- Vanilla ice cream: The creamy, vanilla flavor pairs perfectly with the rich chocolate and caramel of the cake, providing a delicious contrast.
- Fresh berries: A side of mixed fresh berries adds a refreshing pop of color and acidity that balances out the sweetness of the cake.
- Coffee or espresso: Serving a strong cup of coffee or espresso alongside enhances all those rich flavors in the cake while providing a comforting warmth.
- Whipped cream: A dollop of lightly sweetened whipped cream can add an airy texture that complements this dense dessert nicely.
Now that you’re armed with tips and serving suggestions, get ready to enjoy every delicious bite of your Turtle Chocolate Layer Cake!
Make Ahead and Storage
This Turtle Chocolate Layer Cake is not just a showstopper; it’s also perfect for meal prep! You can make it ahead of time and store it properly to enjoy later. Here’s how:
Storing Leftovers
- Store leftover cake slices in an airtight container at room temperature for up to 3 days.
- If you live in a warmer climate, it’s best to refrigerate the cake to maintain freshness.
- For longer storage, wrap individual slices tightly in plastic wrap before placing them in an airtight container.
Freezing
- Wrap the whole cake or individual slices tightly in plastic wrap, then place them in a freezer-safe container.
- The cake can be frozen for up to 2 months.
- Thaw the cake overnight in the refrigerator before serving.
Reheating
- For serving warm slices, preheat your oven to 350°F (175°C) and place the slices on a baking sheet.
- Heat for about 5-10 minutes until warmed through, but be careful not to dry them out.
FAQs
If you have questions about this delightful Turtle Chocolate Layer Cake, you’re not alone! Here are some common inquiries:
Can I make Turtle Chocolate Layer Cake without eggs?
Yes! You can use egg substitutes like unsweetened applesauce or flaxseed meal mixed with water. This will help maintain moisture and binding.
How should I store Turtle Chocolate Layer Cake?
To keep your Turtle Chocolate Layer Cake fresh, store it in an airtight container at room temperature or refrigerate if it’s warm outside.
Can I freeze Turtle Chocolate Layer Cake?
Absolutely! Just wrap it well and freeze for up to two months. Thaw it overnight in the fridge before enjoying!
What can I substitute for heavy whipping cream?
You can use coconut cream or a plant-based heavy whipping cream alternative if you’re looking for dairy-free options!
How long does Turtle Chocolate Layer Cake stay fresh?
When stored properly, this delicious cake will remain fresh for about 3-4 days at room temperature or up to two months when frozen.
Final Thoughts
I hope this Turtle Chocolate Layer Cake brings as much joy to your celebrations as it does to mine! It’s rich, indulgent, and perfect for any occasion. The combination of chocolate, caramel, and pecans creates a delightful experience that your friends and family will love. Enjoy making this cake and don’t forget to share your creations—I’d love to hear from you about how yours turned out!
Turtle Chocolate Layer Cake
If you’re in search of a show-stopping dessert, look no further than this Turtle Chocolate Layer Cake! This decadent cake features layers of moist chocolate cake, creamy caramel buttercream, and rich chocolate ganache, making it a perfect centerpiece for birthdays, anniversaries, or any special occasion. The delightful combination of flavors and textures will leave everyone smiling and craving more. Plus, the process of creating this masterpiece is just as enjoyable as indulging in it!
- Prep Time: 30 minutes
- Cook Time: 60 minutes
- Total Time: 1 hour 30 minutes
- Yield: Approximately 12 servings 1x
- Category: Dessert
- Method: Baking
- Cuisine: American
Ingredients
- 2 cups granulated sugar
- 3/4 cup unsweetened cocoa powder
- 2 cups all-purpose flour
- 2 tsp baking soda
- 1 tsp salt
- 2 large eggs
- 1 cup milk
- 1 cup vegetable oil
- 1 1/2 tsp vanilla extract
- 1 cup hot water
- For Caramel Sauce: 2 cups granulated sugar, 1 cup water, 1/2 cup unsalted butter, 1 cup plant-based heavy whipping cream, vanilla extract, salt
- For Caramel Buttercream: 2 1/2 cups unsalted butter, room temperature; powdered sugar; caramel sauce
Instructions
- Make the Caramel Sauce by dissolving sugar in water over medium-low heat until golden brown. Carefully whisk in heavy cream and set aside to cool.
- Preheat oven to 300°F (148°C) and prepare three cake pans.
- Mix dry ingredients and then add eggs, milk, oil, boiling water, and vanilla. Combine well.
- Divide batter among pans and bake for about 30-33 minutes.
- While cooling the cakes, whip up the caramel buttercream by creaming butter, adding powdered sugar gradually along with cooled caramel sauce.
- Assemble your cake with frosting and caramel sauce between layers and crumb coat it.
- Finish with chocolate ganache made from heated cream poured over chocolate chips.
Nutrition
- Serving Size: 1 slice (140g)
- Calories: 470
- Sugar: 60g
- Sodium: 210mg
- Fat: 25g
- Saturated Fat: 10g
- Unsaturated Fat: 14g
- Trans Fat: 0g
- Carbohydrates: 60g
- Fiber: 3g
- Protein: 4g
- Cholesterol: 50mg